
There’s something almost magical about a piggyback plant. Look closely at the leaves and you’ll notice tiny new plantlets growing right on top of the parent leaves — a quirky, endearing feature that gave this plant its common name. It’s one of nature’s more delightful tricks, and it happens right there on your windowsill.
The piggyback plant (Tolmiea menziesii) is a Pacific Northwest native. It grows wild from Northern California up through Oregon, Washington, and into coastal Alaska. That origin tells you a lot about what it needs indoors. It loves cool temperatures, consistent moisture, and indirect light. It thrives in conditions that many other houseplants find challenging.
For American houseplant enthusiasts — especially those in cooler climates like the Pacific Northwest, New England, and the Upper Midwest — the piggyback plant is an underrated gem. It grows quickly, propagates effortlessly, and rewards attentive care with lush, vibrant foliage year-round.
This complete guide covers everything you need to grow a thriving piggyback plant indoors. From light and watering to propagation and troubleshooting, you’ll find practical, detailed advice that actually works.
What Is a Piggyback Plant?
The piggyback plant (Tolmiea menziesii) belongs to the Saxifragaceae family. It’s also commonly called the youth-on-age plant, the thousand mothers plant, and the pickback plant. All of these names refer to the same remarkable feature — new plantlets that form at the base of each mature leaf, right where the leaf meets its stem.
This is called vivipary. It’s a natural reproductive strategy. In the wild, mature leaves fall to the ground with their plantlets attached. The plantlets root and grow into new plants. Indoors, you can replicate this process intentionally through propagation — one of the most satisfying aspects of caring for this plant.
The foliage is soft and slightly hairy. Leaves are broadly heart-shaped with toothed edges and a rich green color. Some cultivars feature light yellow-green variegation that adds brightness to shaded indoor spaces. The plant grows in a mounding habit. Mature plants typically reach 12 to 24 inches in height and spread with a relaxed, cascading form that makes them particularly striking in hanging baskets.
Piggyback Plant at a Glance
| Feature | Details |
|---|---|
| Botanical Name | Tolmiea menziesii |
| Common Names | Piggyback plant, youth-on-age, thousand mothers |
| Origin | Pacific Northwest, USA |
| Mature Size | 12–24 inches height and spread |
| Light Needs | Bright indirect to medium indirect light |
| Watering | Consistently moist; never waterlogged |
| Humidity | Moderate to high preferred |
| Temperature | 50°F – 75°F (cool to moderate) |
| Toxicity | Non-toxic to humans, dogs, and cats |
| Difficulty Level | Easy to moderate |
Light Requirements: Getting It Right Indoors
Light is one of the most important factors in piggyback plant care. Get this right and most other things fall into place naturally.
Ideal Light Conditions
The piggyback plant thrives in bright indirect light. Think of a spot near a north- or east-facing window. The plant receives good light but no harsh direct sun. This mirrors the dappled, filtered light it receives under Pacific Northwest forest canopies in the wild.
A spot 2 to 4 feet from an east-facing window is ideal for most U.S. homes. Morning light is gentle and won’t scorch the soft, hairy leaves. This kind of placement suits apartments in Seattle, Portland, Boston, and Chicago beautifully — cities with lower average light levels where many sun-loving plants struggle.
What Happens in Low Light
The piggyback plant tolerates medium to low indirect light better than most houseplants. It won’t collapse in a dimly lit corner. But growth slows significantly. Leaves may lose some vibrancy and the mounding form becomes looser and less full.
If you’re growing in a genuinely low-light space, rotate the plant every 2 weeks. This ensures even growth on all sides. A grow light supplementing natural light for 4 to 6 hours daily also works well in darker rooms.
What to Avoid
Direct afternoon sun is the biggest light-related mistake. South- or west-facing windows with full sun exposure bleach the leaves. The soft, hairy texture of the foliage makes it especially vulnerable to sunscorch. Brown, papery patches on leaves are often the first sign of too much direct sun.
Watering: The Most Critical Skill
Watering is where most piggyback plant owners either succeed or fail. This plant has strong opinions about moisture. It wants consistent hydration without sitting in water.
How to Water Correctly
Water when the top inch of soil feels dry to the touch. Press your finger into the soil up to the first knuckle. Dry? Water thoroughly. Still moist? Wait another day or two and check again. This simple test prevents both overwatering and underwatering.
When you water, water fully. Add water slowly until it drains from the bottom of the pot. This ensures the entire root zone is hydrated. Empty the saucer after 30 minutes. Sitting water in the saucer is a primary cause of root rot in this species.
Seasonal Watering Adjustments
Water needs change with the seasons. In spring and summer, the plant is actively growing. It drinks more and dries out faster. You may water every 5 to 7 days during peak growth.
In fall and winter, growth slows. The plant needs less water. Reduce frequency and check the soil before watering every time. Overwatering in winter is a very common cause of piggyback plant decline.
Water Quality
The piggyback plant is sensitive to fluoride and chlorine in tap water. In cities with heavily treated municipal water — Phoenix, Las Vegas, and Houston, for example — leaf tip browning is often a water quality issue. Use filtered water or let tap water sit uncovered overnight before watering. This allows chlorine to dissipate naturally.
Rainwater is excellent for piggyback plants. If you live in a region with regular rainfall like the Pacific Northwest or the Southeast, collecting rainwater for indoor plant use is simple and effective.
Signs of Overwatering
- Yellowing leaves — especially lower leaves
- Soft, mushy stems at the base
- Soil that stays wet for more than 10 days
- A musty or sour smell from the pot
Act immediately if you see these signs. Remove the plant from its pot. Inspect the roots. Trim any black or mushy root sections. Repot in fresh, well-draining soil. Let the soil dry slightly more between waterings going forward.
Signs of Underwatering
- Wilting or drooping leaves that feel soft and limp
- Dry, crispy leaf edges
- Soil pulling away from the pot edges
- Very lightweight pot when lifted
A wilted piggyback plant often recovers quickly after a thorough watering. The leaves perk up within hours in many cases. This plant tells you what it needs — pay attention and respond promptly.
Soil: What the Piggyback Plant Actually Needs
Good soil makes watering management much easier. The piggyback plant needs a mix that holds moisture well but never becomes waterlogged.
Recommended Soil Mix
A standard peat-based potting mix works as a starting point. Improve it by adding perlite at a ratio of about 3 parts potting mix to 1 part perlite. This increases drainage while retaining enough moisture for the plant’s needs.
Coconut coir is an excellent peat alternative. It holds moisture well, drains reliably, and is a more sustainable material than peat. Many modern houseplant soil blends now use coir as their primary base.
What to Avoid
Dense, compacted soils trap water and deprive roots of oxygen. Avoid using pure garden soil or heavy clay-based mixes indoors. These stay wet far too long for this plant’s root system.
Completely fast-draining cactus mix is also unsuitable. It dries too quickly and the piggyback plant will struggle to stay consistently hydrated.
Temperature and Humidity: Staying in the Zone
The piggyback plant’s Pacific Northwest origins mean it prefers cooler, more humid conditions than many common houseplants.
Temperature Range
The ideal indoor temperature range is 50°F to 75°F. This plant genuinely prefers the cool end of that range. Temperatures consistently above 80°F cause stress. Leaf edges may brown, growth slows, and the plant looks tired.
This makes the piggyback plant an excellent choice for rooms that stay cooler. An unused bedroom, a basement with natural light, a sunroom in spring or fall — these locations often suit it perfectly. In most American homes, it thrives comfortably alongside humans during spring, fall, and mild winter conditions.
Keep it away from heating vents and radiators. Dry, hot air from forced-air heating systems is one of the most common causes of piggyback plant stress in U.S. homes during winter. A few feet of distance from a vent makes a significant difference.
Humidity Needs
The piggyback plant prefers moderate to high humidity — ideally between 40% and 60%. Most American homes run between 30% and 50% relative humidity. In winter, when heating systems dry the air, indoor humidity often drops below 30%.
Here’s how to maintain adequate humidity:
Pebble tray method: Place the pot on a shallow tray filled with pebbles and water. As the water evaporates, it raises humidity immediately around the plant. Ensure the pot sits on the pebbles — not directly in the water.
Grouping plants: Placing houseplants near each other raises local humidity naturally through transpiration. It’s simple and effective.
Room humidifier: A small humidifier near your plant collection benefits the piggyback plant and many other humidity-loving species simultaneously. This is the most reliable solution during dry winter months.
Misting: Misting is often recommended but has limited effectiveness. It raises humidity briefly but not consistently. It can also encourage fungal issues if leaves stay wet. Use other methods as your primary humidity strategy.
Fertilizing: Feed It Right
The piggyback plant is a moderate feeder. It doesn’t need heavy fertilization. But consistent feeding during the growing season produces noticeably fuller, more vibrant growth.
When and How to Fertilize
Feed once a month during spring and summer with a balanced liquid houseplant fertilizer. A 10-10-10 or 20-20-20 formulation diluted to half strength works well. Full-strength fertilizer can burn the roots of this relatively sensitive species.
Stop feeding in fall and resume in spring. The plant’s growth slows significantly in fall and winter. Feeding during dormancy pushes weak, leggy growth and stresses the plant unnecessarily.
Signs of Nutrient Deficiency
Pale, yellowish-green leaves that are otherwise healthy may indicate nitrogen deficiency. Resume a regular feeding schedule and improvement should be visible within 2 to 3 weeks of consistent care.
Potting and Repotting
The piggyback plant grows at a moderate to fast pace during the growing season. It benefits from repotting every 1 to 2 years.
When to Repot
Repot when roots begin growing out of drainage holes. Repot when the plant dries out very rapidly after watering — a sign it has become root-bound.
Spring is the ideal time to repot. The plant is entering its active growth period and recovers from root disturbance quickly.
How to Repot
Choose a new pot 1 to 2 inches larger in diameter than the current one. Avoid jumping to a much larger pot. Excess soil around the roots holds moisture the plant can’t use and increases rot risk.
Use fresh potting mix at repotting time. Gently loosen the root ball. Remove any dead or damaged roots. Position the plant at the same depth as it was in the previous pot. Water thoroughly after repotting and place in indirect light for a week while it adjusts.
Propagation: The Piggyback Plant’s Best Trick
Propagation is one of the most enjoyable aspects of growing a piggyback plant. The plantlets that form on mature leaves make propagation almost effortless.
Leaf Plantlet Propagation (Easiest Method)
Select a healthy mature leaf that has a well-developed plantlet at its base. The plantlet should have visible small leaves of its own. Cut the leaf with its stem intact — leave about 2 inches of stem below the leaf.
Fill a small pot with moist potting mix. Insert the stem into the soil. Lay the parent leaf flat on the soil surface with the plantlet in contact with the mix. You can use a small pin or toothpick to hold the leaf gently in place.
Keep the soil consistently moist. Place in bright indirect light. Roots typically develop within 3 to 6 weeks. Once the plantlet shows new growth, it has rooted successfully. The parent leaf will eventually yellow and die — that’s normal. The new plant is established and the parent leaf has done its job.
Division
Mature plants often develop multiple crowns. At repotting time, gently separate these crowns with their attached roots. Pot each division individually. This is a quick way to multiply your plants and refresh an older, crowded plant simultaneously.
Common Problems and How to Fix Them
Brown Leaf Tips and Edges
Cause: Low humidity, fluoride in tap water, or inconsistent watering. Fix: Increase humidity with a pebble tray or humidifier. Switch to filtered or rainwater. Maintain consistent watering habits.
Yellowing Leaves
Cause: Overwatering is the most common cause. Nutrient deficiency and low light are secondary causes. Fix: Check soil moisture before every watering. Ensure drainage is adequate. Resume fertilizing if you’ve been skipping it.
Wilting Despite Moist Soil
Cause: Root rot from overwatering. Roots can no longer transport water even when soil is wet. Fix: Unpot immediately. Inspect roots. Remove all dark, mushy sections. Repot in fresh, well-draining mix. Reduce watering frequency.
Leggy, Sparse Growth
Cause: Insufficient light. The plant stretches toward light sources and loses its compact mounding form. Fix: Move to a brighter spot with more indirect light. Rotate regularly for even growth.
Pale, Bleached Leaves
Cause: Too much direct sun. Fix: Move away from direct sun exposure. A sheer curtain between the plant and a south or west-facing window solves this quickly.
Pests
The piggyback plant can attract spider mites, fungus gnats, and mealybugs. Spider mites thrive in hot, dry conditions — keeping humidity adequate prevents most infestations. Inspect the undersides of leaves regularly. Treat spider mites with neem oil or insecticidal soap spray. Address fungus gnats by allowing soil to dry slightly more between waterings. Treat mealybugs with rubbing alcohol applied with a cotton swab directly to the insects.
Is the Piggyback Plant Safe for Pets?
Yes. The piggyback plant is non-toxic to cats, dogs, and humans. This makes it one of the safer houseplant choices for households with curious pets and young children.
According to the ASPCA Animal Poison Control Center, Tolmiea menziesii is listed as non-toxic to both cats and dogs. This is a meaningful advantage for the millions of American pet-owning households who want to enjoy houseplants without worrying about accidental ingestion.
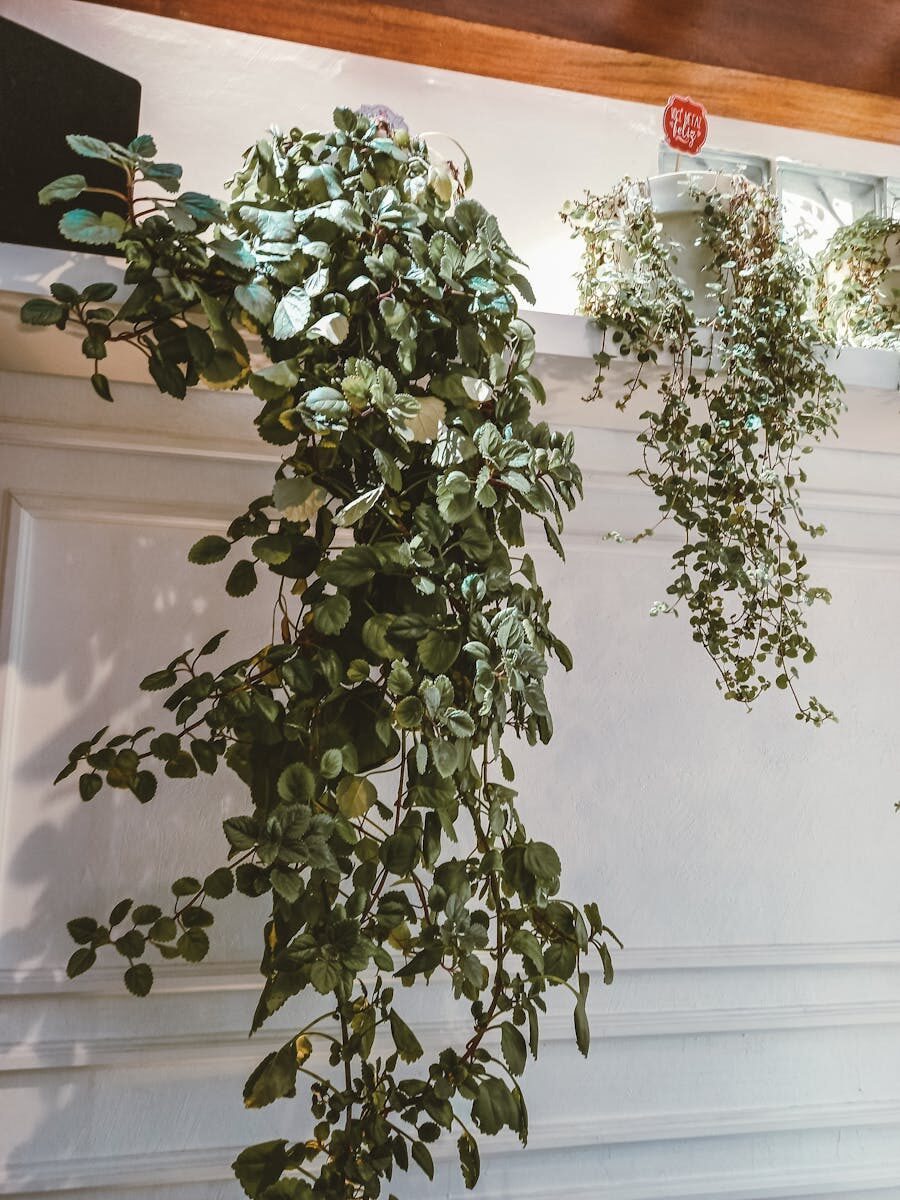
Piggyback Plant as a Hanging Basket
The cascading form of the piggyback plant makes it exceptional in hanging baskets. The mounding habit softens beautifully when given vertical space to trail. Plantlet-laden leaves hang in layers. The effect is lush and full — genuinely impressive when the plant is well cared for.
Use a well-draining hanging basket with a solid liner to prevent dripping. Water hanging plants more frequently than potted ones — they dry out faster due to increased airflow around the pot. Hanging basket piggyback plants are particularly striking in Pacific Northwest homes, New England sunrooms, and any indoor space that runs cooler and stays relatively humid.
For more expert guidance on creating a thriving indoor plant collection — from light management to seasonal care — explore our complete indoor houseplant care guide with tips for beginner and advanced growers alike.
Seasonal Care Calendar
Spring (March – May) Begin monthly fertilizing. Repot if root-bound. Increase watering as growth resumes. Take cuttings for propagation. Watch for new plantlets forming on mature leaves.
Summer (June – August) Keep out of direct afternoon sun. Water more frequently — check soil every 4 to 5 days. Maintain humidity as air conditioning dries indoor air. Continue monthly feeding.
Fall (September – November) Reduce watering frequency as growth slows. Stop fertilizing by October. Move away from drafty windows as temperatures drop. Monitor for spider mites as indoor heating begins.
Winter (December – February) Water sparingly — check soil before every watering. Keep away from heating vents. Run a humidifier if indoor humidity drops below 35%. Avoid repotting. Let the plant rest. Resume active care in March.
Frequently Asked Questions
Why are my piggyback plant leaves turning yellow? Overwatering is the most common cause. Check that soil is not staying wet for extended periods. Ensure your pot has drainage holes and empty the saucer after watering. Reduce watering frequency and monitor improvement over 2 to 3 weeks.
How fast does a piggyback plant grow? In good conditions — bright indirect light, consistent moisture, and regular fertilizing — it grows at a moderate to fast rate during spring and summer. It can double in size within a single growing season when well cared for.
Can I grow a piggyback plant outside in the USA? Yes, in USDA hardiness zones 7 through 9. Coastal Oregon, Washington, Northern California, and parts of the Pacific Northwest are ideal outdoor growing zones. It handles mild frosts but not hard freezes. Outside its native range, treat it as a tender perennial or bring it indoors before the first frost.
How do I make my piggyback plant bushier? Pinch back leggy stems regularly to encourage branching and a fuller form. Ensure adequate indirect light. Rotate the pot every 2 weeks for even growth on all sides.
Why does my piggyback plant keep wilting? Two causes — underwatering or root rot from overwatering. Check the soil moisture. If dry, water immediately. If moist and the plant is still wilting, inspect the roots for rot.
Final Thoughts
The piggyback plant is one of the most rewarding houseplants you can grow indoors. It’s unusual enough to spark conversation. It’s forgiving enough for beginners. And the plantlets that appear on its leaves never stop being fascinating — no matter how many times you’ve seen them.
Give it cool temperatures, consistent moisture, bright indirect light, and a little humidity. Feed it through the growing season. Propagate freely from its abundant plantlets. Check on it regularly and respond to what you see.
It’s a plant that communicates clearly. It tells you when it’s happy. It tells you when something is wrong. Listen closely and it will thrive — filling your shelves, baskets, and windowsills with lush, layered green growth that earns every compliment it gets.