

Most of these 15 designs can be built in a weekend with a miter saw, a drill, a tape measure and a handful of screws. Several of these designs are afternoon projects, a few are a full two-day build, and one or two will stretch past a weekend if you add a finish. The table below shows which is which.
The design matters less than people expect. What decides whether a wooden trellis works is the plant you grow, the wood you choose and how the trellis is anchored. A beautiful lattice panel is useless for a vine that will pull it off the wall by August, while a plain ladder frame can carry pole beans for years. So this guide starts with the three decisions that matter most, then moves on to the plans.
Before You Pick a Plan: Three Decisions That Save You From Rebuilding
1. Match the trellis to how the plant climbs
Plants climb in different ways, and that decides what your trellis needs to look like.
- Twiners such as pole beans, morning glory and honeysuckle wrap around thin supports, and clematis climbs by twisting its leaf stalks around them. They have trouble gripping wide boards, so choose slats, dowels, or wire or twine strung between the wood.
- Tendril climbers like peas, cucumbers, many squash and grapes grab thin supports in open structures, so a grid of narrow slats or strung twine works well.
- Leaners such as climbing roses and some tomatoes don’t grip at all. You’ll need to tie them in, so build in rails or anchor points every foot or so.
- Woody vines like wisteria and mature trumpet vine can break or tear down light lattices. If you’re planting one of these, build the arbor (design #9) with posts of at least 4×4 lumber, or rethink the plant. See our Amethyst Falls wisteria guide for how much support it needs.
2. Choose wood that can handle weather
Rot, not strength, is what ends most outdoor wood projects. Your options:
- Cedar (western red or eastern red/aromatic). Naturally rot-resistant, light, easy to cut, and it weathers to silver-gray. Usually the best all-round choice for trellis panels, and typically more expensive per board foot than pine.
- Redwood. Similar benefits, mostly easier to find on the West Coast, and often pricey elsewhere.
- Pressure-treated pine. Cheaper, and a sound choice for posts and anything touching soil. Look for lumber labeled for ground contact (commonly UC4A) for anything set in the earth. Modern residential treated lumber no longer uses arsenic-based CCA, which was phased out of residential use in the early 2000s. Let it dry before staining, as it’s often sold wet.
- Untreated pine, fir, or spruce. Fine for a trellis you expect to replace in a few seasons or for covered spaces. Expect it to rot faster in wet climates like the Southeast and Pacific Northwest.
- Cypress, black locust, white oak. Excellent where you can find them, but less available and often costlier.
A practical split: use cedar for the visible panels and treated lumber for anything buried.
For hardware, use exterior-rated screws (coated or stainless steel). Plain interior screws rust and leave black streaks on cedar. Stainless costs more but is the cleanest option next to light-colored wood.
3. Plan the anchoring, because wind is the real test
A full trellis covered in leaves behaves like a sail. A few rules of thumb:
- Freestanding trellises need posts set in the ground (gravel or concrete) or a heavy base. A flat panel pushed into soil will tip in the first storm.
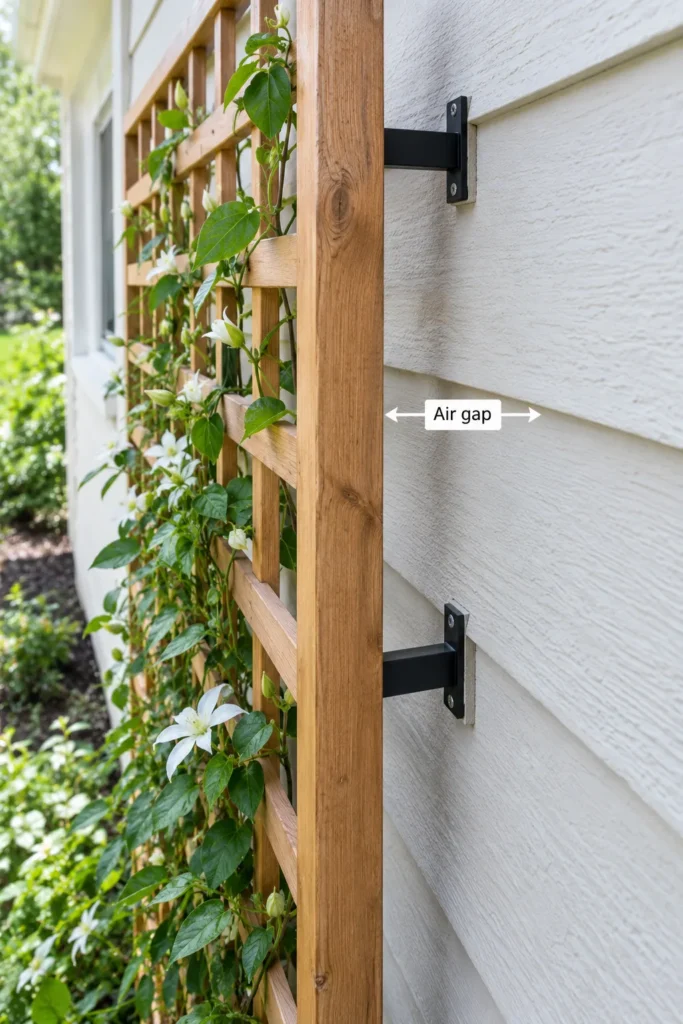
- Wall-mounted trellises should sit a few inches off the wall on spacers so air can circulate and the plants don’t trap moisture against your siding.
- Don’t let clinging vines like English ivy or Virginia creeper grow directly onto wood siding or brick. They hold on aggressively and are difficult to remove cleanly.
- Taller structures, arbors, and anything near a property line may fall under local rules. Check with your city or county building department and, if you have one, your HOA before building something over roughly six or seven feet tall. Rules vary a lot, so we won’t guess at a number for your area. Frost depth also varies from place to place, so ask local officials or a lumberyard how deep post holes should go where you live.
The 15 Designs at a Glance
| # | Design | Skill level | Realistic build time | Best for |
|---|---|---|---|---|
| 1 | Flat lattice panel | Beginner | 2–4 hours | Clematis, roses, fence dressing |
| 2 | Diamond lattice panel | Intermediate | 4–6 hours | Decorative walls |
| 3 | Ladder trellis | Beginner | 1–2 hours | Peas, pole beans |
| 4 | A-frame trellis | Beginner | 3–5 hours | Cucumbers, squash over beds |
| 5 | Obelisk | Intermediate | 4–6 hours | Pots, flower beds |
| 6 | Raised-bed trellis | Beginner | 2–3 hours | Vegetable gardens |
| 7 | Fence-top extension | Beginner | 2–3 hours | Privacy plus vines |
| 8 | Garden arch | Intermediate | 1 weekend | Entryways, paths |
| 9 | Four-post arbor | Intermediate | 1–2 weekends | Heavy vines, seating spots |
| 10 | Standoff wall trellis | Beginner | 2–3 hours | House walls |
| 11 | Hinged tilt-down trellis | Intermediate | 4–6 hours | Walls that need painting |
| 12 | Fan trellis | Intermediate | 3–5 hours | Small spaces, corners |
| 13 | Rustic branch trellis | Beginner | 2–3 hours | Informal gardens |
| 14 | Pallet trellis | Beginner | 1–3 hours | Budget builds |
| 15 | Planter with built-in trellis | Intermediate | 5–8 hours | Patios, balconies |
Build times are rough estimates for someone with basic tool experience. Add drying time if you stain or paint.
Plans & Designs
1. Flat lattice panel
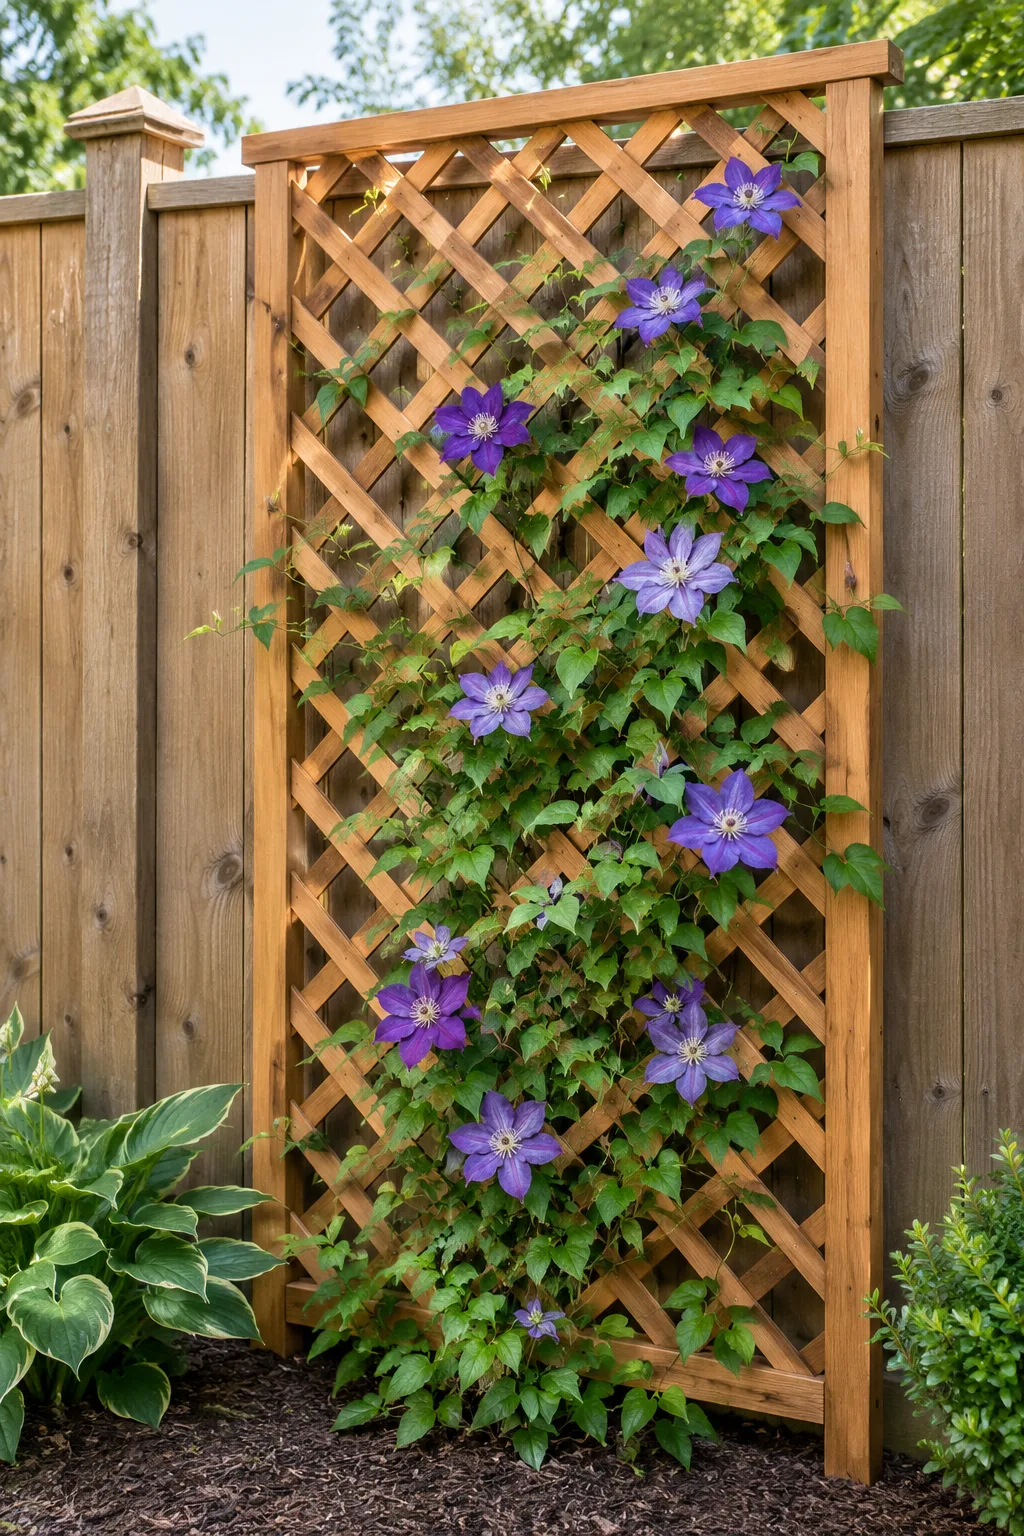
The classic. Build a frame from 1×3 or 1×4 boards, then fasten thin slats in a square grid across it. A typical starting size is 2 feet wide and 6 feet tall. Pre-drill every screw hole, especially near the ends of the slats, to stop them from splitting, particularly if they’re cedar. This is the most adaptable design: lean it on a fence, bolt it to posts or hang it on a wall.
2. Diamond lattice panel
Same construction, but the slats go at a 45-degree angle. It looks more refined. Every cut has to be angled, which leads to more waste and a higher chance of gaps between pieces. Always cut a test piece first. Then clamp a stop block to your miter saw so your repeat cuts stay consistent.
3. Ladder trellis
Two long rails and evenly spaced horizontal rungs. That’s it. Space the rungs about 6 to 8 inches apart for peas and beans, and sharpen the bottom of each rail so it pushes into soft soil. It’s the fastest build in this list and a good first project.
4. A-frame trellis
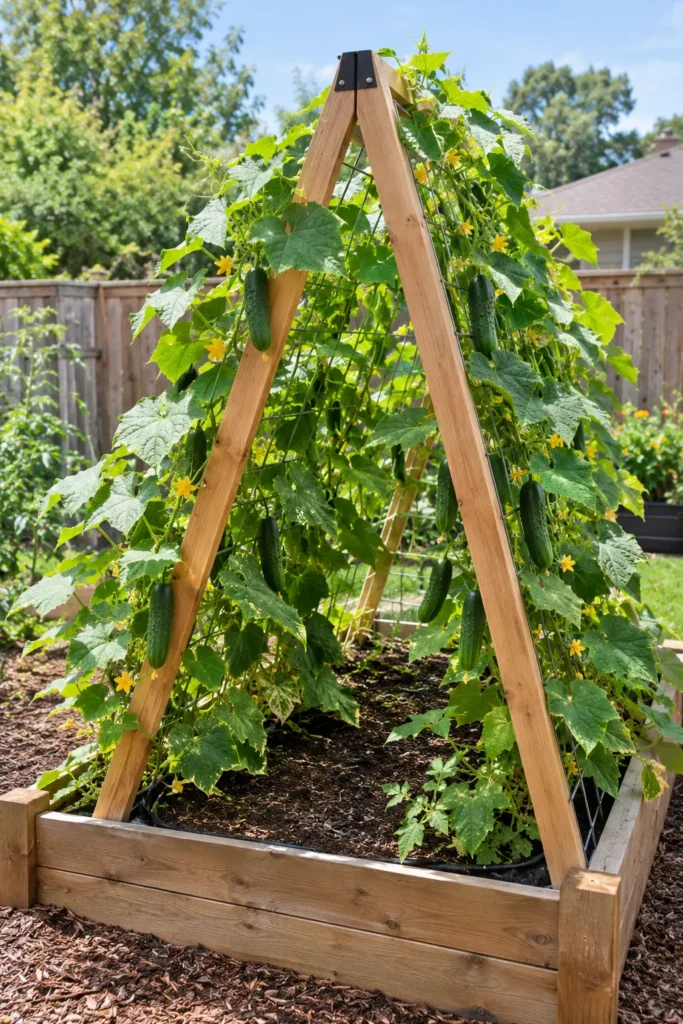
Two ladder-style panels hinged at the top and spread at the bottom into an A shape. Set one over a raised bed or garden row and train cucumbers or small squash up both sides. Fruit hangs down inside where it’s easy to pick. Add a diagonal brace or a bottom crossbar so it can’t spread under load.
5. Obelisk
A four-sided tapered tower, narrower at the top. Cut four legs, add horizontal rungs at graduated lengths, and top it with a small cap or finial. Good in pots and flower beds, particularly for annual vines like sweet peas. The angles take patience, so dry-fit before screwing anything.
6. Raised-bed trellis
A tall frame mounted to the back or side of a raised garden bed with brackets or lag screws. It uses the bed’s own structure as an anchor, which is more stable than driving stakes. Make sure it’s tied into the bed’s frame, not just the soil.
7. Fence-top extension
A lattice panel added above an existing fence to increase privacy and give vines extra height. Check that your fence posts can handle the extra wind load, and look up local height rules for fences before adding more than a foot or two.
8. Garden arch
An arched top is typically cut from plywood or built from thin strips glued and clamped around a curved form (lamination). Plywood cutting is easier. The curved form method is stronger and looks better but needs more clamps and patience. Set the legs into the ground with gravel or concrete, or bolt them to a deck. This one is realistic for a weekend only if you skip curved lamination.
9. Four-post arbor
A pergola-style structure with four posts, cross beams, and an open top. This is the design for wisteria or other heavy vines, and the one most likely to need permission from your town. Use 4×4 treated posts set properly in the ground and keep the whole thing square with a level and diagonal measurements. Plan on two weekends, especially with concrete curing time.
10. Standoff wall trellis
A lattice panel mounted on short wooden or metal spacers so there’s an air gap against the wall. This protects your siding and gives twining stems room to wrap around the back. Use stainless or coated screws into studs or masonry anchors, not just siding.
11. Hinged tilt-down trellis
A trellis hinged at the bottom and held at the top with removable hooks or pins. Unhook and it swings down so you can paint or repair the wall behind it. Most trellis guides skip this idea, and it’s the one you’ll thank yourself for in five years. Use heavy exterior hinges and support the plant stems loosely so they can bend.
12. Fan trellis
Slats radiate from a point near the bottom, spreading outward like a hand fan. It fits narrow spaces and corners well, and suits climbing roses that need lots of horizontal ties. Mark the radiating lines on a flat bench before cutting.
13. Rustic branch trellis
Straight branches or cedar poles lashed or screwed into a grid. It costs little if you have access to cuttings, and it suits informal or cottage-style gardens. Use fully dry, debarked wood where possible, since green branches shrink and loosen over time.
14. Pallet trellis
Standing a wooden pallet upright against a wall is the lowest-effort idea here. Look for the HT stamp (heat-treated) and avoid pallets marked MB (methyl bromide) or without any marking, especially if you’ll be growing food. Sand rough surfaces and expect it to weather faster than cedar. It’s more of a temporary solution.
15. Planter with built-in trellis
A wooden planter box with a lattice panel rising from the back. Handy for patios, balconies, and rentals where you can’t dig. A full planter can get extremely heavy once soil is wet, so check what your balcony or deck is rated to hold, and drill drainage holes.
Quick Start: Build a Ladder Trellis in an Afternoon
If this is your first trellis, start with design #3. Here’s what to gather and how to build it. Adjust the size to your plant and space.
Tools and materials checklist
- Two long rails and a handful of shorter rungs in cedar, or in ground-contact treated lumber if the ends will sit in soil
- Exterior-rated screws (coated or stainless steel)
- Tape measure and pencil
- Miter saw or hand saw
- Drill with a bit sized for pilot holes, plus a driver bit
- Carpenter’s square, or a tape measure to check diagonals
- Optional: exterior sealer or stain, if you don’t want the wood to weather to silver-gray
Steps
- Decide on the size. Check your plant’s mature height and your site, then cut both rails to the same length.
- Cut the rungs. Make them all the same length. Cut one first and use it as a template for the rest.
- Mark the rung positions. Lay both rails side by side and mark rung locations about 6 to 8 inches apart, so the rungs line up on both rails.
- Pre-drill. Drill pilot holes at every screw location, especially near the ends of the rungs, to prevent splitting.
- Assemble flat. Screw the rungs to the rails, working from one end. Check that the frame is square by measuring the diagonals, which should match.
- Sharpen the rail ends. Cut the bottom of each rail to a point if the trellis will be pushed into soft soil. For hard or windy sites, set it in gravel or concrete instead.
- Finish and install. Apply sealer if you want one, let it dry, then set the trellis and tie in your plants. Check that it’s stable by pushing on it before the plant gets heavy.
Which One Should You Build?
- First project or limited tools: the ladder trellis (#3) or flat lattice panel (#1).
- Vegetables: A-frame (#4) or raised-bed trellis (#6).
- House wall with vines: standoff trellis (#10), or the tilt-down version (#11) if you’ll need to repaint.
- Heavy vines or a focal point: the arbor (#9), but only after checking local rules.
- Renting or a small patio: planter with trellis (#15).
- Nothing in your budget: the pallet (#14) or branch design (#13), with the safety notes above.
Common Mistakes
Buying the wrong lumber thickness. Very thin lattice strips look fine in the store, but they can warp or snap when wet. If you’re building your own, ¾-inch material or thicker for frames helps panels hold shape.
Ignoring the plant’s mature size. A small clematis and a mature climbing rose have very different weight and spread. Plan for the full-grown plant, not the nursery pot.
Burying untreated wood. Even cedar rots in constant ground contact over time. Keep wood panels above the soil line or use ground-contact treated posts.
Skipping pre-drilling. Cedar and redwood split easily near edges and ends.
Finishing too early. Stain or paint on wet treated lumber often fails. Let the wood dry, and check the product label. Many gardeners also leave cedar unfinished and let it silver naturally.
Not checking plant hardiness. A trellis is only half the project. Confirm what will survive winters where you live using the USDA Plant Hardiness Zone Map. The map was updated in 2023, and USDA reported that about half the country shifted to a warmer half-zone compared with the 2012 version, so an older zone you remember may be out of date.
Maintenance
Every spring, check for loose screws, soft spots, and rubbing between stems and wood. Prune and retie vines instead of letting them pull the structure. In snowy regions, brush heavy snow off arches and arbors. If you want to keep the original wood color, reapply an exterior-rated sealer or stain every few years, following the product’s own directions. Planning more outdoor spaces? See our swivel chair garden guide for patio seating ideas, or our guide to indeterminate tomatoes, which are another good plant to train on a trellis.
FAQ
What’s the easiest wooden trellis to build for beginners?
The ladder trellis. It needs only two rails and a few rungs, uses basic cuts, and can be finished in an afternoon.
What wood is best for an outdoor trellis?
Cedar is the most popular choice for visible parts because of its natural rot resistance. Ground-contact pressure-treated lumber is the practical choice for posts set in soil.
How tall should a trellis be?
It depends on the plant. Peas and small beans do well at around 5 to 6 feet, and many vining crops will keep climbing as high as you allow. Check the mature height of your specific plant and local height limits.
How far apart should trellis slats be?
For tendril climbers and twiners, gaps of roughly 4 to 8 inches work for most home gardens. Smaller gaps can look tidy but trap moisture and slow drying.
Can I attach a trellis directly to my house?
You can, but it’s better to use spacers so air flows behind it. Avoid direct contact between clinging vines and siding. A hinged design makes future painting easier.
Do I need a permit for a garden trellis or arbor?
Small trellises generally don’t, but larger structures, taller fence extensions, or anything near a property line sometimes do. Rules vary by city, county, and HOA, so call your local building department.
Is a pallet safe for growing vegetables?
Choose pallets marked HT (heat-treated) and avoid ones marked MB or with unknown treatment. Even then, many gardeners prefer new lumber for edible plants.
How long will a wooden trellis last?
There’s no single number. Cedar or ground-contact treated wood can last many years, while untreated pine in a wet climate may need replacing sooner. Good drainage, air flow, and not burying untreated wood make the biggest difference.
Sources & References
- USDA Agricultural Research Service, Plant Hardiness Zone Map (2023 update, based on 1991–2020 temperature data)
- Check your state’s university extension service for plant-specific support needs and local lumber guidance