

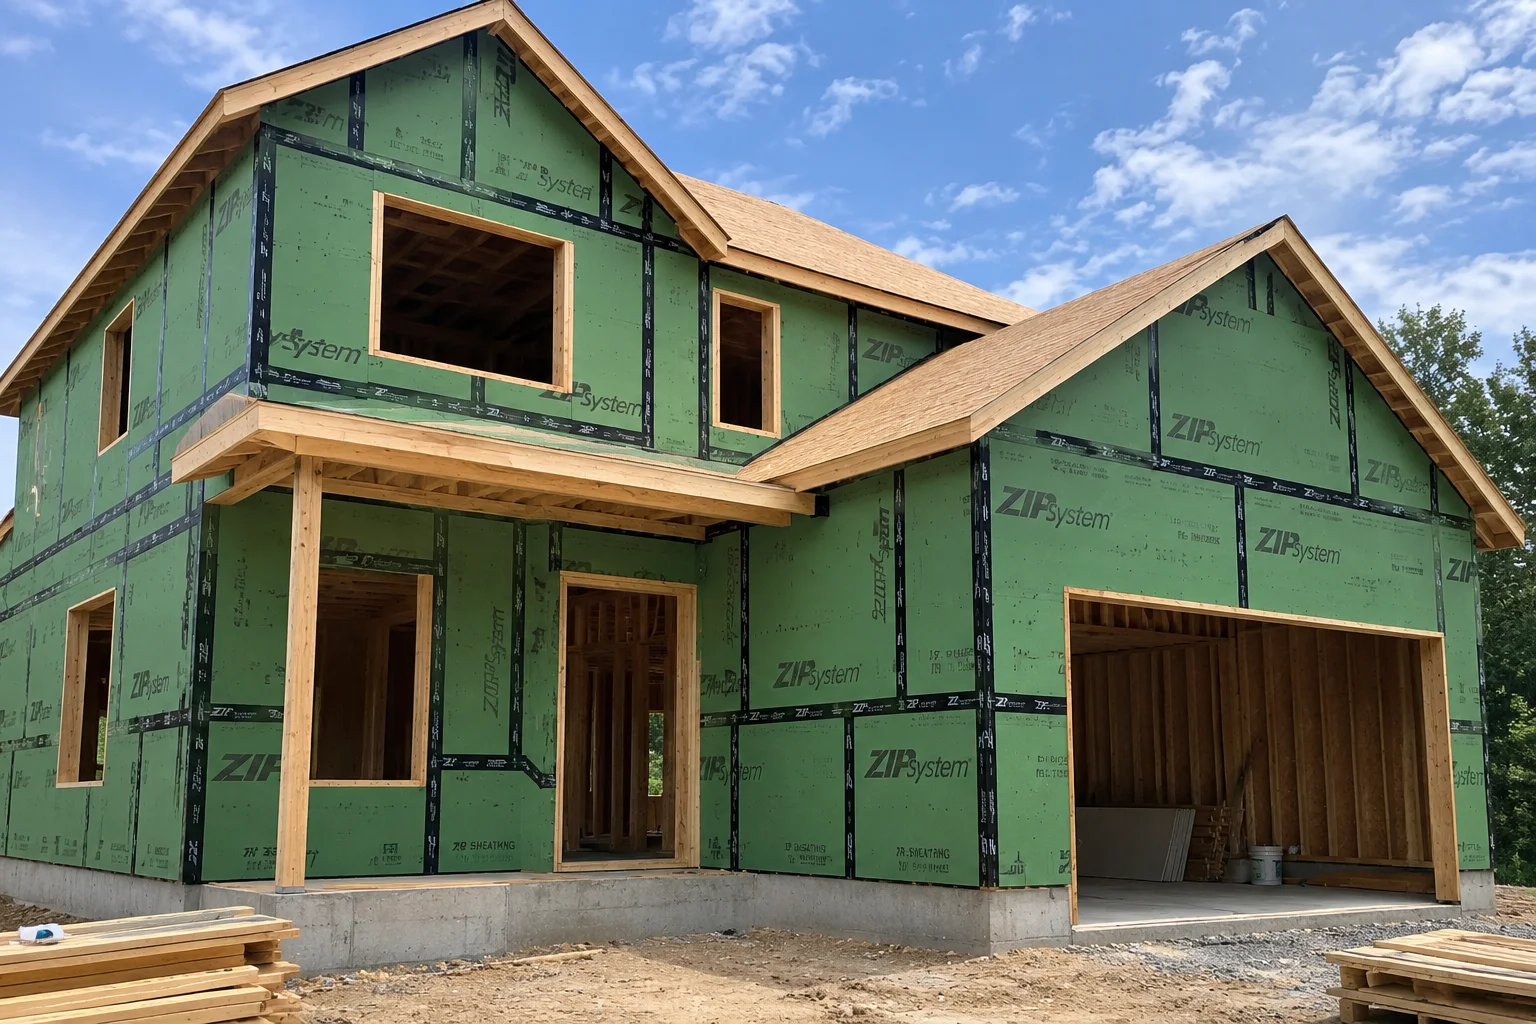
If you’re researching ZIP System sheathing for a build or renovation, here’s the quick version. It’s a structural wall and roof panel made by Huber Engineered Woods. It combines OSB sheathing with a built-in, factory-applied water-resistive barrier, so you skip separate house wrap or roofing felt entirely. Material costs typically run $40 to $70 per 4×8 sheet, translating to roughly $2 to $3 per square foot for materials alone. Total installed costs, including tape, labor, and accessories, generally land between $7 and $12 per square foot. That’s usually comparable to or slightly higher than traditional OSB plus separate house wrap, but it saves installation time and provides a more consistent air and moisture barrier. Below is what it actually is, how installation works, and what to budget for a real project.
Quick Answer: What Is ZIP System Sheathing?
ZIP System sheathing is oriented strand board (OSB) with a factory-applied protective overlay bonded to one side. It functions as both structural sheathing and a code-recognized water-resistive and air barrier in a single panel. You install the panels, then tape the seams with ZIP System’s proprietary tape, and the building becomes effectively weathertight without a separate house wrap step. On roofs, it eliminates the need for felt underlayment in most applications. Huber Engineered Woods manufactures it, and it has become a standard product in residential and light commercial framing over the past two decades.
How ZIP System Sheathing Actually Works
The core idea is combining two construction steps into one product. Traditional wall assembly involves installing OSB or plywood sheathing, then separately wrapping the building in house wrap (like Tyvek) and taping those seams. ZIP System panels arrive with the water-resistive barrier already bonded to the OSB at the factory. So once the panels go up, you’re taping panel seams directly rather than running a whole separate wrap layer afterward.
This two-step installation, panels then tape, is the product’s central selling point. According to Huber’s own materials, ZIP System tape installs roughly 40% faster than traditional house wrap application. That’s a meaningful labor savings on a full-size build.
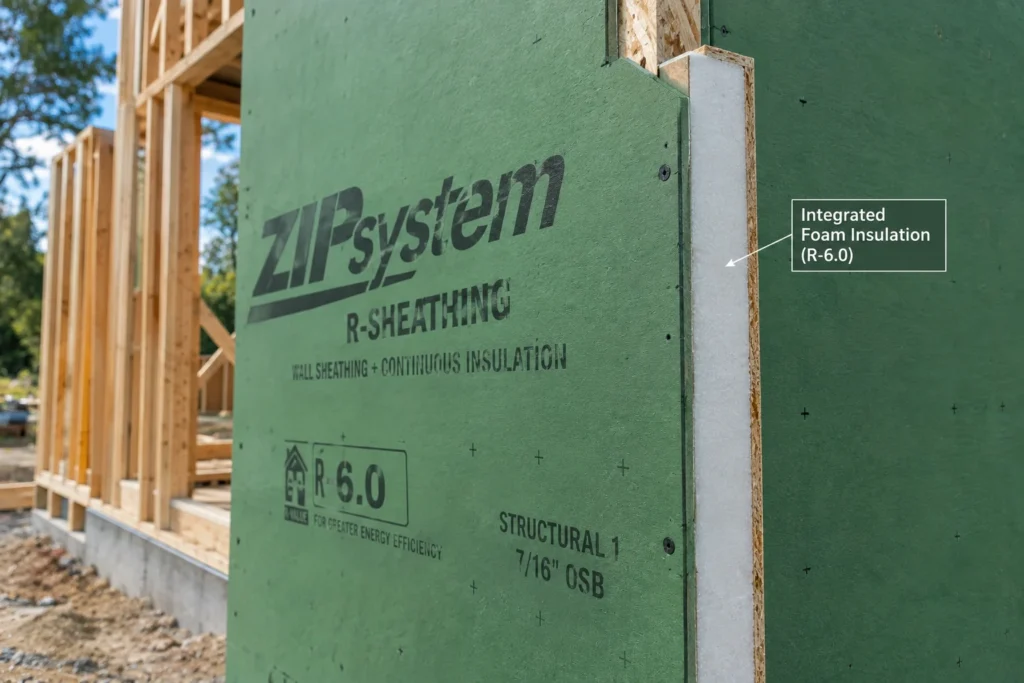
The product line includes standard ZIP System sheathing and ZIP System R-sheathing. Standard sheathing comes in 7/16 inch thickness for walls and thicker options like 1/2 inch or 5/8 inch for roof applications. R-sheathing adds a layer of rigid foam insulation bonded to the panel for additional R-value, ranging from roughly R-3.6 up to R-9.6 depending on foam thickness.
Cost Breakdown
Pricing varies by region, supplier, and project scope, but here’s a realistic breakdown based on current material and installation pricing.
| Cost Component | Typical Range |
|---|---|
| Standard ZIP panels (4×8 sheet, 7/16″) | $40–$70 per sheet |
| Material cost per square foot | $2.00–$3.00 |
| Installation labor per square foot | $0.75–$2.50 |
| ZIP System tape (per roll, covers multiple sheets) | ~$30–$40 per roll |
| Tape and accessories per square foot | $0.50–$1.50 |
| R-sheathing (insulated) panels | $80–$105+ per sheet, depending on foam thickness |
| Total installed cost per square foot | $7–$12 |
| Traditional OSB + separate house wrap (comparison) | $5–$10 per square foot |
For a typical 1,000 to 2,000 square foot roof or wall area, budget for 25 to 40 sheets depending on exact dimensions and waste factor, plus tape and fasteners. Prices shift with lumber and OSB market conditions, which can swing significantly year to year. So treat these figures as planning ranges rather than a firm quote, and check current pricing with local suppliers before budgeting a specific project.
ZIP System vs. Traditional OSB and House Wrap
This is the comparison most homeowners and builders actually want answered. On pure material cost, ZIP System often runs slightly higher per square foot than buying separate OSB and house wrap. Where it tends to even out, or come out ahead, is in labor time and long-term performance.
The water-resistive barrier comes factory-bonded rather than field-installed. That means less room for installation error, gaps, or missed seams that can occur with house wrap installed on a job site, sometimes in less-than-ideal weather conditions. The faster installation time on the taping step also reduces labor costs on larger projects, partially offsetting the higher material price.
Traditional OSB with separate house wrap remains a perfectly viable, code-compliant option. It’s often the more budget-friendly choice for smaller projects or budget-conscious builds where the labor savings don’t add up to as much. The decision often comes down to project scale, local labor costs, and how much value you place on the more consistent barrier performance.
Installation Steps
Install the panels. Installers fasten panels to framing according to standard OSB sheathing nailing patterns and spacing requirements, following local code and Huber’s published fastening schedules for wind and structural load requirements in your area.
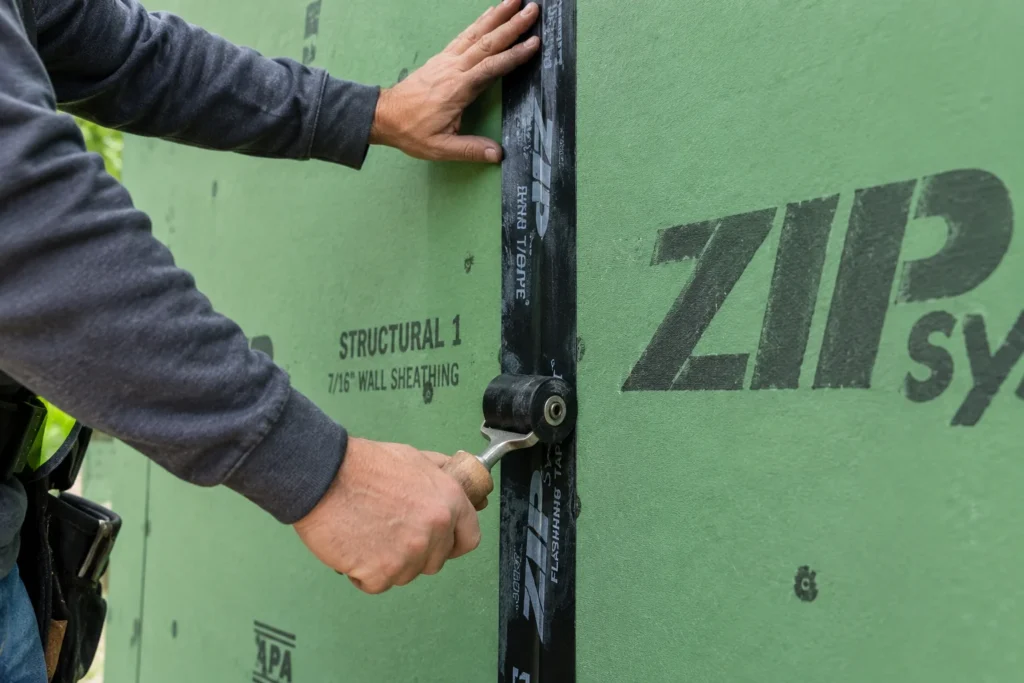
Tape the seams. Crews apply ZIP System tape over all panel seams, using a roller to ensure full adhesion. This step completes the water-resistive barrier, so proper tape application, clean surfaces, and correct overlap matter significantly for actual performance.
Address penetrations and transitions. Window and door openings, corners, and any penetrations need appropriate flashing tape or liquid flash product, following Huber’s detailing guidance, to maintain a continuous barrier at these vulnerable points.
Inspect before covering. Before siding or roofing goes on top, inspect tape seams for proper adhesion. This barrier becomes far harder to fix once finish materials cover it.
Common Installation Mistakes
Skipping proper surface prep for tape. ZIP tape needs a clean, dry surface for full adhesion. Dust, debris, or moisture on the panel surface at the time of taping can compromise the seal, sometimes without becoming apparent until water intrusion shows up later.
Under-detailing window and door openings. These transition points are consistently where water intrusion problems occur in any wall assembly, ZIP System included. Follow the manufacturer’s specific flashing details rather than improvising, since these details are engineered based on real failure patterns.
Installing in poor weather conditions. ZIP System is more forgiving than traditional house wrap in some ways, but tape adhesion still depends on temperature and surface dryness. Extreme cold or wet conditions during installation can affect how well the tape bonds.
Assuming all panels and tape are interchangeable with other brands. ZIP System components are engineered to work together as a system. Mixing brands of tape or sealant not specifically approved for use with ZIP panels can void warranty coverage and potentially compromise performance.
DIY vs. Professional Installation
Basic panel installation follows the same skills required for standard OSB sheathing work. So an experienced DIY builder comfortable with framing and sheathing can reasonably handle ZIP System installation on a wall or roof. The tape application step is relatively straightforward but benefits from careful attention to detail, since seam quality directly determines barrier performance.
For larger projects, complex rooflines, or if you’re not experienced with proper flashing details around windows and doors, professional installation is worth the added cost. ZIP System’s performance advantage depends heavily on correct detailing at transitions. So an experienced installer familiar with the system’s specific requirements reduces the risk of costly water intrusion problems down the line.
U.S. Regional Considerations
ZIP System’s built-in water-resistive barrier offers a particular advantage in climates with significant rain exposure during construction, such as the Pacific Northwest or Southeast. In these areas, getting a building weathertight quickly matters more than in drier climates. In high-wind zones, including hurricane-prone coastal areas, manufacturers specifically market the combo sheathing product for durability in these conditions. Still, local code requirements for wind resistance should always take precedence over general marketing claims. Check with your local building department on specific fastening and bracing requirements for your zone.
In colder climates, ZIP System R-sheathing’s added insulation value can contribute meaningfully to a wall assembly’s overall energy performance. This is worth discussing with your builder or energy consultant if you’re targeting specific energy code compliance in northern states.
If you’re planning a broader building envelope or exterior renovation project, PlazmaHomes’ wood siding guide covers another key material decision — the finish layer that goes directly over sheathing like this — worth factoring into your overall project budget alongside your sheathing choice.
For official product specifications, installation guides, and code compliance documentation, Huber Engineered Woods’ official ZIP System resource page is the most authoritative source for current technical details.
Frequently Asked Questions
How much does ZIP System sheathing cost per square foot?
Material costs typically run $2.00 to $3.00 per square foot. Total installed costs, including labor, tape, and accessories, generally fall between $7 and $12 per square foot, depending on region and project complexity.
Is ZIP System sheathing worth the extra cost over traditional OSB and house wrap?
It depends on your priorities. ZIP System often costs slightly more in materials but saves labor time and reduces the risk of installation gaps compared to separately installed house wrap. For larger projects, the labor savings can partially or fully offset the higher material cost.
Do you still need house wrap with ZIP System sheathing?
No. ZIP System sheathing functions as the water-resistive and air barrier on its own once installers put up panels and tape the seams. This eliminates the need for a separate house wrap layer.
Can you install ZIP System sheathing yourself?
Yes, for builders comfortable with standard OSB sheathing installation. The tape application step requires careful attention to detail, particularly around window and door openings, where most real-world water intrusion issues tend to occur.
Does ZIP System sheathing work for roofs as well as walls?
Yes. ZIP System offers roof-specific sheathing that eliminates the need for felt underlayment in most standard applications, in addition to its wall sheathing products.
What’s the difference between standard ZIP System sheathing and R-sheathing?
Standard ZIP System sheathing is OSB with the integrated water-resistive barrier only. R-sheathing adds a layer of rigid foam insulation bonded to the panel, providing additional R-value (roughly R-3.6 to R-9.6 depending on thickness) for improved energy performance.
Does ZIP System sheathing meet local building codes?
Most U.S. jurisdictions recognize ZIP System sheathing and tape as a water-resistive and air barrier, but always confirm specific requirements with your local building department, since code adoption and amendments vary by location.