
If you’ve ever walked past a lush, upright fern on someone’s shaded porch and thought, “I need that in my life,” chances are you were looking at a Kimberly Queen Fern. It has a quiet confidence that Boston ferns and other droopy cousins can’t quite match — those stiff, sword-shaped fronds stand tall instead of flopping over, and the whole plant keeps its shape whether you tuck it into a corner of your living room or let it anchor a patio container garden.
I’ve grown Kimberly ferns both indoors in a sunny apartment in North Carolina and outdoors on a shaded deck in Georgia, and every time I recommend this plant, people come back and say the same thing: “Why didn’t I grow this sooner?” It’s forgiving without being boring, beautiful without being fussy, and genuinely useful — more on that in a minute.
This complete guide walks you through everything you need to know to grow a thriving Kimberly fern in 2026, whether you’re in a sun-baked Phoenix apartment or a shaded yard in the Pacific Northwest.
What Is the Kimberly Fern? A Quick Introduction
The Kimberly Queen Fern (Nephrolepis obliterata) is an evergreen fern native to Australia. It belongs to the Nephrolepidaceae family — the same family as the more commonly known Boston fern — but it behaves quite differently in the home and garden.
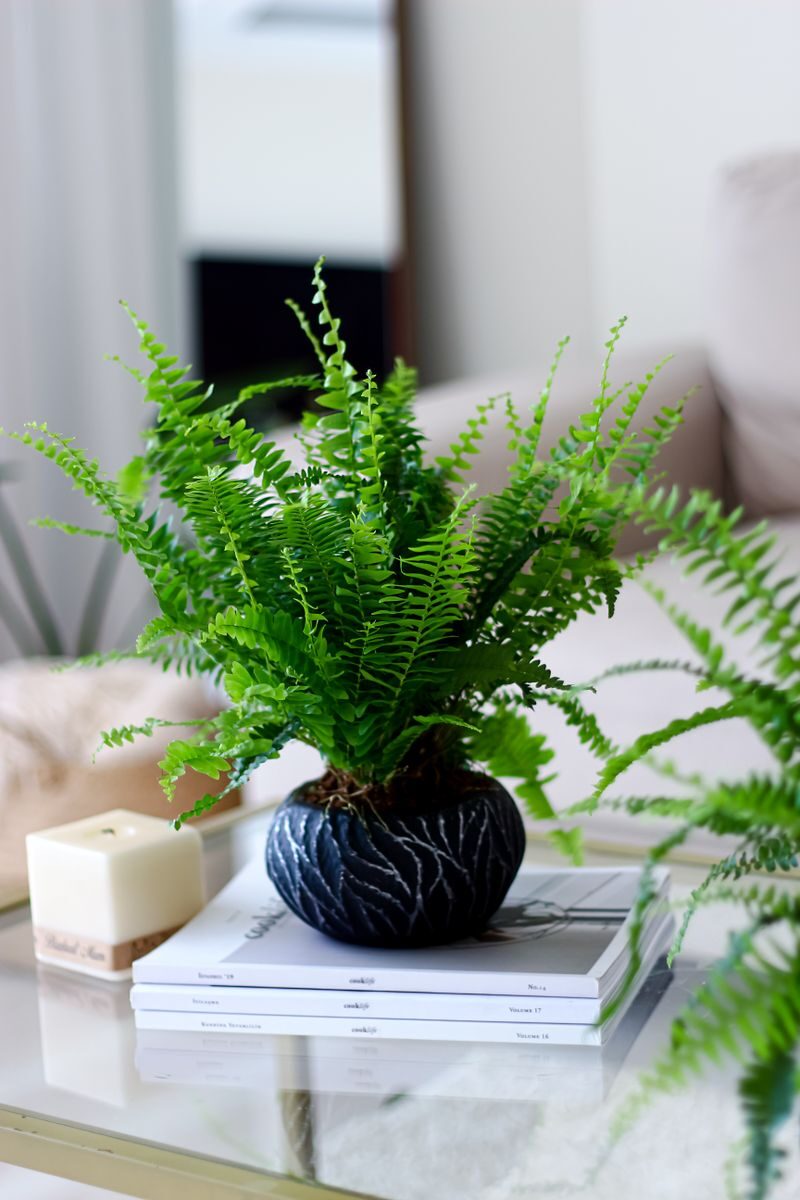
Where Boston ferns cascade and droop, the Kimberly fern grows upright and compact, with dense, sword-shaped fronds that stay tidy and structured. Mature plants typically reach 2 to 3 feet tall with a spread of 2 to 4 feet, making them ideal for floor containers, urns, shaded garden beds, and hanging baskets.
One thing that often surprises people: the Kimberly Queen Fern appeared on NASA’s famous Clean Air Study list, recognized for its ability to filter formaldehyde, xylene, and other indoor air pollutants. While current science (as of 2026) advises realistic expectations — you’d need many plants to meaningfully clean a whole room — there’s no question this fern contributes to a fresher indoor atmosphere and exceptional humidity regulation through transpiration.
It’s also completely non-toxic to humans, dogs, cats, and horses, which makes it one of the most family-friendly houseplants you can own.
Kimberly Fern at a Glance: Quick Care Reference
| Care Factor | Details |
|---|---|
| Botanical Name | Nephrolepis obliterata |
| Common Names | Kimberly Queen Fern, Australian Sword Fern |
| Plant Type | Evergreen perennial fern |
| Mature Size | 2–3 ft. tall, 2–4 ft. wide |
| Light | Bright indirect light (indoors); dappled shade (outdoors) |
| Watering | Every 5–7 days; keep soil consistently moist |
| Soil | Rich, moisture-retentive, well-draining |
| Temperature | 60–85°F (15–29°C) |
| Humidity | Moderate to high |
| Fertilizer | Balanced liquid fertilizer, diluted, every 4–6 weeks in growing season |
| USDA Zones | 9–11 (outdoor perennial); zones 3–8 (grown as annual or houseplant) |
| Toxicity | Non-toxic to humans and pets |
Light Requirements: Finding the Sweet Spot
Getting the light right is probably the single most important thing you’ll do for your Kimberly fern, and the good news is it’s not complicated.
Indoors, place your fern near a north- or east-facing window where it receives bright, indirect light for several hours a day. A spot within 3 to 6 feet of a window is ideal. Avoid south- or west-facing windows where harsh afternoon sun will scorch the fronds, turning them brown and crispy along the edges.
If your fronds start looking pale, leggy, or sparse — like the plant is reaching toward the window — that’s a clear sign it needs more light. Move it closer to the window without putting it in direct beams.
Outdoors, the Kimberly fern shines (pun intended) in dappled shade or partial shade. Under a covered porch, beneath a large tree canopy, or on a shaded patio are all ideal placements. Unlike Boston ferns, the Kimberly Queen can actually tolerate more light, including some gentle morning sun, as long as you keep the soil consistently moist during those sunnier periods.
Pro tip for USA gardeners: If you’re in the South or Southwest — think Texas, Florida, Louisiana, Southern California — you can grow this fern outdoors nearly year-round. In states like Tennessee, North Carolina, or the Pacific Northwest, use it as a seasonal porch plant from late April through October, then bring it inside.
Watering: The Most Common Mistake and How to Avoid It
Here’s the honest truth about watering ferns: most people either overwater or underwater, and then blame the plant. Kimberly ferns want consistency more than anything else.
The goal is to keep the soil evenly moist — not soggy, not bone dry. Check the soil every few days during spring and summer. Stick your finger about 2 inches into the soil; if it feels dry at that depth, it’s time to water. Water thoroughly until water flows out of the drainage holes at the bottom, then let it drain completely before putting it back in a saucer.
Signs of overwatering: Yellowing fronds, mushy stems near the base, a sour smell from the soil. If you see these, let the soil dry out slightly between waterings and check that your pot has proper drainage.
Signs of underwatering: Brown, crispy frond tips and edges, dry soil that pulls away from the pot’s sides, fronds that look wilted or dull. During hot summer months — especially in states like Arizona, Nevada, or Texas — you may need to water outdoor Kimberly ferns every 2 to 3 days.
Winter adjustment: During winter months, growth slows naturally and the plant needs less water. Pull back to watering once a week or slightly less, but never let the root ball completely dry out.
One practical habit that works well: water your Kimberly fern in the morning. This gives any moisture on the fronds time to evaporate during the day, reducing the risk of fungal issues.
Soil and Potting: Build the Right Foundation
Kimberly ferns thrive in rich, moisture-retentive soil that still drains well. Think of the conditions on a forest floor — loamy, slightly acidic, consistently damp but never waterlogged.
A quality potting mix formulated for ferns or tropical plants works well right out of the bag. You can also build your own blend by mixing equal parts of:
- Peat moss or coco coir (for moisture retention)
- Perlite (for drainage and aeration)
- Standard potting soil (for nutrients and body)
Avoid heavy garden soil, which compacts in containers and suffocates roots. Also stay away from overly alkaline mixes; Kimberly ferns prefer a slightly acidic to neutral pH of around 5.5 to 7.0.
A note on pots: Any pot with drainage holes works. These ferns actually prefer to be slightly root-bound, so don’t rush to upsize the pot. Look for roots emerging from the drainage holes or pushing up through the soil surface as your signal to repot.
Temperature and Humidity: The Tropical Zone
This fern comes from Australia’s warm, humid climate, and it brings those preferences with it wherever it grows.
Temperature range: Kimberly ferns are happiest between 60 and 85°F (15–29°C), which conveniently aligns with typical indoor room temperatures across the USA. They become stressed below 55°F and will not survive frost. If temperatures in your area drop below 40°F at night, bring the fern indoors.
Humidity: Moderate to high humidity keeps the fronds lush and green. In dry climates — Colorado, Arizona, Nevada, and the intermountain West — and in winter when indoor heating systems drop home humidity, brown frond tips become common.
Ways to boost humidity around your Kimberly fern:
- Group plants together — plants release moisture through transpiration, raising the ambient humidity around them collectively.
- Use a pebble tray — fill a shallow tray with pebbles and water, set the pot on top (above the water line), and evaporation will raise local humidity.
- Run a small humidifier nearby, especially during winter months.
- Choose a naturally humid room — bathrooms and kitchens with good light are excellent placements indoors.
Fertilizing: Feed Lightly, Feed Consistently
Kimberly ferns are not heavy feeders, and over-fertilizing is a more common problem than under-fertilizing. Too much fertilizer causes salt buildup in the soil, which burns roots and turns frond tips brown.
During the active growing season (spring through early fall), feed your fern with a balanced liquid houseplant fertilizer diluted to half the recommended strength, once every 4 to 6 weeks. A 10-10-10 or 20-20-20 balanced formula works well. Slow-release granular fertilizers applied in spring can also be used as a base, supplemented with liquid feedings through summer.
Critical rule: Never fertilize a dry fern. Always water the plant first, then apply fertilizer. Applying nutrients to dry soil concentrates the fertilizer salts and can seriously damage the roots.
Stop fertilizing in late fall and through winter when growth naturally slows down.
Growing Kimberly Ferns Outdoors in the USA
One of the things I love most about Kimberly Queen ferns is how versatile they are in American landscapes.
USDA Zones 9–11 (South Florida, Gulf Coast, Southern California, Hawaii): This fern is a true outdoor perennial here. Plant it in the ground or in containers in shaded garden beds, use it as a lush border plant under trees, or let it spill from large decorative urns on a covered porch. It stays evergreen year-round and fills in beautifully.
USDA Zones 7–8 (much of the Southeast and Pacific Northwest): Kimberly ferns work beautifully outdoors from late spring through fall. A light frost may damage fronds, so watch the forecast. Potted plants can be brought indoors before the first frost and returned outside after the last frost date in spring.
Zones 3–6 (Midwest, Northeast, Mountain West): Treat the Kimberly fern as a seasonal annual or a summer container plant. Many gardeners across Illinois, Ohio, and the Mid-Atlantic states pick these up at nurseries in May and enjoy them on patios all summer. When fall hits, either bring them inside or let them go.
Outdoor placement tips:
- Use organic mulch around the base of in-ground plants to retain soil moisture and moderate temperature swings.
- Pair Kimberly ferns with caladiums, impatiens, or begonias for a classic shaded garden display.
- On patios and decks, large decorative containers work beautifully — they make a bold statement as specimen plants.
For more ideas on designing beautiful outdoor plant combinations, check out our guide on shade garden plants that thrive in summer heat.
How to Repot Your Kimberly Fern
Kimberly ferns are somewhat tolerant of being root-bound, which means you don’t need to repot them every year. Plan on repotting when you notice roots visibly emerging from drainage holes or pushing through the soil surface.
When it is time to repot:
- Stop fertilizing at least four weeks before repotting to minimize stress on the plant.
- Water the fern thoroughly one or two days before repotting — moist soil holds together better and is easier on the roots.
- Choose a new pot just one size up (about 2 inches larger in diameter). Going too large invites root rot.
- Gently remove the plant, shake off old soil, and untangle roots if they’re circling.
- Place fresh potting mix in the new pot, position the fern so the crown sits about 2 inches below the rim, and fill in around the roots with soil.
- Water thoroughly until it drains from the bottom, and keep the fern in indirect light for a week or two while it adjusts.
Propagating Kimberly Ferns: Division Is Your Best Bet
The most reliable way to propagate a Kimberly Queen fern is by division — splitting a mature plant into two or more sections, each with its own roots and fronds.
When to divide: Late spring or early summer when the plant is actively growing is ideal.
How to do it:
- Water the parent plant thoroughly a day or two before dividing.
- Remove the plant from its pot and gently loosen the root ball.
- Using clean, sterilized pruning shears or a sharp knife, divide the root mass into two or more sections. Each section should have healthy roots and at least a few fronds.
- Pot each division into a fresh potting mix in an appropriately sized container.
- Keep new divisions in bright indirect light, maintain consistent moisture, and boost humidity if possible.
- Expect a short adjustment period — some frond loss and slowdown in growth is normal. Within a few weeks, new growth should emerge.
Kimberly ferns occasionally produce runners (similar to strawberry plants), and these can sometimes be separated and potted, though success rates are lower than with division.
Common Pests and Problems (and How to Fix Them)
Even a tough plant like the Kimberly Queen can run into trouble. Here’s what to watch for.
Spider mites tend to appear in hot, dry conditions and low humidity. You’ll notice tiny yellow spots or a fine webbing on fronds. Increase humidity around the plant, rinse fronds with water, and treat with neem oil or insecticidal soap for severe cases.
Mealybugs look like white, cottony masses in leaf joints and undersides of fronds. Remove manually with a cotton swab dipped in rubbing alcohol, and follow up with insecticidal soap if the infestation spreads.
Scale insects show up as small brown bumps on stems and fronds. Treat with horticultural oil or insecticidal soap, or scrape them off manually.
Aphids cluster on new growth. A strong stream of water from a hose or sink nozzle is often enough to dislodge them. Neem oil works as a follow-up treatment.
Brown frond tips are almost always a humidity or moisture issue — not enough humidity, inconsistent watering, or salt buildup from over-fertilizing. Trim brown tips with clean scissors at an angle for a natural look, then address the root cause.
Yellowing fronds can signal overwatering, poor drainage, or nutrient deficiency. Check drainage first and adjust watering before adding fertilizer.
According to the University of Florida IFAS Extension, maintaining proper humidity and avoiding waterlogged soil are the two most important factors in keeping ferns healthy long-term — a principle that holds true whether you’re growing in a Miami garden or a Minnesota living room.
Kimberly Fern vs. Boston Fern: Which One Is Right for You?
This comparison comes up constantly, and the honest answer depends on your lifestyle and your space.
Go with Kimberly Queen if:
- You want a tidier, more upright plant that holds its shape
- You’re growing it in a container on a porch or in a floor planter indoors
- You tend to miss a watering here and there
- You live in a drier climate where maintaining very high humidity is challenging
- You want something that doesn’t shed fronds all over your floor
Go with Boston fern if:
- You love that dramatic, cascading look in hanging baskets
- You have a consistently humid environment (a bathroom or greenhouse space)
- You’re an experienced plant grower who can manage its higher moisture demands
Both ferns are beautiful. But for most American households — especially those without consistently high indoor humidity — the Kimberly Queen is simply more forgiving and more practical.
Seasonal Care Calendar (USA)
Spring (March–May): Resume regular watering as growth picks up. Begin fertilizing once every 4–6 weeks. Transition outdoor plants back to porches and patios after the last frost date for your region. Repot if needed.
Summer (June–August): Peak growing season. Water more frequently, especially for outdoor plants in hot climates. Monitor for pests. Continue fertilizing. Mulch outdoor plants to retain moisture during heat waves.
Fall (September–November): Reduce fertilizing by mid-fall. Watch nighttime temperatures — bring potted plants indoors before temperatures consistently dip below 50°F. Trim dead or damaged fronds before bringing inside.
Winter (December–February): Reduce watering frequency but don’t let the soil dry completely. Stop fertilizing. Boost humidity indoors if heating systems are drying out the air. Growth will slow; this is normal.
Frequently Asked Questions
1. How often should I water a Kimberly fern indoors? In a 5-inch pot without direct sunlight, most Kimberly ferns need about half a cup of water every seven days — but this varies by pot size, season, and your home’s humidity. The most reliable method is to check the soil directly: water thoroughly when the top 2 inches of soil feel dry to the touch. During summer or in heated, dry homes, you may need to water more frequently.
2. Can Kimberly ferns survive indoors year-round? Yes, absolutely. Kimberly ferns do well as permanent houseplants as long as they receive bright indirect light, consistent moisture, and adequate humidity. Growth naturally slows in winter, but with proper care they’ll come back strong each spring. They’re a popular choice for living rooms, kitchens, and covered indoor atriums.
3. Why are my Kimberly fern fronds turning brown? Brown tips are most commonly caused by low humidity, inconsistent watering, or salt buildup from over-fertilizing. Check each possibility in order. If it’s humidity, run a humidifier or use a pebble tray. If it’s watering, establish a more consistent routine and if you’ve been fertilizing heavily, flush the soil with plain water and resume fertilizing at half the recommended strength.
4. Is the Kimberly Queen fern safe for pets? Yes — the Kimberly Queen Fern is non-toxic to dogs, cats, horses, and humans. This makes it one of the most pet-friendly fern options available and a great choice for households where animals roam freely. Always double-check with your veterinarian if a pet ingests any plant material in large quantities.
5. What’s the difference between a Kimberly Queen fern and a Boston fern? The key differences come down to growth habit and maintenance demands. Kimberly Queen ferns grow upright and stiff, shed less, and tolerate lower humidity better. Boston ferns have softer, drooping fronds and require consistently high humidity to thrive indoors. Kimberly ferns are generally considered easier to maintain and are better suited to containers and upright displays, while Boston ferns are classic hanging basket plants.
6. How do I know when to repot my Kimberly fern? The clearest signs are roots visibly growing out of drainage holes or pushing up through the soil surface. Kimberly ferns actually prefer to be slightly root-bound, so don’t rush repotting. When you do repot, go up just one pot size (2 inches larger in diameter) and use fresh potting mix formulated for ferns or tropicals. Spring is the best time to repot.
7. Can I grow Kimberly ferns in full shade? They can tolerate deeper shade but don’t thrive in it long-term. In very low light, growth becomes sparse, fronds turn pale, and the plant loses its full, lush appearance. Bright indirect light — or dappled outdoor shade — is ideal. If your space is quite dim, consider supplementing with a grow light positioned about 12 to 18 inches above the plant.
Final Thoughts: Why the Kimberly Fern Deserves a Spot in Your Home or Garden
The Kimberly Queen Fern hits a sweet spot that’s genuinely hard to find in the plant world. It’s lush and tropical-looking without demanding a tropical climate. It’s low-maintenance without being boring. And it genuinely adapts — to bright apartments in Chicago, shaded patios in Atlanta, humid bathrooms in Seattle, or covered porches in Dallas.
Whether you’re a first-time plant parent who wants something forgiving or an experienced gardener looking to add a bold textural statement to a shaded garden bed, this fern delivers.
Give it bright indirect light, consistent moisture, and enough humidity to keep those fronds green and upright — and it’ll reward you with years of effortless, beautiful growth.