
Most of us clean our homes regularly — but deep cleaning is something else entirely.
Regular cleaning handles the visible mess. Deep cleaning handles everything underneath it: the grease behind the stove, the dust inside the vents, the grime along the grout lines, and all the other buildup that accumulates quietly in corners you rarely think about. When you finally tackle it all, the difference is not just visible — it is something you can feel in the air and the energy of the space.
The good news is that deep cleaning your entire house does not have to be overwhelming. In fact, the secret is simple: work room by room, follow a clear order, and break the process into manageable steps rather than trying to do everything in a single chaotic day.
This complete guide walks you through every room in your home — kitchen, bathroom, bedroom, living room, laundry room, and more — with step-by-step instructions, pro tips, and a practical cleaning schedule you can actually stick to in 2026.
What Is Deep Cleaning — and How Is It Different from Regular Cleaning?
Before diving into the room-by-room breakdown, it is worth clarifying what deep cleaning actually means — because it is often confused with a thorough tidy-up.
Regular cleaning covers the basics: wiping down counters, mopping floors, vacuuming carpets, and cleaning visible surfaces. Deep cleaning, on the other hand, goes much further. It targets the areas that routine cleaning skips — inside appliances, behind furniture, under sinks, inside grout lines, on top of ceiling fans, and inside air vents.
Unlike routine tidying or weekly chores, deep cleaning targets those overlooked areas where dust, grime, and bacteria build up over time. As a result, it is particularly important for home health — especially for households with children, pets, or allergy sufferers.
How often should you deep clean? One schedule you can follow is seasonal, or about one weekend deep clean every three months. Another option is to break your deep cleaning checklist into smaller monthly or weekly tasks, tackling one room per month, or one to two tasks per week, so that you chip away on an ongoing basis.
What You Need Before You Start
You do not need a cart full of expensive specialty products to deep clean your home effectively. Common products like white vinegar, baking soda, dish soap, a scrub brush, and microfiber cleaning cloths are effective and easy to find.
Here is a complete supplies list to have ready before you begin:
Cleaning Solutions:
- All-purpose cleaner
- White vinegar (mixed 1:1 with water for a DIY spray)
- Baking soda (mixed with water to form a paste for stubborn grime)
- Dish soap
- Bathroom disinfectant and toilet bowl cleaner
- Glass cleaner
- Degreaser for kitchen surfaces and ovens
Tools and Equipment:
- Microfiber cloths (several — use separate ones per room)
- Scrub brush and old toothbrush (for grout and tight corners)
- Vacuum with HEPA filter and attachments
- Mop and bucket
- Squeegee for glass and tiles
- Rubber gloves to protect your hands
- Face mask for dusty areas like vents and ceiling fans
- Spray bottles for DIY solutions
Pro tip: When using commercial cleaning products, always ensure good ventilation by opening windows. Wear gloves to protect your skin from harsh chemicals, and always read product labels for usage instructions and safety warnings.
The Golden Rule: Always Clean Top to Bottom
Before starting any room, remember this one rule that professional cleaners follow without exception: always work from top to bottom.
Start at the ceiling — dust light fixtures, ceiling fans, and the tops of door frames first. Then work down to shelves, countertops, and appliances. Finally, clean the floors last. This way, anything that falls or drips during cleaning lands on a surface you have not yet cleaned, saving you from doing the same work twice.
Similarly, within each room, clear clutter before you start cleaning. You cannot properly wipe down a counter that is covered with items, and moving things mid-clean slows you down considerably.
Room 1: The Kitchen — Where to Start and Why
The kitchen is the hardest-working room in any American home — and consequently, it is usually the most in need of a thorough deep clean. Start here, because the kitchen requires the most time, the most soaking, and the most effort. Getting it done first means the rest of the house feels easier by comparison.
Appliances: Inside and Out
The oven is typically the most neglected appliance in the kitchen. To deep clean it without harsh chemicals, coat the interior with a baking soda and water paste, let it sit overnight, then wipe away the loosened grime with a damp cloth. For stubborn spots, a light spray of white vinegar will help lift the residue.
The refrigerator should be emptied completely before cleaning. Remove all drawers and shelves, wash them separately with dish soap and warm water, then wipe down the interior walls with a solution of equal parts white vinegar and water. While everything is out, check expiration dates and discard anything past its prime.
The microwave is one of the quickest appliance deep cleans. Place a bowl of water with a few slices of lemon inside and run it for three to five minutes. The steam loosens splatter instantly, and then everything wipes clean effortlessly.
The dishwasher is often forgotten but genuinely needs attention. To clean the interior, empty it out, clean the filter, then add one cup of vinegar and run on the hottest setting. This removes mineral buildup and eliminates odors.
Countertops, Sink, and Backsplash
Wipe down all countertops with your all-purpose cleaner, paying special attention to the edges and the area directly behind the sink where grime accumulates invisibly. For tile backsplashes, use a grout brush or old toothbrush with baking soda paste to scrub the grout lines — this single step makes a dramatic visual difference.
Scrub the sink basin and faucet thoroughly. Hard water stains around the base of faucets respond well to white vinegar left to soak for 15 minutes before scrubbing.
Cabinets and Pantry
Wipe down cabinet fronts with a damp microfiber cloth and a drop of dish soap. For greasy cabinet fronts near the stove, a degreaser works significantly better than general-purpose cleaners.
Inside the pantry, remove everything, wipe the shelves, check expiration dates, and reorganize as you replace items. This is also a good moment to consolidate half-empty packages and declutter items you will not realistically use.
Range Hood and Stovetop
Use a vinegar and baking soda paste to cut through grease on stovetops and oven doors. The range hood filter, which catches grease from cooking, should be removed and soaked in hot soapy water for at least 20 minutes before scrubbing. Most Americans skip this step entirely — and it shows, because a clogged range hood filter significantly reduces its effectiveness.
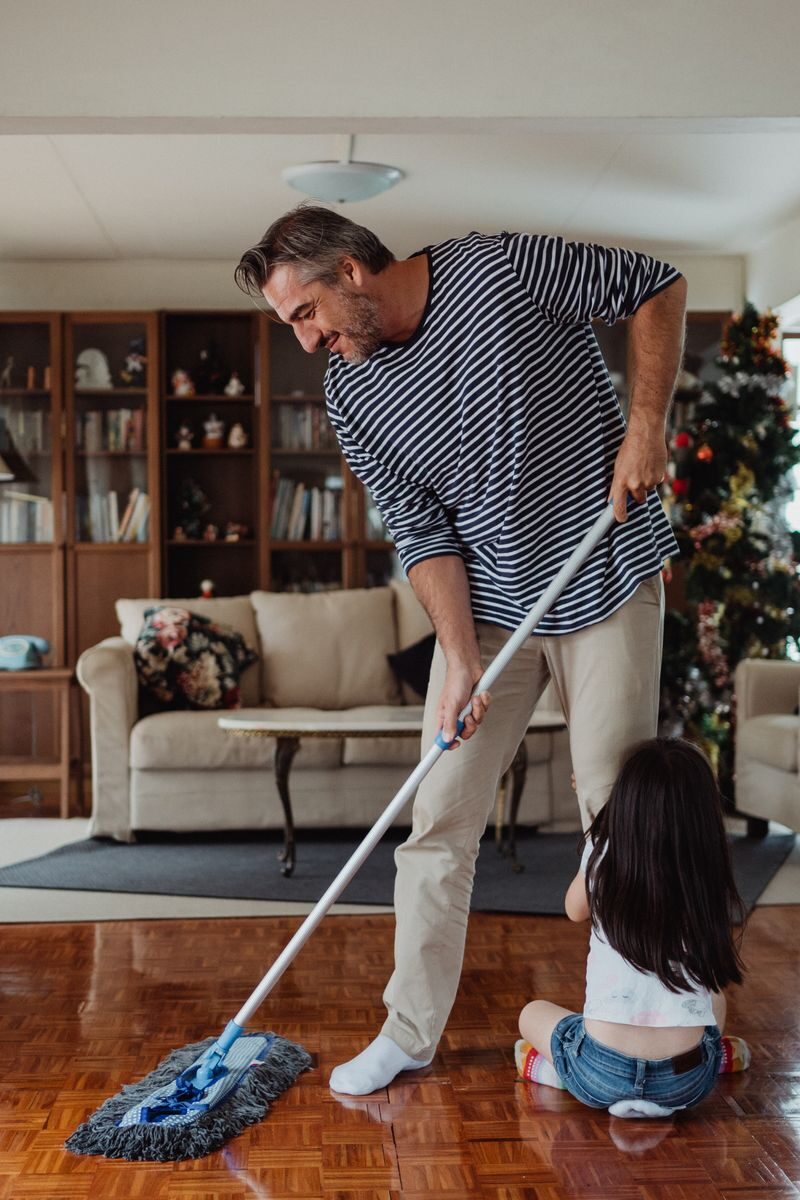
Kitchen Floor
Sweep or vacuum the floor first, pulling out the stove and refrigerator to clean underneath if possible. Then mop with a suitable cleaner for your floor type. If you have grout between floor tiles, use the same baking soda paste technique as the backsplash.
Room 2: The Bathroom — The Most Important Room for Hygiene
After the kitchen, the bathroom is the most critical room to deep clean thoroughly. Given the moisture, warmth, and daily use, it is where mold, mildew, soap scum, and bacteria build up fastest.
Toilet — All of It
Apply toilet bowl cleaner inside the bowl at the very beginning of your bathroom deep clean, then let it sit while you work on everything else. By the time you come back to scrub, the cleaner has already done most of the work.
Beyond the bowl, wipe down the entire exterior of the toilet — the tank, the base, behind the tank, and around the bolts at the floor level. These are the areas that rarely get cleaned during routine bathroom maintenance and that accumulate the most bacteria.
Shower and Tub
Spray your shower and tub surfaces with a bathroom cleaner and let them soak for at least five minutes. Then scrub the walls, floor, and fixtures thoroughly. Use a toothbrush to get into crevices around faucets and drains. For soap scum on glass shower doors, a paste of baking soda and dish soap applied with a non-scratch sponge works remarkably well.
Grout lines in the shower are, for most households, the most visually impactful thing to deep clean. Scrub them with a stiff grout brush and baking soda paste, then rinse. White or light-colored grout that has turned gray or brown will look dramatically different after this single step.
To address mildew or mold in the grout, apply a solution of one part bleach to ten parts water with an old toothbrush, let it sit for ten minutes, then rinse thoroughly with the fan running.
Sink, Vanity, and Mirror
Wipe down the sink, vanity top, and faucet hardware. Pull out items from under the sink and wipe the cabinet interior. Dispose of expired products — most Americans have several tubes, bottles, and containers under the bathroom sink that have long since passed their useful life.
Clean the mirror with glass cleaner and a microfiber cloth for a streak-free finish.
Bathroom Exhaust Fan
This is the most commonly skipped step in bathroom deep cleaning. The exhaust fan cover collects dust and lint, which reduces its effectiveness and can become a fire hazard over time. Remove the cover, wash it in warm soapy water, let it dry, then wipe the fan blades with a damp cloth before replacing.
Room 3: The Bedroom — Rest Better in a Truly Clean Space
Most people underestimate how much the cleanliness of the bedroom affects sleep quality. Dust mites, allergens trapped in bedding, and accumulated clutter all impact the air quality of the room where you spend roughly a third of your life.
Mattress
Strip the bed completely and vacuum the mattress surface using the upholstery attachment. Sprinkle baking soda generously over the surface, let it sit for at least 30 minutes to absorb odors, then vacuum it away thoroughly. Flip or rotate the mattress if the manufacturer recommends it — most should be rotated every three to six months.
Wash all bedding — sheets, pillowcases, duvet covers, and pillow protectors — on the hottest setting the fabric allows. If your pillows are washable, now is the time to launder those too.
Wardrobe and Closet
To deep clean a closet, it is essential to take everything out, reorganize, and declutter. While everything is out, vacuum and wipe down any shelves, baseboards, and walls.
As you return items to the closet, use this opportunity to create a donate pile. A useful rule of thumb: if you have not worn or used something in twelve months, it is probably time to let it go.
Dust Every Surface — Including the Hidden Ones
Wipe down all furniture surfaces with a damp microfiber cloth. Then dust the areas that rarely get attention during regular cleaning: the tops of door frames, window sills, baseboards, light switch plates, and the blades of any ceiling fan or standing fan.
For under the bed, vacuum thoroughly — this area collects a remarkable amount of dust, particularly in carpeted bedrooms, and is a significant source of allergens.
Room 4: The Living Room — High Traffic, High Impact
The living room sees more daily use than almost any other room in the home, which means it collects more dust, pet hair, skin cells, and general debris than its appearance often suggests.
Upholstered Furniture
Vacuum all upholstered furniture using the brush and crevice attachments, including the cushions, beneath the cushions, and along the back and arms. Use a lint roller or rubber gloves to remove pet hair from furniture before vacuuming — this makes the vacuum more effective by loosening the hair first.
For fabric sofas and chairs with removable covers, check the care label. Many covers are machine washable and benefit significantly from being laundered during a deep clean.
Electronics and Entertainment Equipment
Dust the television screen with a dry microfiber cloth. Wipe down remote controls, gaming controllers, and keyboards with a cloth lightly dampened with isopropyl alcohol — these are some of the highest-touch, least-cleaned surfaces in any American home.
Dust around and behind entertainment units and media consoles, where cables tend to trap extraordinary amounts of dust.
Windows, Blinds, and Curtains
Clean windows inside and out with glass cleaner and a microfiber cloth or squeegee. For blinds, close them in one direction and wipe with a damp cloth, then close in the opposite direction and repeat. Fabric curtains and drapes should be taken down and either machine washed (if the label allows) or run through a dryer on a low heat/air-only cycle to remove dust.
Baseboards, Walls, and Light Fixtures
Wipe baseboards with a damp microfiber cloth. Use a magic eraser to remove scuff marks on walls and doors — it is surprisingly effective on painted surfaces without damaging the finish. Dust light fixtures and lamp shades thoroughly.
Room 5: The Laundry Room — Often the Most Forgotten Room
The laundry room is, somewhat ironically, one of the least-cleaned rooms in most American homes. However, a dirty laundry room means dirtier laundry — so it genuinely deserves its own deep clean session.
Washing Machine
Run an empty load with white vinegar to deodorize your washer. For front-loading machines, the rubber door gasket is a common source of mold and mildew — wipe it down thoroughly with a vinegar solution, pulling back the folds to clean inside. Clean the detergent drawer by removing it and soaking it in warm soapy water.
Dryer
Clean the lint trap after every load during normal use, but during a deep clean, go further: vacuum the lint trap housing with a crevice attachment to remove the lint that accumulates past the screen. If possible, disconnect the dryer vent duct and vacuum inside — lint buildup in dryer vents is one of the leading causes of house fires in the USA.
Surfaces and Floors
Wipe down the tops and sides of both machines. Sweep and mop the floor, pulling the machines out if possible to clean beneath them. Wipe down shelving and check for expired or nearly empty cleaning product containers to discard.
Room 6: Hallways, Entryways, and Stairs
These transitional spaces take an enormous amount of foot traffic and, as a result, collect dirt faster than any room in the house. Yet they are almost always overlooked during deep cleaning sessions.
Start by clearing shoes, bags, and clutter from the entryway. Wipe down the front door inside and out, including the door handle and frame. Clean the light switches, which in hallways and entryways are touched dozens of times per day. Vacuum and mop the floors, paying particular attention to corners and the edges along the baseboards.
For stairs, vacuum each tread, riser, and edge thoroughly. Wipe down the banister and spindles with a damp cloth — these rarely get proper attention during routine cleaning and accumulate significant hand oil and dust over time.
How to Maintain Your Home Between Deep Cleans
Deep cleaning is most effective when combined with simple daily habits that prevent buildup from returning too quickly. A daily reset of five to ten minutes putting items back where they belong prevents clutter from piling up. Stopping dirt at the door by using doormats and encouraging a no-shoes policy indoors reduces dust and debris on floors significantly. Wiping high-touch surfaces often — kitchen counters, tables, and door handles — regularly avoids grease and bacteria buildup.
Beyond those daily habits, a simple weekly routine of vacuuming, wiping bathroom surfaces, and cleaning the kitchen keeps the gap between deep cleans manageable rather than daunting.
Your Deep Clean Schedule: A Practical Plan for 2026
Rather than attempting to deep clean the entire house in a single weekend, consider spreading the work over two weeks for a more sustainable approach.
Week 1:
- Day 1–2: Kitchen (appliances, cabinets, countertops, floor)
- Day 3–4: Bathrooms (all fixtures, tiles, grout, exhaust fans)
- Day 5: Laundry room
Week 2:
- Day 1–2: Bedrooms (mattress, closet, dust all surfaces)
- Day 3–4: Living room (furniture, windows, electronics, floors)
- Day 5: Hallways, entryway, and stairs
Following this schedule means the whole house gets a thorough deep clean without any single day feeling completely unmanageable.
Eco-Friendly Deep Cleaning in 2026
More American households than ever are moving toward eco-friendly cleaning solutions, and the good news is that they genuinely work. A mixture of equal parts white vinegar and water in a spray bottle makes an excellent all-purpose cleaner, though it should not be used on natural stone surfaces like granite or marble due to its acidity.
Baking soda paste handles scrubbing tasks on everything from ovens to grout lines. Dish soap mixed with warm water tackles most general-purpose cleaning jobs. These multi-functional products are perfect for everything from cleaning pesticides off your fruits and vegetables, to cleaning almost every hard surface in the house.
For those who want tested commercial products, Seventh Generation Free & Clear dish soap earned the top spot in 2026 testing — it is EPA-certified as a Safer Choice product, meaning it does not contain any ingredients that harm people or the planet.
For a comprehensive look at the top-rated cleaning products tested in 2026, the Bob Vila Best Cleaning Products Guide 2026 is one of the most thorough, independently tested resources available.
You can also check out our complete home maintenance checklist for seasonal tasks that pair well with your deep cleaning schedule throughout the year.
Frequently Asked Questions
How long does it take to deep clean a house room by room?
The time depends on the size of your home and how long it has been since the last deep clean. For an average American home of 1,500 to 2,000 square feet, a thorough deep clean typically takes between eight and sixteen hours spread across multiple days. Spreading it over two weekends makes it far more manageable than trying to complete everything at once.
What is the best order to deep clean a house?
Always start with the kitchen, as it is the most labor-intensive room and benefits from soaking time on appliances. Follow with the bathrooms, then the bedrooms, living room, laundry room, and finally hallways and entryways. Within each room, always work from top to bottom — ceiling and light fixtures first, floors last.
How often should you deep clean your house?
Most cleaning professionals recommend a full deep clean at least twice a year — typically in spring and fall. However, households with pets, young children, or allergy sufferers benefit from deep cleaning every three months. High-use areas like the kitchen and bathroom warrant more frequent attention even between full deep cleans.
Can I deep clean my house without harsh chemicals?
Absolutely. White vinegar, baking soda, dish soap, and lemon juice handle the vast majority of deep cleaning tasks effectively and safely. The main exception is disinfecting surfaces where you need to kill bacteria and viruses — for those tasks, an EPA-registered disinfectant is more reliable than a DIY solution alone.
What is the hardest room to deep clean?
For most people, the kitchen takes the most time and effort because of grease buildup on appliances, range hoods, and cabinets. The oven in particular requires soaking time and multiple cleaning steps. Starting the kitchen deep clean the night before — applying oven cleaner or baking soda paste before bed — makes the process much more efficient the following day.
How do I deep clean a house that has not been cleaned in a long time?
Start by decluttering each room before cleaning — trying to deep clean around piles of items is inefficient and discouraging. Then work room by room, starting with the kitchen and bathroom. For very heavy buildup, let cleaning solutions soak longer before scrubbing rather than applying more force. For particularly neglected spaces, a professional cleaning service for the first session can be a practical reset before establishing a regular routine.
What supplies do I need to deep clean my whole house?
The core supplies you need are: microfiber cloths, a HEPA vacuum with attachments, an all-purpose cleaner, white vinegar, baking soda, dish soap, a grout brush, rubber gloves, a mop, and a glass cleaner. These basics, combined with room-specific products like bathroom disinfectant and a degreaser for the kitchen, cover every task in this guide without requiring a large investment in specialty products.
Is it worth hiring a professional for deep cleaning?
For a first-time or annual deep clean, hiring a professional service is often worth the cost — particularly for households that have not been deep cleaned in over six months. Professional cleaners bring commercial-grade equipment, time efficiency, and experience with problem areas most homeowners miss. However, following this room-by-room guide consistently means your home rarely reaches the point where professional intervention feels necessary.