

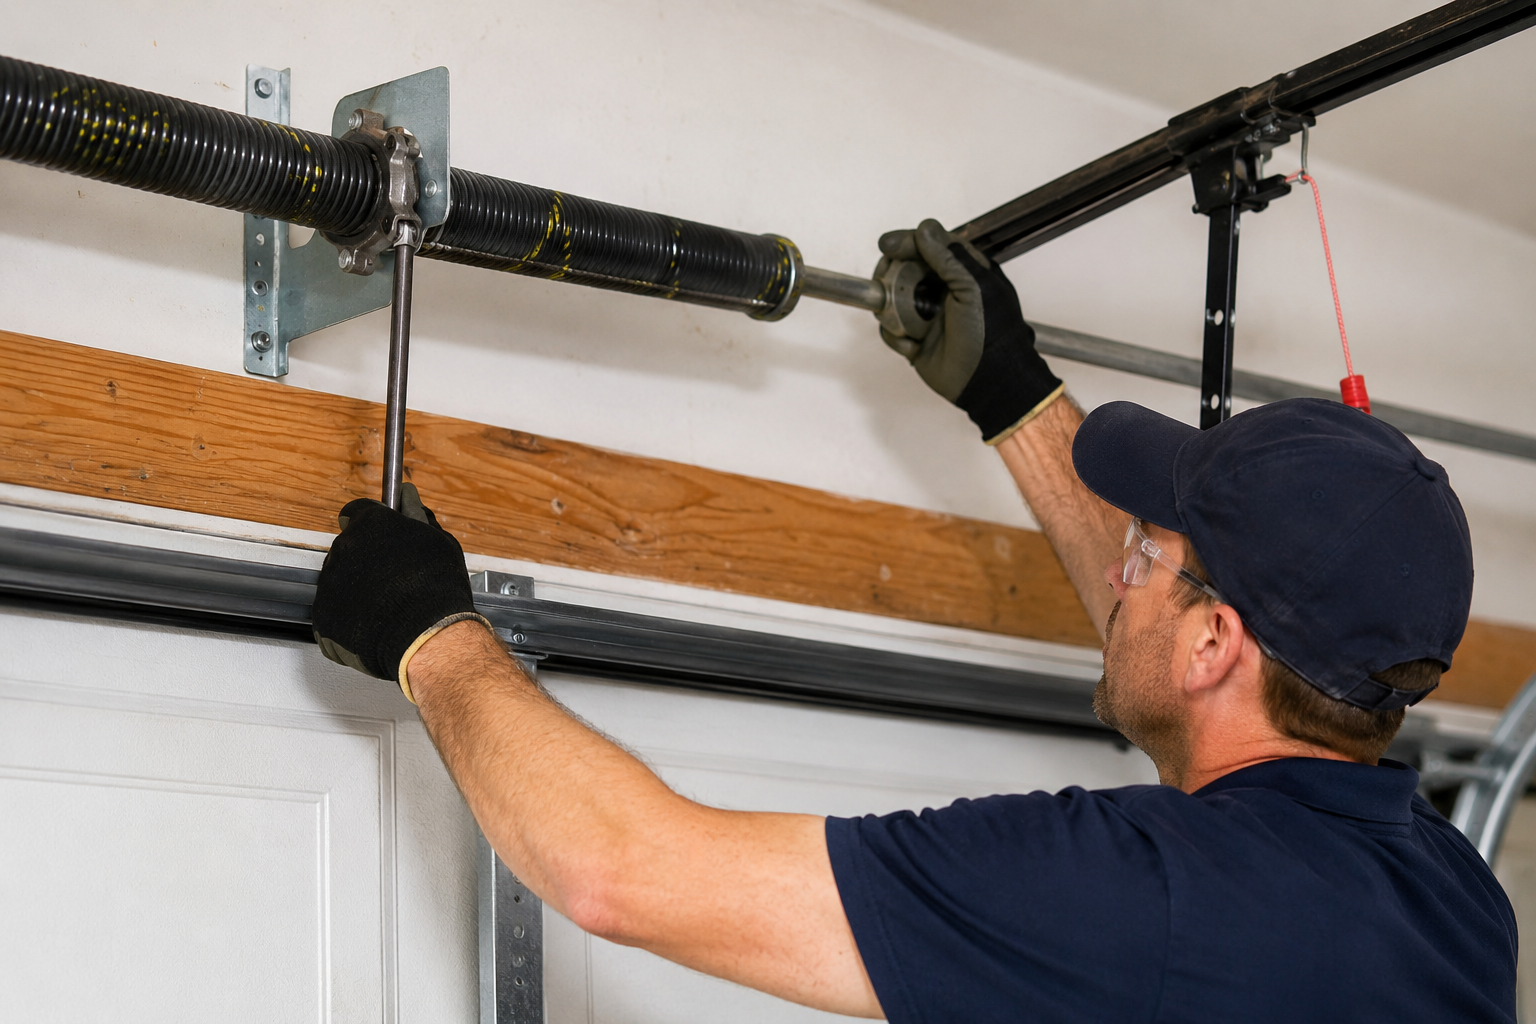
Garage door torsion springs do the heavy lifting every single day. They balance the weight of your door so it opens and closes smoothly. When one breaks, the door becomes almost impossible to move by hand. In the United States, this problem hits thousands of homes every year.
Most residential doors use torsion springs mounted on a shaft above the opening. These springs store energy by twisting. When the door closes, they wind tighter. When it opens, they release that energy to lift the panels. A typical pair lasts about 10,000 cycles. That equals roughly seven to ten years of normal use. High-cycle springs can reach 25,000 or even 50,000 cycles.
If your spring has failed or feels weak, replacement is the only real fix. This guide walks you through the entire process. You will learn how to spot the problem, measure the old spring correctly, choose the right replacement, and decide between DIY and professional help. Safety comes first at every step.
Why Garage Door Torsion Springs Fail
Torsion springs wear out from repeated use. Each open-and-close cycle adds stress to the metal. Over time the wire fatigues and eventually snaps. Temperature swings across the USA make the problem worse. Hot summers in Texas and Arizona expand the metal. Cold winters in Minnesota and Michigan contract it. Both conditions shorten spring life.
Rust is another common enemy. Garages in humid coastal areas like Florida or the Pacific Northwest see more corrosion. Salt air speeds up the damage. Even inland homes can develop rust if the garage stays damp.
You will usually hear a loud bang when a spring breaks. The door then refuses to stay open or feels extremely heavy. Sometimes the opener struggles and trips its safety reverse. In other cases the door drops suddenly after rising only a few inches. All of these signs mean the spring needs attention right away.
Critical Safety Warnings Before You Start
Torsion springs hold enormous tension. A broken or improperly handled spring can cause serious injury. The force is strong enough to break bones or cause eye damage. Therefore, never attempt this job without the right tools and knowledge.
Always wear safety glasses and heavy gloves. Keep children and pets far away from the work area. If you feel unsure at any point, stop and call a professional. In most U.S. states, licensed garage door technicians carry insurance and follow strict safety standards.
Many insurance policies will not cover injuries from DIY spring work. Local building codes in cities such as Chicago, Los Angeles, and New York often recommend professional installation for this reason. Consequently, the safer choice for most homeowners is to hire a trained technician.
How to Measure Your Garage Door Torsion Spring
Accurate measurement is the key to buying the correct spring. Wrong sizes lead to poor balance, opener damage, or another early failure. Follow these steps carefully while the spring is completely unwound and relaxed.
First, confirm you have torsion springs rather than extension springs. Torsion springs sit horizontally on a metal shaft above the door. Extension springs run along the sides of the tracks. This guide covers only torsion systems.
Next, measure the wire size. Count out exactly 20 coils. Measure the length of those 20 coils with a tape measure. Divide that number by 20. The result is your wire diameter. Common residential sizes range from 0.207 inches to 0.283 inches. Write the number down to three decimal places.
Then measure the inside diameter. This is the hollow center of the spring. Most residential doors use 1-3/4 inch, 2 inch, or 2-1/4 inch inside diameters. The size is often stamped on the stationary cone. If not, measure it carefully after the spring is off the shaft.
After that, measure the overall length. Include only the coiled portion. Do not include the cones at each end. Measure any broken pieces and add them together. Round to the nearest half inch.
Finally, determine the wind direction. One spring is left-wound and the other is right-wound on most two-spring doors. Look at the winding cone. Black cones usually indicate left wind. Red cones usually indicate right wind. Matching the wind direction is essential for proper function.
Record all four numbers: wire size, inside diameter, length, and wind. These details allow any reputable supplier to match your spring exactly.
How to Buy the Right Garage Door Torsion Spring
Once you have the measurements, shopping becomes straightforward. You can buy online or from local garage door supply houses. Online suppliers often stock a wider range of high-cycle options. Local shops may offer same-day pickup in larger metro areas.
Choose oil-tempered or galvanized springs for longer life. High-cycle versions cost a bit more but last two to five times longer. For busy households that open the door ten or more times a day, the upgrade is usually worth it.
Always replace both springs at the same time. Even if only one has broken, the second spring has the same age and wear. Replacing only one creates an unbalanced system that fails sooner.
Prices in the United States as of mid-2026 typically run $80 to $200 for a quality pair of residential springs. Shipping adds $15 to $40 depending on weight and location. Professional installation usually costs $250 to $450 total, including parts and labor. Costs run higher in California, New York, and Hawaii. They tend to be lower in the Midwest and South.
When ordering, double-check the part numbers against your measurements. Reputable sellers provide charts that match wire size, length, and lift capacity to door weight and height. A seven-foot door with standard drums needs a different spring than an eight-foot door.
You can find additional helpful tips and a full maintenance routine in our garage door maintenance checklist. That resource helps you keep the rest of the system in good shape after the springs are replaced.
DIY Replacement Versus Hiring a Professional
Some experienced homeowners replace torsion springs themselves. The job requires winding bars, locking pliers, C-clamps, and a solid understanding of the process. One small mistake can release dangerous energy.
Most manufacturers and safety organizations strongly recommend professional service. The Door and Access Systems Manufacturers Association provides clear safety guidelines on this topic. You can review their official recommendations here: DASMA Garage Door Safety Information. Following those standards protects both you and your property.
DIY makes sense only if you already own the correct tools and have replaced springs before. Otherwise the risk outweighs the savings. A professional finishes the job in one to two hours and tests the door balance thoroughly. They also check cables, rollers, and the opener at the same time.
In many U.S. cities, emergency spring service is available the same day. Response times are usually faster in suburban areas than in dense urban centers. Ask for proof of insurance and a written warranty on both parts and labor.
Step-by-Step Overview of the Replacement Process
Professionals follow a consistent sequence. First they secure the door in the closed position with C-clamps in the tracks. Then they disconnect the opener. Next they carefully unwind the old springs using winding bars. After removing the old springs, they slide the new ones onto the shaft. They install the cones, attach the cables, and wind the new springs to the correct number of turns.
The number of quarter turns depends on door height. A standard seven-foot door usually needs about 30 quarter turns. An eight-foot door needs roughly 34. The technician then tests the balance by lifting the door halfway. It should stay in place without help. Finally they reconnect the opener and run several full cycles.
This process looks simple on paper. In reality the tension makes every movement critical. That is why most homeowners prefer to leave the work to trained hands.
Cost Factors Across the United States in 2026
Labor rates vary by region. Coastal cities and major metros charge more. Rural areas and the Midwest often cost less. Parts prices remain fairly consistent nationwide because most springs ship from central distribution centers.
High-cycle springs add $30 to $80 to the parts cost. Stainless or galvanized options cost a little extra but resist rust better in humid climates. Some companies offer lifetime warranties on premium springs when installed by their technicians.
Always get at least two written quotes. Ask what the price includes. Some quotes cover only the springs. Others include new cables, bearings, and a full system check. The more complete package usually provides better long-term value.
Maintenance Tips to Extend Spring Life
After replacement, simple habits keep the new springs working longer. Lubricate the springs twice a year with a silicone-based or lithium grease spray. Avoid heavy oils that attract dirt. Wipe away excess so it does not drip onto the door panels.
Keep the tracks clean and free of debris. Check the balance every six months by disconnecting the opener and lifting the door by hand. It should stay open at any height. If it drifts, call for an adjustment.
Inspect the cables and rollers at the same time. Frayed cables or worn rollers put extra stress on the springs. Replacing small parts early prevents larger problems later.
In snowy northern states, clear ice and snow from the tracks before operating the door. In dusty southwestern states, vacuum the area around the shaft more often. These small steps make a measurable difference in cycle life.
FAQ Section
How long do garage door torsion springs last?
Most standard springs last 10,000 cycles. That equals seven to ten years for an average household. High-cycle springs can last 20,000 to 50,000 cycles.
Should I replace one spring or both?
Always replace both. The unbroken spring has the same age and wear. Leaving it in place leads to another failure soon afterward.
Can I measure the spring while it is still under tension?
No. Measurements must be taken on a fully relaxed spring. Measuring under tension produces inaccurate numbers and the wrong replacement.
Is it safe to replace torsion springs myself?
Only if you have the proper tools and prior experience. The stored energy is dangerous. Most experts and manufacturers recommend professional installation.
How much does professional replacement cost in the USA?
In 2026 the typical range is $250 to $450 including parts and labor. Prices are higher on the coasts and lower in the Midwest.
What happens if I install the wrong size spring?
The door will be unbalanced. It may open only part way, strain the opener, or become unsafe. Correct measurements prevent this problem.
Do torsion springs need special winding tools?
Yes. You must use proper winding bars. Screwdrivers or other tools can slip and cause injury.
Are high-cycle springs worth the extra money?
Yes for homes that open the door frequently. The longer life usually pays for the small price difference within a few years.
Final Thoughts and Next Steps
Replacing a garage door torsion spring restores smooth, safe operation. Accurate measurement and the correct replacement parts make the difference between a lasting repair and another early failure. Safety must remain the top priority throughout the process.
If you prefer to handle the work yourself, gather the right tools and follow every step carefully. For most homeowners, calling a licensed professional remains the smarter and safer choice. Either way, addressing the problem promptly protects your door, your opener, and your household.
Take the measurements listed in this guide. Compare prices from a couple of suppliers. Then decide whether DIY or professional service fits your situation best. A properly replaced torsion spring will give you years of reliable performance.