

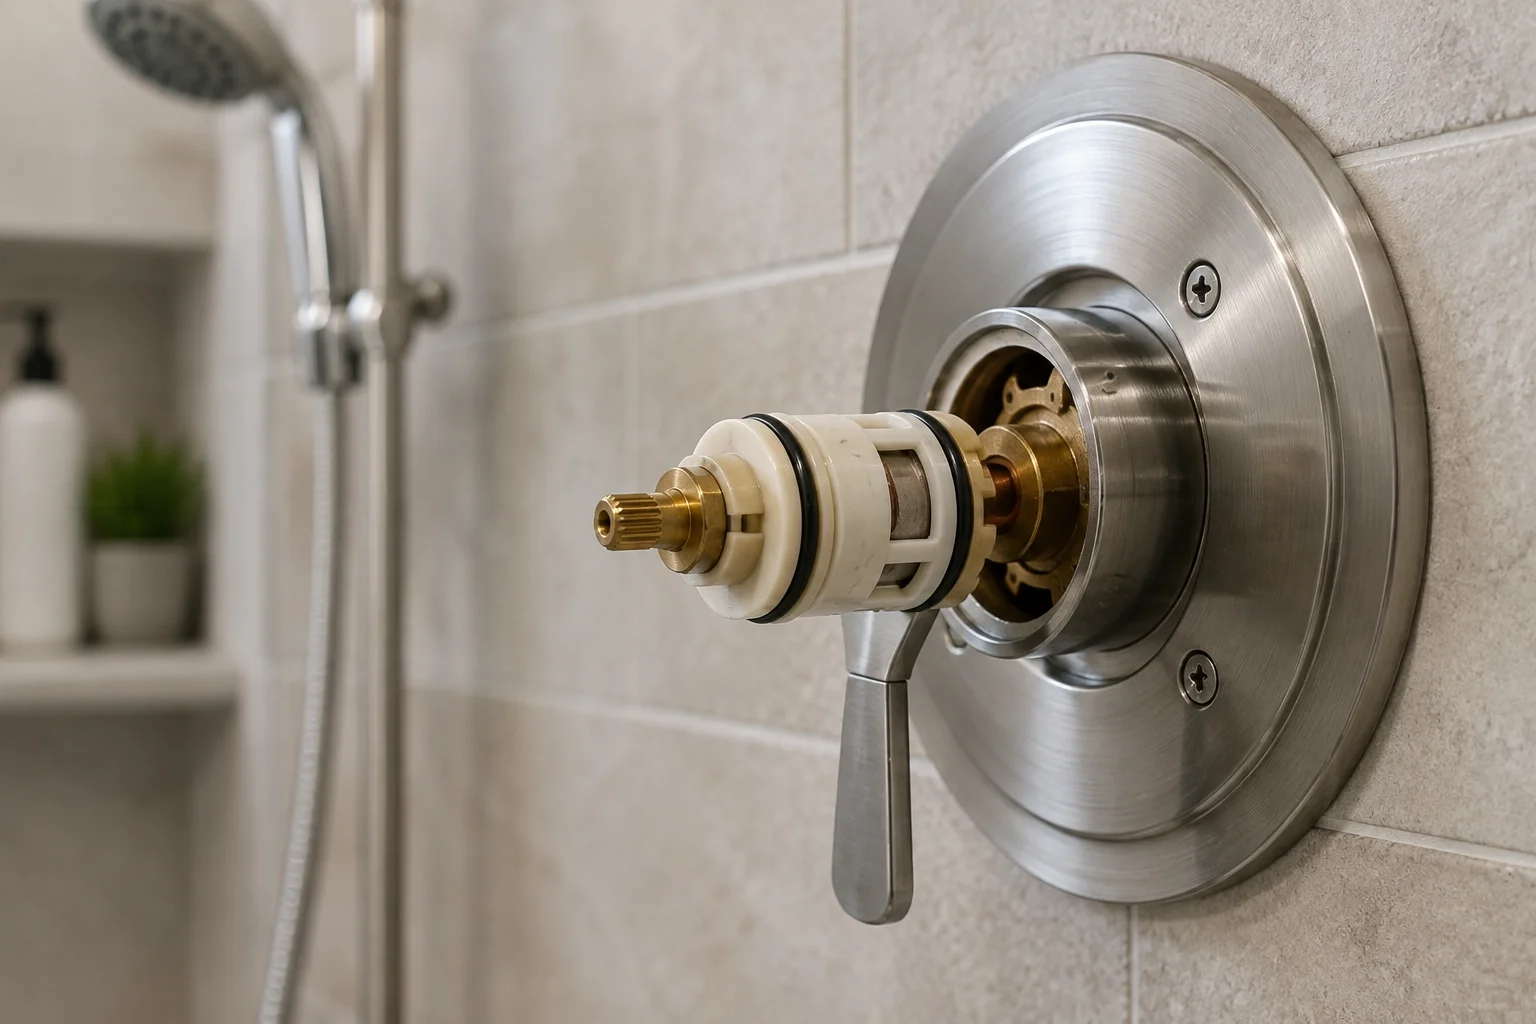
If your shower handle feels stiff, drips long after you’ve shut off the water, or swings wildly between scalding and freezing, the cartridge is usually the culprit. It’s a small part. But it controls almost everything about how your shower performs. Once it wears out, no amount of tightening or fiddling with the handle will fix the problem.
In this guide, we’ll walk through what a shower cartridge actually does, the different types available, how to identify the one you have, and what it costs to replace it yourself versus hiring a plumber. Whether you’re dealing with a leak right now or just want to understand your bathroom’s plumbing better, this should give you a clear, practical starting point.
What Is a Shower Cartridge, Exactly?
A shower cartridge is the internal mechanism tucked inside your faucet handle. When you turn or push the handle, you’re not directly controlling water flow. Instead, you’re moving the cartridge. It opens and closes internal ports that regulate hot water, cold water, or a blended mix of both.
Think of it as the brain of your shower. Temperature, pressure, and on-off control all trace back to this one part. So, when something feels off with your shower, the cartridge is often where the problem starts.
This single component affects a surprising number of households. According to research, cartridge-related issues, from drips to sudden temperature swings, impact roughly 15 million U.S. homes each year. That’s a significant number. And it explains why cartridge replacement is one of the most common plumbing repairs homeowners tackle.
Signs Your Shower Cartridge Needs Replacing
Before jumping into types and replacement steps, it helps to confirm the cartridge is actually the problem. Here are the most common warning signs:
- The handle is hard to turn. This often points to mineral buildup inside the cartridge, especially common in areas with hard water.
- Water won’t shut off completely. If your shower keeps dripping after you’ve turned the handle all the way, corrosion inside the cartridge is likely to blame.
- Temperature swings unexpectedly. Sudden bursts of hot or cold water, especially when someone flushes a toilet elsewhere in the house, usually means the cartridge’s pressure-balancing function has failed.
- Leaking behind the wall. Water stains on the ceiling below your bathroom, or visible mold near the shower valve, can indicate a cracked or corroded cartridge body.
- Reduced water pressure. Mineral deposits can clog cartridge ports over time, slowly choking off flow.
If you’re noticing more than one of these symptoms, there’s a good chance your cartridge has reached the end of its life. The good news is that replacing it is usually a manageable project. It rarely requires opening up walls or replacing your entire shower system.
The Three Main Types of Shower Cartridges
Not all cartridges are created equal. Depending on your faucet setup, you’ll likely be dealing with one of three main types.
Single-Handle Cartridges
These control both hot and cold water using a single lever or knob. Moving the handle up or down typically adjusts flow, while moving it side to side adjusts temperature. Single-handle cartridges are common in modern bathrooms because they’re simple to use and only require one hole in the shower wall.
Dual-Handle Cartridges
Also called two-handle cartridges, these are used in setups with separate hot and cold handles. Each handle operates its own cartridge, so you may need to replace one or both, depending on which side is malfunctioning. Dual-handle systems tend to be more common in older homes, particularly those built before the 1990s.
Diverter Cartridges
Diverter cartridges don’t control temperature at all. Instead, they redirect water flow between different outlets, for example, switching between a tub spout and a showerhead. If your tub-and-shower combo won’t properly switch between the two, a worn diverter cartridge is often the reason.
Knowing which type you’re dealing with narrows your search significantly. It also helps you avoid buying the wrong part, which is one of the most common (and frustrating) mistakes homeowners make during a DIY repair.
How to Identify Your Exact Cartridge Model
Once you know the general type, you’ll need to pinpoint the exact model. This step matters because cartridges are rarely interchangeable across brands, and sometimes not even across different product generations from the same brand. A few methods can help:
First, look for a brand name or logo somewhere on the fixture. Common spots include the center of the handle cap, the underside of the spout, or the back of the trim plate covering the wall opening.
Second, once you’ve identified the brand, narrow things down using the handle style and number of handles. Major manufacturers, including Moen, Delta, Kohler, and Pfister, offer online identification tools that walk you through this process.
Third, if labeling has worn off or been painted over, you can remove the old cartridge and measure it directly. Key measurements include the total length (usually 3 to 6 inches), the body diameter (typically 1 to 1.5 inches), and the stem shape, which is usually spline, broach, or square.
Fourth, take a clear photo of the cartridge before removing it entirely. Many hardware stores and plumbing supply shops can help match a part visually if you’re unsure which model you need.
This identification step is genuinely the most important part of the entire process. According to This Old House, shower cartridges and valves are not universal across brands, so buying the wrong part is one of the most frequent and avoidable mistakes homeowners make.
Shower Cartridge Replacement Costs in 2026
Cost varies quite a bit depending on whether you handle the job yourself or hire a professional.
DIY replacement: Parts alone typically run $15 to $80, depending on the brand and cartridge type. Brass and ceramic cartridges tend to cost more than plastic ones, but they also tend to last longer and resist mineral buildup better. Most DIY replacements take 30 to 60 minutes once you have the correct part in hand.
Professional replacement: Hiring a plumber typically costs between $150 and $350 for a full service call, with an average around $275 in many U.S. markets. Labor rates vary by region, and complicated installations, like ones involving corroded shut-off valves or unusual wall configurations, can push costs higher.
Material choice plays a role in overall value too. Brass and ceramic cartridges generally cost more upfront but resist corrosion better than plastic versions. Since mineral buildup and corrosion are the leading causes of cartridge failure, spending a bit more on quality materials can extend the time between replacements significantly.
Step-by-Step: How to Replace a Shower Cartridge
If you’re comfortable with basic tools, replacing a cartridge yourself can save a meaningful amount of money. Here’s a general walkthrough. Keep in mind that exact steps can vary slightly depending on your specific fixture.
1. Shut off the water supply. Most homes have a main shut-off valve, though some bathrooms have dedicated shut-offs behind an access panel. Turn the water off completely before starting.
2. Remove the handle. Most handles are secured with a small screw, often hidden under a decorative cap. Pop the cap off, remove the screw, and gently pull the handle free.
3. Take off the trim plate and sleeve. Behind the handle, you’ll typically find a trim plate or escutcheon, followed by a plastic or metal sleeve protecting the cartridge itself.
4. Remove the retaining clip or nut. This piece holds the cartridge in place. It’s usually a small metal clip that pries out with pliers, though some models use a threaded retaining nut instead.
5. Pull out the old cartridge. Cartridges can stick due to mineral deposits, so you may need a cartridge puller tool for stubborn ones. Avoid using excessive force, since this can damage the valve body.
6. Insert the new cartridge. Make sure it’s oriented correctly, matching the alignment of the old one. Most cartridges have a flat side or notch that needs to face a specific direction.
7. Reassemble everything. Replace the retaining clip, sleeve, trim plate, and handle in reverse order.
8. Turn the water back on and test. Check for leaks around the valve, and confirm that hot and cold water both function properly and that the handle moves smoothly.
If at any point something doesn’t fit correctly or you’re unsure about compatibility, it’s worth pausing and double-checking the part number rather than forcing pieces together.
When to Call a Professional Instead
While many cartridge replacements are DIY-friendly, some situations call for a licensed plumber. If your shut-off valve is corroded or won’t turn, forcing it can lead to a much bigger leak. Similarly, if you discover water damage behind the wall once you open things up, that’s a sign of a larger issue that likely needs professional attention.
Older homes, particularly those with outdated plumbing systems, sometimes have valve setups that no longer match anything currently sold in stores. In these cases, a plumber may need to replace the entire valve body rather than just the cartridge.
If you’re in a region with notoriously hard water, common across much of the Southwest and parts of the Midwest, mineral buildup can also make cartridges especially difficult to remove without specialized tools. A professional plumber will have equipment designed specifically for these stubborn situations.
Buying Tips: Choosing the Right Replacement Cartridge
When shopping for a replacement, a few factors matter more than others.
Match the brand first. Cartridges are almost never interchangeable across manufacturers. Even within the same brand, older and newer product lines sometimes use different cartridge families that look nearly identical but aren’t compatible.
Consider the material. Brass and ceramic cartridges tend to outperform plastic ones in durability and resistance to mineral buildup, though they typically cost more upfront.
Check for a warranty. Many manufacturers, including Moen and Delta, offer limited warranties on cartridges for original purchasers. Keep your receipt, since warranty claims usually require proof of purchase or model registration.
Buy from a reputable source. Big-box hardware stores, plumbing supply shops, and manufacturer websites are generally more reliable than third-party marketplace listings, where counterfeit or mismatched parts occasionally show up.
When in doubt, bring the old cartridge with you. Most hardware store employees can help match a physical part faster than trying to describe it from memory.
If you’re planning a broader bathroom refresh alongside this repair, it’s worth reviewing our guide to choosing the right flooring for bathrooms, since moisture-resistant flooring pairs naturally with plumbing updates like this one.
Regional Considerations for U.S. Homeowners
Water quality varies significantly across the country, and that affects how often cartridges need replacing. Homes in areas with hard water, common throughout Arizona, Texas, and much of the Midwest, tend to see faster mineral buildup inside cartridges. This often shortens their lifespan compared to homes in regions with naturally softer water, like parts of the Pacific Northwest.
If you live in a hard water area, consider installing a water softening system alongside your cartridge replacement. This won’t eliminate future maintenance entirely, but it can meaningfully extend the time between repairs. It’s a worthwhile investment, especially in homes with multiple bathrooms experiencing similar issues.
Final Thoughts
A failing shower cartridge is one of those small plumbing problems that can quietly become a bigger headache if ignored. Fortunately, it’s also one of the more approachable repairs for homeowners willing to spend an hour with a wrench. The key is accurate identification. Once you know your brand, model, and cartridge type, the rest of the process becomes fairly straightforward.
Whether you tackle it yourself or bring in a professional, addressing a worn cartridge early can prevent bigger issues down the line, like water damage or a fully corroded valve body. A little attention now can save you both money and frustration later.
Frequently Asked Questions
How do I know if my shower cartridge is bad? Common signs include a stiff or hard-to-turn handle, water that won’t fully shut off, sudden temperature swings, or reduced water pressure. If you’re noticing more than one of these symptoms, the cartridge is likely worn out.
Can I replace a shower cartridge myself? Yes, in most cases. It typically takes 30 to 60 minutes and requires basic tools. The most important step is correctly identifying your cartridge brand and model before purchasing a replacement.
How much does it cost to replace a shower cartridge? DIY replacement parts generally cost $15 to $80. Hiring a professional plumber typically runs $150 to $350, with an average around $275, depending on your location and the complexity of the job.
Are shower cartridges universal across brands? No. Cartridges are almost never interchangeable between manufacturers, and sometimes not even across different generations of the same brand. Matching the exact model is essential.
How long do shower cartridges typically last? Lifespan varies based on material and water quality, but many cartridges last several years under normal conditions. Homes with hard water often see faster wear due to mineral buildup.
What’s the difference between single-handle and dual-handle cartridges? Single-handle cartridges control both hot and cold water with one lever, while dual-handle setups use separate cartridges for each handle. Diverter cartridges, meanwhile, redirect water flow rather than controlling temperature.
Do I need to shut off my home’s main water supply to replace a cartridge? Not always. Many bathrooms have a dedicated shut-off valve near the shower. If yours doesn’t, shutting off the main water supply is necessary before starting the repair.
What should I do if my shower cartridge is corroded and won’t come out? Avoid forcing it, since this can damage the valve body. A cartridge puller tool can help with stubborn cases. If it still won’t budge, it’s best to call a licensed plumber to avoid further damage.