

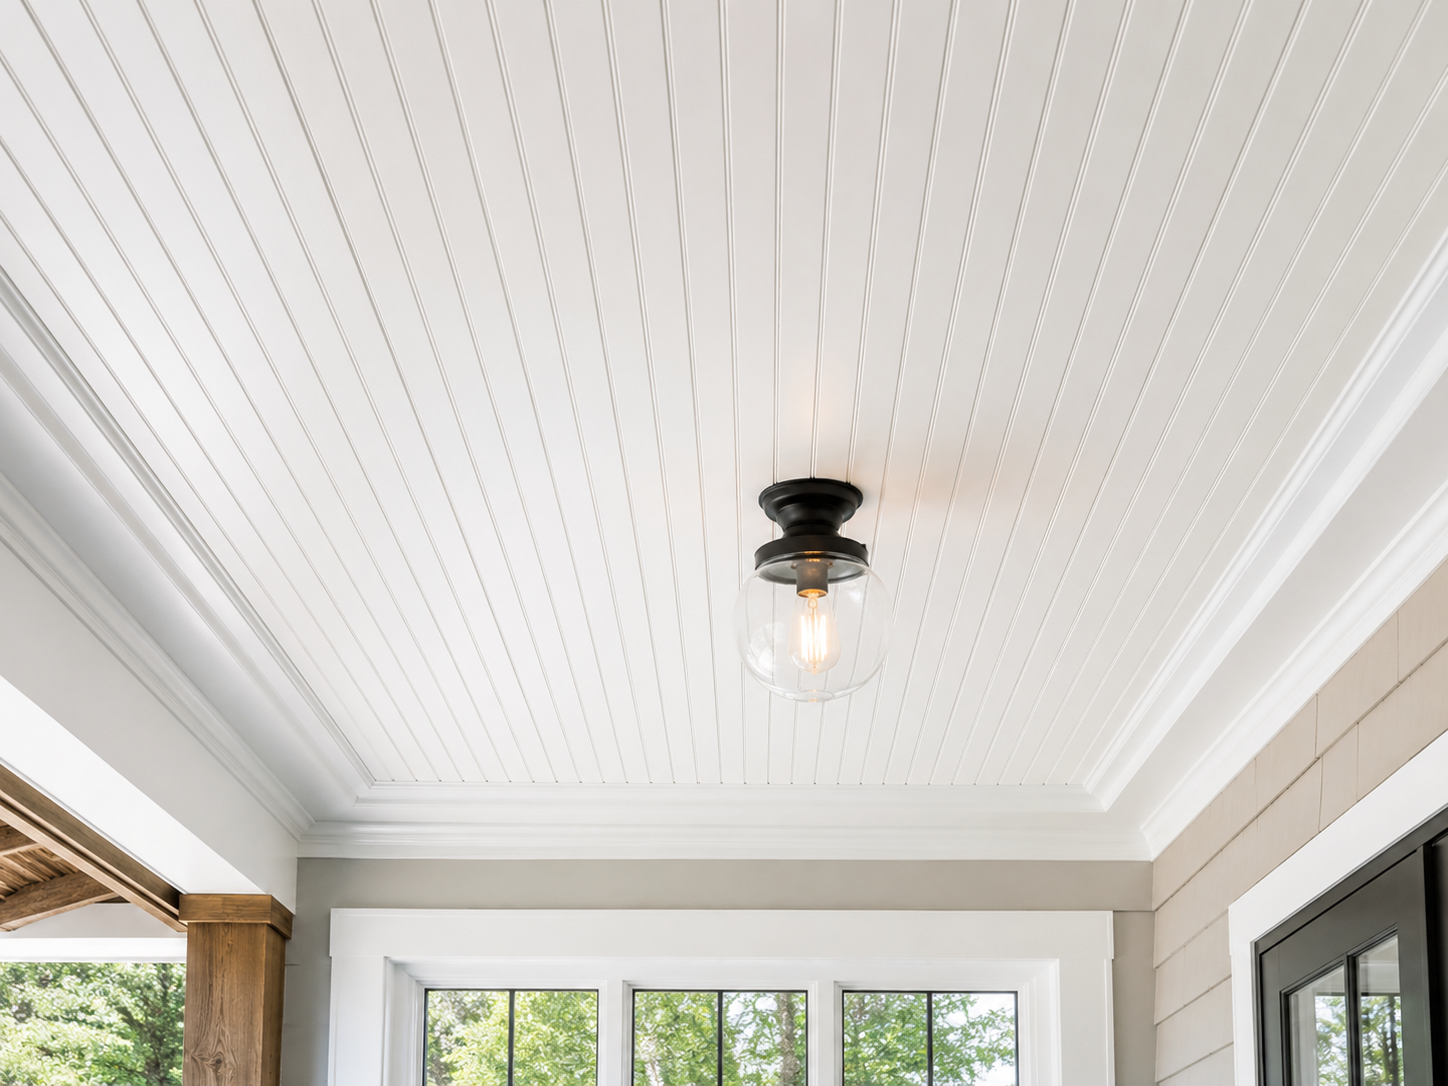
Walk into a farmhouse kitchen, a coastal cottage, or a renovated craftsman bungalow today, and you will likely look up and spot a beadboard ceiling. This classic detail has made a strong comeback in American homes. It adds texture, character, and a finished look that flat drywall simply cannot match.
I have worked alongside contractors and designers on several remodeling projects. Beadboard ceilings consistently rank among the most requested upgrades for kitchens, porches, and bathrooms. However, homeowners often underestimate the planning involved. Material choice, spacing, and moisture exposure all affect the final result. This guide breaks down everything you need to know in 2026, including current design trends, realistic costs, and step-by-step installation advice.
What Is a Beadboard Ceiling?
Beadboard refers to narrow wood or PVC panels joined together with a small ridge, or “bead,” running along each seam. Builders traditionally used it on walls and wainscoting. Today, it has become a popular ceiling treatment because it adds depth without overwhelming a room.
Shiplap has wider boards and a flatter profile. Beadboard, by contrast, has a distinctive grooved texture that catches light beautifully. It works well in spaces where a flat ceiling feels too plain, yet a heavily coffered or beamed ceiling would feel too formal. As a result, it strikes a balance between simplicity and visual interest.
Why Beadboard Ceilings Are Popular in 2026
Cottage-core and modern farmhouse styles remain strong throughout the United States, especially in regions like New England, the Pacific Northwest, and the South. Beadboard ceilings pair naturally with these aesthetics. Consequently, demand has kept climbing this year.
Many homeowners are also renovating older homes built before 1978. Beadboard offers a period-appropriate way to update ceilings without losing historical charm. These homes often have plaster ceilings that are cracked or uneven. As a result, beadboard provides a practical way to cover imperfections without a full ceiling replacement.
Screened porches and three-season rooms have driven beadboard’s popularity too. Homeowners across the Southeast and Midwest frequently choose beadboard for outdoor living spaces. It holds up well against humidity when properly sealed, and it gives porches a finished, cottage-style look.
Popular Beadboard Ceiling Styles for 2026
Style choice depends on the room, the home’s architecture, and how much maintenance you want to take on.
Classic White Beadboard
White remains the most requested beadboard finish, and it is not hard to see why. It brightens rooms and pairs with almost any color scheme. This style works especially well in smaller rooms, where a darker ceiling might feel heavy.
Natural Wood Tone Beadboard
Stained or clear-coated wood beadboard has grown in popularity, particularly in cabins, mudrooms, and rustic-style homes. The wood grain stays visible. As a result, this option adds warmth without requiring paint touch-ups over time.
Painted Accent Color Beadboard
Some homeowners are taking a bolder approach by painting beadboard ceilings in soft blues, sage greens, or warm terracotta tones. Designers sometimes call this a “ceiling fifth wall” treatment. It works especially well in dining rooms and reading nooks, where a subtle pop of color adds personality.
PVC and Vinyl Beadboard
For bathrooms, porches, and basements, PVC beadboard has become a practical alternative to wood. It resists moisture, warping, and insect damage. Because of this, it works well in humid climates like Florida, Louisiana, or coastal Georgia. It never needs repainting either, so it appeals to homeowners who want a low-maintenance finish.
Reclaimed and Distressed Beadboard
For farmhouse and cabin-style homes, reclaimed wood beadboard adds authentic texture and history. This option costs more upfront. Even so, it delivers a look that new materials cannot replicate, especially in dining rooms and great rooms with exposed beams.
Beadboard Ceiling Cost Guide for 2026
Pricing depends on material, room size, and whether you hire a professional or install it yourself. Here is a general breakdown based on current U.S. market rates.
MDF beadboard panels: Typically range from $2 to $4 per square foot for materials alone. This is the most budget-friendly option, and it works well for dry indoor spaces like bedrooms or hallways.
Solid wood beadboard: Usually costs between $4 and $8 per square foot, depending on wood species. Pine tends to sit on the lower end. Cedar and knotty alder, meanwhile, cost more.
PVC beadboard panels: Generally priced between $3 and $6 per square foot. Moisture-resistant grades used for porches or bathrooms may cost slightly more.
Professional installation: Labor typically adds $3 to $7 per square foot, depending on ceiling height, region, and whether electrical fixtures need to be worked around.
For a standard 200-square-foot kitchen ceiling, most homeowners can expect total project costs between $1,200 and $3,500, including materials and labor. Porches and smaller bathrooms tend to fall on the lower end of that range. Vaulted or complex ceilings, on the other hand, push costs higher.
Material pricing has fluctuated throughout 2026. So, it is worth getting a few local quotes before finalizing a budget.
Choosing the Right Material for Your Space
Base your material choice mainly on moisture exposure and maintenance tolerance, rather than looks alone.
For kitchens, MDF or solid wood beadboard works well. Just make sure it is properly primed and painted to resist grease and steam buildup near the stove.
For bathrooms, PVC beadboard is generally the safer choice. It resists warping from shower steam and repeated humidity exposure.
For porches and sunrooms, PVC or cedar beadboard both perform well. Cedar, however, requires periodic sealing to maintain its natural resistance to moisture and insects.
For living rooms and bedrooms, almost any material works, since these spaces experience low humidity. This gives homeowners more flexibility to choose based on style rather than function.
If you are working on a home built before 1978, check for lead-based paint before sanding or removing any existing ceiling material. The U.S. Environmental Protection Agency provides detailed guidance on lead-safe renovation practices for older homes. This is especially relevant, since many beadboard installations involve removing old plaster or painted trim first.
Step-by-Step Beadboard Ceiling Installation Guide
Hiring a professional ensures a polished result. Still, many homeowners choose to install beadboard themselves, especially for smaller rooms like bathrooms or porches.
Step one: Measure and plan. Calculate the total square footage of the ceiling. Then add roughly ten percent extra material to account for cuts and waste. Planning the board direction ahead of time also helps you avoid awkward seams near light fixtures.
Step two: Locate the ceiling joists. Beadboard panels need secure attachment points. So, use a stud finder to mark joist locations before you begin. This step matters more than most people expect, because panels attached only to drywall can sag over time.
Step three: Cut panels to size. Measure twice before cutting. Account for any light fixtures, vents, or fan boxes that will need cutouts. A jigsaw typically works best for detailed cuts around fixtures.
Step four: Install panels or planks. Beadboard may come in full sheets or individual planks, depending on the product. Attach panels using construction adhesive combined with finish nails driven into the joists for extra support.
Step five: Fill nail holes and seams. Wood filler works well for nail holes. Paintable caulk, meanwhile, helps blend seams for a smooth, finished appearance.
Step six: Prime and paint, or seal. Apply a quality primer before painting wood or MDF to prevent moisture absorption. For natural wood finishes, a clear polyurethane sealant helps protect against humidity and everyday wear.
Step seven: Add trim. Crown molding or simple trim along the ceiling edges gives the installation a finished, professional appearance. It also hides any minor gaps along the perimeter.
Most DIY installers can complete a small bathroom or porch ceiling in a single weekend. Larger rooms, though, may take two to three days once you factor in drying time between coats.
Where Beadboard Ceilings Work Best in Your Home
Kitchens: Beadboard ceilings pair beautifully with shaker cabinets and farmhouse sinks, especially in white or soft cream tones.
Bathrooms: A beadboard ceiling adds cottage charm while helping visually lower a tall ceiling in older homes. If you are planning a full bathroom refresh, our bathroom remodeling checklist covers additional details worth reviewing before you start.
Porches and sunrooms: Beadboard remains one of the most requested porch ceiling treatments in the U.S. It is particularly popular painted in the traditional “haint blue” shade seen throughout the South.
Dining rooms: A painted or natural wood beadboard ceiling adds warmth, especially in homes with wainscoting or board-and-batten walls already in place.
Mudrooms and hallways: These high-traffic transitional spaces benefit from beadboard’s durability and easy-to-clean surface.
Maintenance Tips for Beadboard Ceilings
Beadboard ceilings are exposed to dust, humidity, and occasional grease in kitchens. So, a bit of regular maintenance keeps them looking sharp for years.
Dust the surface periodically using a soft microfiber duster, since grooves tend to trap more dust than flat drywall. In kitchens, wipe down painted beadboard every few months with a mild soap solution to remove grease buildup near the stove.
For natural wood finishes, check the sealant every one to two years, especially in humid climates. Reapply polyurethane or wood sealant if the surface starts looking dull or dry. PVC beadboard, on the other hand, only needs a damp cloth for cleaning, since the material does not absorb moisture or stain easily.
If you notice any sagging, gaps, or separation between panels, address it quickly. Delayed repairs can lead to larger structural issues, particularly in bathrooms and porches exposed to consistent moisture.
Final Thoughts
A beadboard ceiling is one of the most impactful upgrades you can add to a home in 2026, whether you are renovating a historic bungalow or adding character to a newer build. The right material, careful installation, and a bit of regular maintenance will keep it looking beautiful for decades.
Before starting your project, measure carefully and choose a material suited to your room’s humidity level. Budget realistically for both materials and labor too. Doing so will help you avoid costly mistakes and get a result you will be happy with for years to come.
Frequently Asked Questions
What is the difference between beadboard and shiplap? Beadboard features narrow boards with a small decorative groove. Shiplap uses wider, flatter boards with an overlapping edge. Because of this, beadboard tends to look more textured and traditional, while shiplap leans more modern and minimal.
How much does it cost to install a beadboard ceiling? Most homeowners spend between $1,200 and $3,500 for a standard-sized room, including materials and labor. Larger or more complex ceilings, such as vaulted spaces, typically cost more.
Can beadboard be installed in a bathroom? Yes. PVC or moisture-resistant beadboard is generally recommended over wood or MDF, since bathrooms experience regular humidity and steam exposure.
Is beadboard ceiling installation a good DIY project? For smaller rooms like bathrooms, porches, or hallways, yes. Larger or vaulted ceilings often benefit from professional installation instead, due to the added complexity of joist alignment and fixture cutouts.
What paint finish works best for a beadboard ceiling? Satin or semi-gloss finishes tend to work best. They resist moisture and are easier to clean than flat paint, particularly in kitchens and bathrooms.
How long does a beadboard ceiling installation take? A small bathroom or porch ceiling typically takes one to two days for an experienced DIYer. Larger rooms may take two to three days when you account for drying time between coats.
Does beadboard work well in older, pre-1978 homes? Yes, and it is a popular choice for updating cracked or uneven plaster ceilings. Always check for lead-based paint before sanding or removing existing materials in homes built before 1978, though.
Can beadboard be used on ceilings with existing light fixtures or ceiling fans? Yes, though panels need careful measuring and cutting around existing fixtures. It is generally easier to temporarily remove fixtures during installation rather than cutting around them in place.
This guide reflects material pricing, installation practices, and design trends current as of July 2026. Costs may vary by region, contractor, and material availability.