

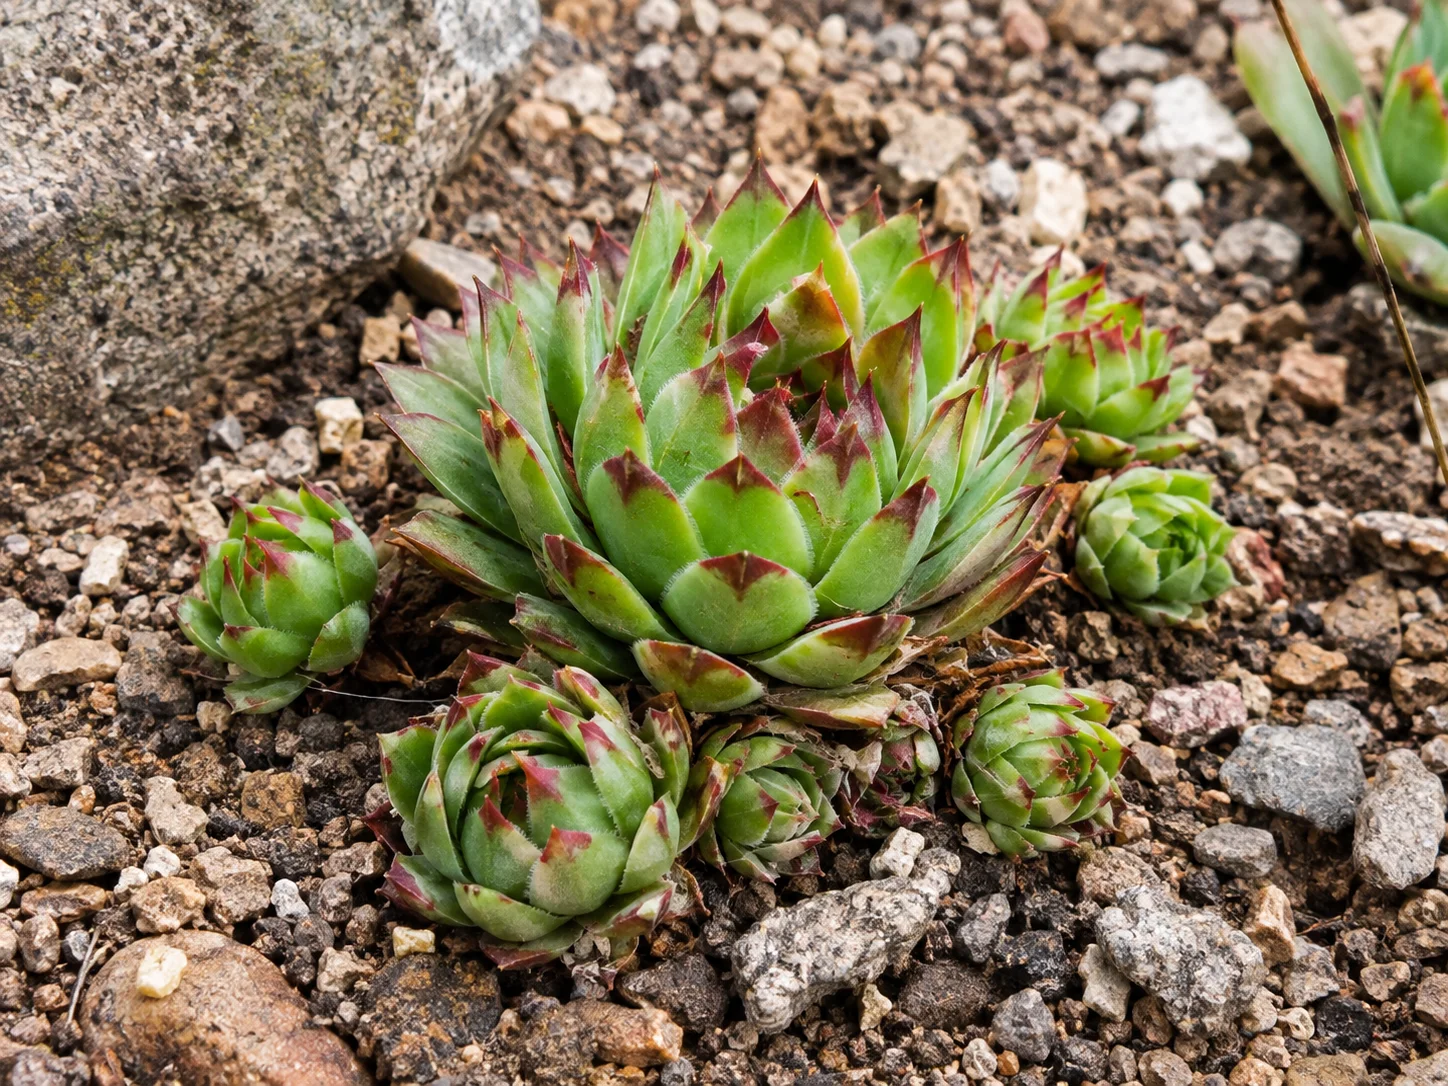
To plant sempervivum, choose a spot with at least six hours of sun and use fast-draining, gritty soil. Set each rosette so the roots are covered but the lowest leaves sit just above the soil line. Space plants 4 to 6 inches apart, water lightly until they root, then mostly leave them alone. Poor drainage kills these plants far more often than cold, drought, or neglect.
That one fact shapes every other choice. Sempervivum, better known as hens and chicks or houseleeks, are succulents native to the mountains of Europe and western Asia. They evolved in rocky ground where water drains away fast. Give them those conditions and they are among the easiest, longest-lived perennials you can grow. Give them wet garden soil and they rot.
Quick Planting Checklist
- Sun: full sun is best. Light afternoon shade helps in very hot climates.
- Soil: gritty, lean, and fast-draining. Slightly acidic to neutral is fine.
- Spacing: 4 to 6 inches apart. Closer for a quick carpet, wider for a tidy display.
- Depth: cover the roots only. Keep the rosette above the soil and don’t push it down.
- Timing: spring or early fall across most of the U.S.
- Watering: a little at first, very little afterward.
- Fertilizer: usually none needed.
Hens and Chicks vs. Sempervivum: Are They the Same Thing?
Mostly, yes. “Hens and chicks” is the common name for Sempervivum, a genus with several true species (such as Sempervivum tectorum) and hundreds of named hybrids. The “hen” is the mother rosette, and the “chicks” are the small offsets that grow from short stems around her.
One caution: the same nickname is sometimes used for Echeveria and Jovibarba, which look similar. Echeveria is not frost-hardy and is usually grown indoors or in frost-free areas. If a plant label says only “hens and chicks” and your winters freeze, confirm it is actually Sempervivum before planting.
Where to Plant Sempervivum
Sun and Light
Aim for six or more hours of direct sun. With less light, rosettes stretch, loosen, and lose the red, burgundy, and purple tones that make many varieties so attractive. Green types tolerate a bit more shade than deeply colored ones.
In the Deep South, the Southwest, and desert regions, strong afternoon sun plus heat can scorch leaves. Morning sun with afternoon shade usually works better there.
Hardiness Zones
Sempervivum is generally reliable in USDA zones 3 through 8, and many cultivars survive colder winters. Look up your zone with the USDA Plant Hardiness Zone Map.
Zone numbers only tell part of the story, because winter wetness hurts these plants more than cold. A sempervivum on a Minnesota slope can outperform one in a flat bed in western Oregon, even though the Minnesota winter is far colder.
Good Planting Sites
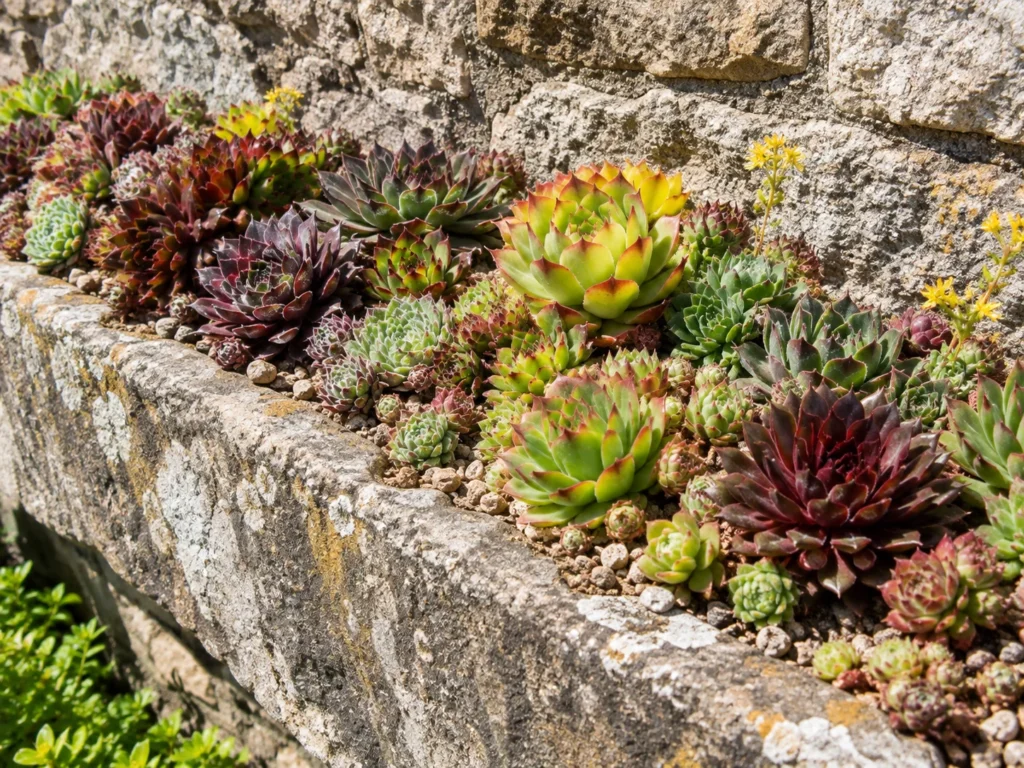
- Rock gardens and rock walls
- Raised beds with added grit
- Gravel gardens
- Shallow containers, troughs, and strawberry jars
- Sunny slopes and the tops of retaining walls
- Cracks between pavers or stepping stones
Avoid low spots where water pools, areas under downspouts, beds hit by sprinklers, and shady corners that stay wet through winter.
The Right Soil for Sempervivum
Sempervivum needs soil that drains quickly and doesn’t hold moisture. Many gardeners assume bagged cactus mix is the answer, but what matters is how the soil behaves: water should pass through fast, and the soil should not stay wet for days.
For containers, a good starting mix is equal parts standard potting soil and a gritty material such as pumice, coarse sand, or fine gravel. Some growers go grittier, using two parts grit to one part potting mix. Cactus mix alone can work, but it often holds too much water, so adding perlite or pumice helps.
For in-ground planting, the right approach depends on what you have:
| Your soil | What to do |
|---|---|
| Sandy or already gritty | Often fine as is. |
| Average loam | Mix in coarse grit, or plant in a mound or raised bed. |
| Heavy clay | Don’t just amend the hole. Build a raised mound or bed instead, because a planting hole in clay can hold water like a bowl. |
Soil rich in organic matter holds water and leads to soft, floppy growth. Sempervivum prefers lean soil, so skip compost-heavy mixes.
A top layer of gravel or small stones helps in three ways: it keeps rosettes off damp soil, reduces water splash on the leaves, and suppresses weeds. For sizes and options, see our river rock buying guide.
How to Plant Sempervivum, Step by Step
1. Choose the Time
Spring and early fall are best, with mild weather that lets roots grow without stress. In cold regions, plant a few weeks before the first hard freeze so roots can settle. Summer planting works too, but expect to water more often and provide shade in extreme heat.
2. Prepare the Spot
Remove weeds and loosen the soil. Work in grit if drainage is mediocre. If water lingers after rain, build a small mound a few inches high.
3. Plant at the Right Depth
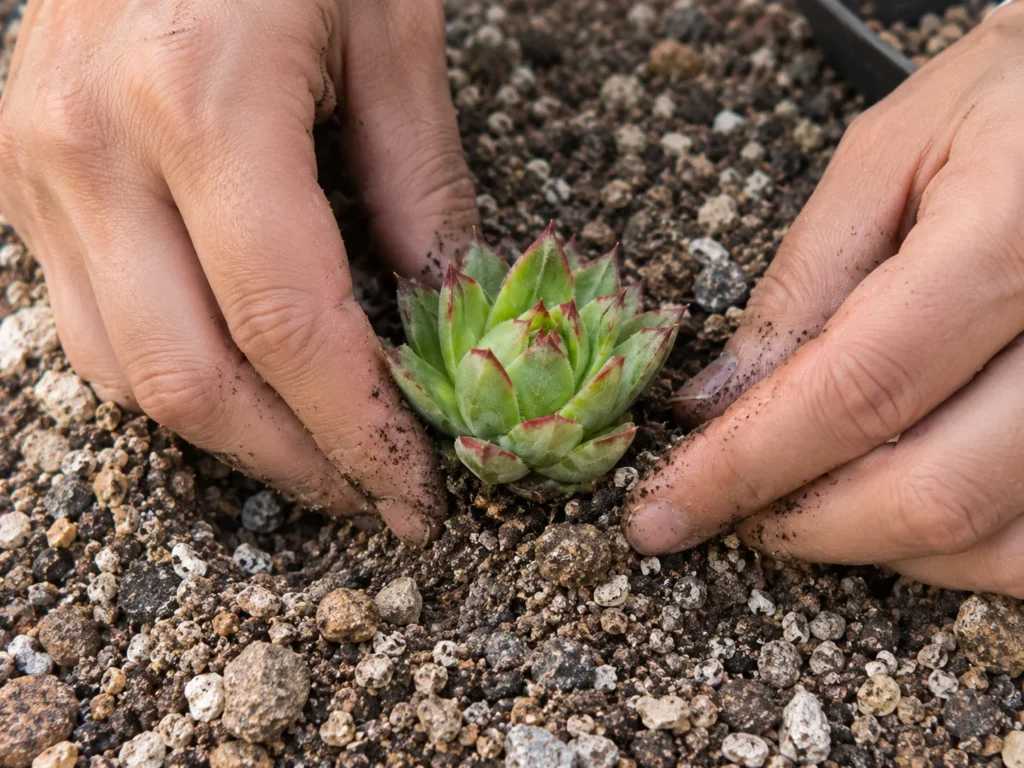
Dig a hole just deep enough to cover the roots. Sempervivum roots are shallow, so there’s no need to dig deep. Set the rosette so its lowest leaves sit at or just above the soil surface. Burying the crown invites rot.
4. Firm the Soil
Gently press soil around the roots so the plant stands steady. A small stone can hold tiny rosettes in place until roots take hold.
5. Give Them Room
Space rosettes 4 to 6 inches apart. They’ll send out offsets and fill in over time. Plant closer for fast coverage, or farther apart with gravel between to show off individual varieties.
6. Water Sparingly
Water once right after planting. After that, water only when the soil has been dry for a few weeks. Once established, rainfall is often enough.
Spacing: How Far Apart and Why It Matters
Four to six inches is a good general rule, but the best spacing depends on your goal.
- About 4 inches fills in faster but can crowd rosettes, trap moisture, and require earlier thinning.
- About 6 inches leaves visible gaps for a season or two but gives each rosette more airflow and shows off color differences.
In humid regions, wider spacing and good air circulation are safer. In dry climates, tighter plantings carry less risk.
Mixed plantings can get messy. Vigorous varieties may crowd out slower ones, so separate them with stones or give delicate types their own pocket.
Care After Planting
Watering
Established sempervivum needs little extra water. In rainy regions, in-ground plants may never need watering. In dry summers, a deep soak every few weeks is plenty. Always wait for the soil to dry first. Containers dry out faster and may need water more often, but the rule is the same: water, then wait.
Shriveled, thin leaves usually mean thirst. Soft, translucent, or blackened lower leaves usually mean too much water or poor drainage.
Fertilizer
Most plants never need fertilizer. If container plants look weak, a diluted balanced fertilizer once in spring is enough. Overfeeding causes soft, stretched growth.
Winter Care
Sempervivum handles freezing temperatures well. The bigger winter threat is wet soil. In wet-winter areas such as the Pacific Northwest, the Southeast, and parts of the Northeast, plant on slopes, in raised beds, or in containers you can move under an eave. A thin gravel layer helps shed water, and covering is usually unnecessary.
Rosettes may close up, shrink, or take on a duller look in winter. That’s normal, and they typically perk up in spring.
Hot, Humid Climates
On the Gulf Coast and in the Southeast, sempervivum can struggle even in well-drained soil, because warm, damp nights encourage rot. Choose spots with good airflow, mulch with gravel, avoid overhead watering, and consider pots you can move out of heavy rain. Some varieties tolerate heat better than others, so local garden centers and plant societies can point you to ones that suit your area.
Propagating Hens and Chicks
Offsets make multiplying plants easy. Once a chick has rooted and is large enough, you can separate it:
- Gently pull or cut the stem connecting the chick to the hen.
- If the cut is large, let it dry for a day or two.
- Plant it in gritty soil with the rosette at the surface.
- Water lightly until it roots.
Even rootless chicks often take hold in sandy soil if you don’t overwater.
Each sempervivum rosette is monocarpic: it flowers once and then dies. A tall flower stalk signals the hen is finishing her life, and it isn’t something you did wrong. The surrounding offsets carry on, and you can remove the old rosette after it blooms.
Common Mistakes
- Planting too deep. Burying the crown invites rot. Keep leaves above the soil.
- Using rich, moisture-retentive soil. Great for vegetables, bad for houseleeks.
- Overwatering containers. A pot with no drainage hole is a common cause of loss.
- Too much shade. Plants stretch, lose color, and thin out.
- Heavy organic mulch. Bark or compost holds moisture against the plant. Use gravel instead.
- Letting aggressive varieties crowd out slow ones.
- Assuming every “hens and chicks” is hardy. Check the Latin name if winter hardiness matters.
Pests and Problems
Sempervivum has few serious pests. The usual suspects are aphids, vine weevils, and a rust fungus that can cause pustules or odd elongation of leaves. If you spot rust, remove and discard affected rosettes to protect the rest, and keep infected material out of your compost. In damp climates, slugs and snails may nibble the plants. Deer and rabbits usually ignore them, a real plus in suburban gardens, though no plant is animal-proof.
If a rosette rots at the base, remove it promptly. You can often cut off the healthy top and reroot it in dry, gritty soil.
Best Approach by Situation
- Heavy clay soil: use raised beds or containers rather than heavily amending the ground.
- Rainy region: plant on slopes, add grit, and consider containers under partial cover in winter.
- Dry, cold region (Mountain West, northern Plains): ideal territory. Plant almost anywhere sunny with decent drainage.
- Hot desert or Deep South: provide afternoon shade and airflow.
- Beginners: start with a few vigorous, common varieties in a gravelly raised spot, and keep your hand off the hose.
Looking for more low-maintenance sun lovers to pair with them? Our lavender plant care guide covers another plant that thrives on good drainage and plenty of sun.
FAQ
Can you plant hens and chicks directly in the ground?
Yes, as long as the soil drains well. In heavy or compacted soil, plant on a mound or in a raised bed. A planting hole in clay can fill with water and cause rot.
How far apart should you plant sempervivum?
About 4 to 6 inches apart works well for most gardens. Closer spacing fills in sooner, while wider spacing gives better airflow in humid areas.
When is the best time to plant hens and chicks?
Spring and early fall are best in most of the U.S. Both seasons offer moderate temperatures that let roots establish without heat or hard freezes.
Do hens and chicks need full sun?
Full sun is ideal and keeps rosettes compact and colorful. In very hot climates, a little afternoon shade can prevent stress.
How often should I water sempervivum?
Lightly after planting until established, then rarely. Always let the soil dry before watering again. In many areas, rainfall is enough once plants are established.
Why are my hens and chicks turning mushy?
Mushy, translucent, or dark leaves usually mean too much water or poor drainage. Remove the damaged parts, improve drainage, and don’t water until the soil is completely dry.
Do hens and chicks come back every year?
Yes, within their hardiness zones. Individual rosettes die after flowering, but offsets keep the clump going and spreading.
Can sempervivum grow in pots year-round outdoors?
Yes, in most climates, as long as the pot has drainage holes and the mix is gritty. In rainy winters, move pots under cover so the soil doesn’t stay soaked.
Sources & References
- USDA Plant Hardiness Zone Map, for checking your growing zone.