

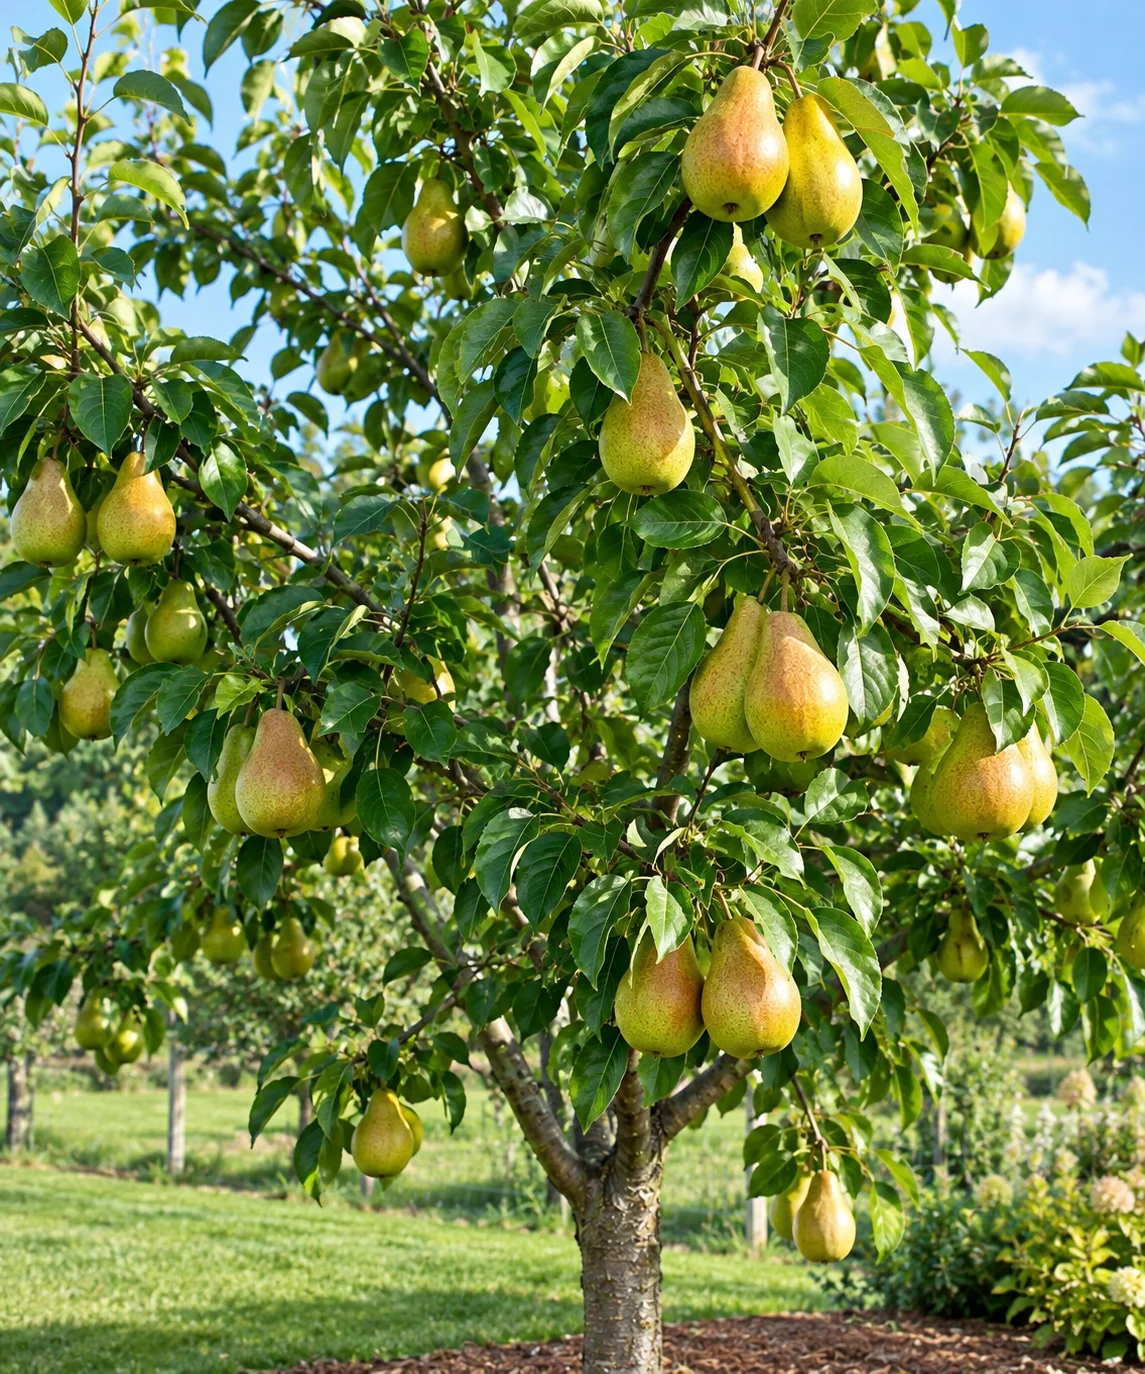
Pears are simple to plant but tough to keep healthy, so the decisions you make before planting matter more than anything you do afterward. Choose a variety that suits where you live (fire blight resistance is especially important), plant at least two varieties that can pollinate each other, give the tree plenty of sun and well-drained soil, prune lightly in late winter, and go easy on fertilizer. Expect fruit in about three to six years, depending on the size of the tree.
The sections below explain why each of those steps is important and where people often make mistakes.
Start here: can you grow pears where you live?
Many pear problems in the United States are really about where the tree’s planted so check this information before you buy a pear tree.
European pears such as Bartlett, Bosc and Anjou usually grow best in USDA zones 4 to 8 or 9. Asian pears are usually listed for zones 5 to 9. The exact range can differ by the variety so read the plant tag carefully. You can find your zone on the USDA Plant Hardiness Zone Map, and our USDA growing zone guide shows how zone ranges work in practice.
Cold hardiness is rarely the real problem. Two other things are.
Bloom timing and late frost
Pears flower early. A freeze during bloom can wipe out a season’s crop even though the tree itself is fine. Gardeners in the Midwest and Northeast where spring freezes are common should plant on a slope or elevated spot where cold air drains away, not in a low pocket.
Fire blight pressure
This bacterial disease is the main reason pears are harder than apples. University of Georgia Extension notes that because fire blight is so prevalent in eastern and southern states much commercial pear production moved to the drier Pacific Northwest. Fire blight develops when warm wet weather coincides with flowering, which is why the humid Southeast and parts of the Midwest are riskier than the arid interior West.
That doesn’t mean you can’t grow pears in a humid region. It means you should be selective about variety, which is covered in the next section.
Choosing a variety
Variety selection is the most important decision in this guide.
In blight-prone areas, choose pears that resist fire blight. The University of New Hampshire Extension recommends Magness, Potomac and Moonglow as varieties with good resistance. Kieffer and Orient are also often suggested for the South. Asian pears grow well in that region too, though resistance varies a lot from one Asian variety to another. Your state Extension service has a variety list.
That list shows which varieties have actually survived in your climate.
Match the type to how you’ll use the fruit
| Type | Best for | Things to know |
|---|---|---|
| European (Bartlett, Bosc, Anjou) | Fresh eating, canning, baking | Ripen off the tree; many varieties are blight-prone |
| Asian (Shinseiki, Hosui, Korean Giant, etc.) | Crisp, apple-like fresh eating | Ripen on the tree; need cross-pollination from another Asian variety |
| Hybrid/cooking types (Kieffer, Orient) | Canning, preserves, tougher climates | Often more blight-tolerant; eating quality is usually more modest |
Hybrid types like Kieffer are sometimes dismissed as gritty. That is a fair criticism for fresh eating, but a tree that survives and produces is worth more than a prized variety that blights out in year three.
Check the rootstock
Most nursery pears are grafted. The rootstock controls size and, to some extent, precocity, which is how soon the tree fruits. UNH Extension gives spacing as 15 to 20 feet for standard trees, about 12 feet for semi‑dwarf trees and about 8 feet for dwarf trees. Dwarf trees and semi‑dwarf trees are easier to prune, spray and harvest. They also bear sooner, which is why most backyard growers should choose dwarf trees or semi‑dwarf trees. Ask the nursery which rootstock is on your tree and, if you are growing in a difficult region, how that rootstock performs there.
Pollination: the step people skip
Most pear types need pollen from another pear type to produce a harvest. Some, such as Bartlett, can set some fruit on their own, but they usually yield more when paired with another variety.
Two rules matter:
- Bloom times must overlap. Two varieties that bloom a month apart will not help each other. UGA’s pollination code system, like most nursery catalogs, groups varieties by bloom period.
- Not every pairing works. Some varieties are known to pollinate each other well, with Bartlett and Seckel the classic example, while others are poor matches. Ask the nursery to confirm a pair before you buy.
Asian and European pears can sometimes cross‑pollinate. That is not reliable. Walter Reeves, the Georgia gardening authority, recommends planting two varieties together for best results. If space is limited, check whether a neighbor has a pear tree nearby or look at multi‑grafted trees that carry two varieties on one trunk.
How to plant a pear tree
When to plant
Late winter to spring is the standard time to plant pears across most of the country. In areas with mild winters, like parts of the South and California, fall planting is also a good option. The cool weather allows roots to grow and settle before the heat of summer.
Where to plant
Pick a location that gets at least six to eight hours of direct sunlight each day. Good air circulation helps leaves dry which lowers the risk of diseases like scab and leaf spot. Stay away from spots where frost collects or where water gathers after rain. Pears don’t like wet feet, so avoid areas that hold water.
Soil requirements
Pears can grow in different kinds of soil but they do best in well-drained loam. The UNH Extension recommends a soil pH around 6.5. A soil test from your local county Extension office is cheap and very helpful. It will tell you whether you need lime or other soil amendments, which is much better than guessing what your soil needs.
Planting steps:
- Dig a hole about twice as wide as the root ball but no deeper than the roots. Planting too deep is a common killer.
- Locate the graft union, the swollen bump near the base. Keep it a few inches above the soil line. If it’s buried, the upper variety can root and you lose the dwarfing effect.
- Spread the roots (for bare-root trees) and backfill with the native soil. Skip heavy amendments in the hole, which can discourage roots from moving into the surrounding soil.
- Stake only if the site is windy or the tree is spindly.
- Water thoroughly, then apply a few inches of mulch in a ring, keeping it away from the trunk.
Watering and feeding
New pears require moisture while their roots are getting established. A deep watering about once a week during dry periods is better than frequent shallow watering. Soil type matters, though: sandy soils drain quickly and need more attention. Once established, pears can handle some dry periods, but fruit quality and size drop during long droughts.
Be careful with nitrogen. This is where many gardeners make a mistake with their trees. Excessive fast, soft growth is exactly what fire blight bacteria look for. UNH Extension specifically warns that trees that grow vigorously are more likely to get infected than trees that grow at a moderate pace. A better approach than fertilizing on a schedule is to check how much new growth the tree puts on each year and fertilize only if growth is slow. If you are planting in a lawn keep in mind that fertilizer used on the lawn near the tree also affects the tree.
Pruning pears: what to do and when
The short version: trim in winter when the tree isn’t growing, shape young trees to have one main trunk and only do a little trimming on trees that are older.
Utah State University Extension says it’s best to start shaping the tree when you plant it and use the trunk method for home gardens. In reality this means:
- At the time of planting: Choose one straight trunk. Take out any overlapping branches and don’t cut too much.
- In a few years: Pick three to five branches that are spread out around the trunk not one on top of another. Pears often grow tight branches that have weak angles where they join the trunk, which can break when the fruit gets heavy so it’s worth spreading the branches early (using tools or weights).
- When the trees are grown: Pears usually don’t need as much trimming as apples or peaches. Cut out dead or damaged wood, branches that cross each other, shoots that grow inward, and any vigorous sprouts at the base. Heavy cutting triggers a flush of fast, soft regrowth, which is exactly what fire blight likes, so prune lightly.
Don’t trim when the weather is wet if you can help it. Wet cuts make it easier for bacteria to get in and fire blight moves through tools. Disinfect your pruners between cuts whenever you are working on a tree you suspect is infected.
Fire blight: recognize it early
Fire blight causes shoot tips to wilt into a shepherd’s crook and blossoms and leaves to blacken as if scorched. It often starts at bloom.
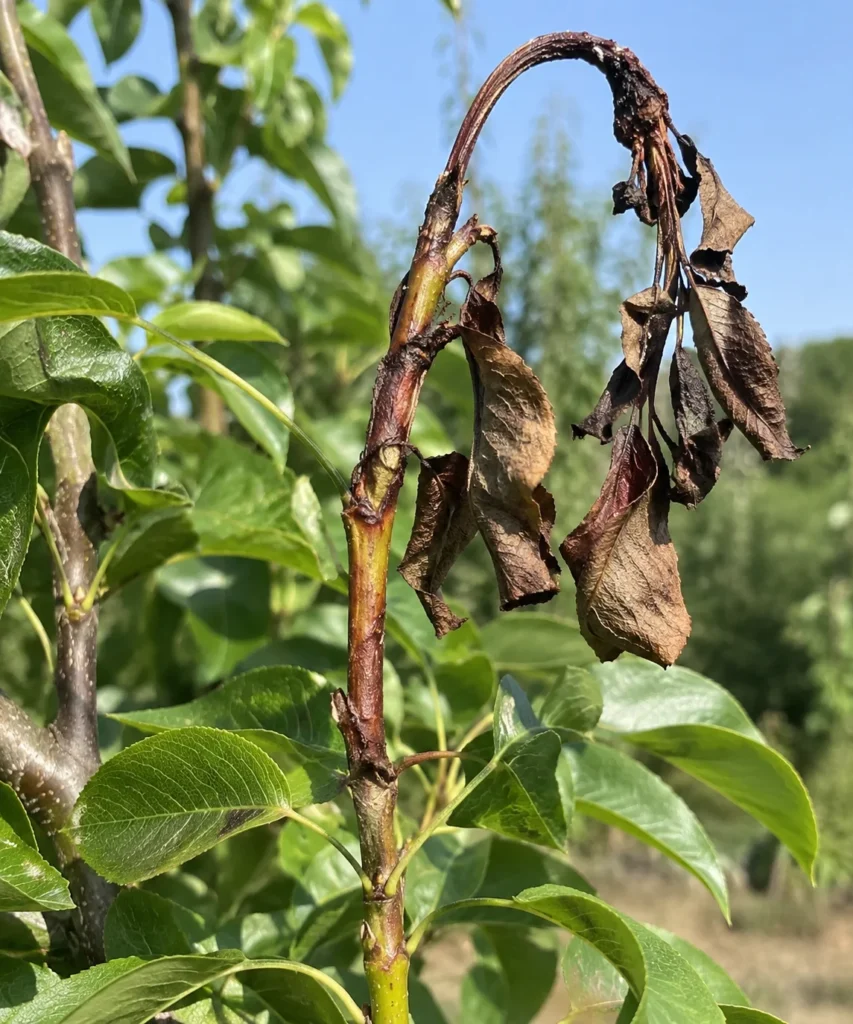
For a home gardener the choices are not many. Utah State University Extension recommends removing infected wood as the most effective way to stop the spread. The University of Georgia suggests cutting at least six inches below any signs of disease. Many gardeners choose to cut more—eight to twelve inches into what looks like healthy wood. Some Extension programs agree with this approach so it’s good to check what your state says. After cutting, get rid of the pieces away from the tree. Burn them if it’s allowed where you live or bag them. Always clean your tools after every cut to avoid spreading the problem.
Prevention works better than trying to fix an infection. Use resistant plant varieties when you can. Don’t over-fertilize. Keep pruning light and careful. Some local Extension offices talk about using copper sprays or antibiotics during bloom time. These don’t always work well. In fact Utah State University points out that fire blight in Utah has mostly become resistant to antibiotics. Your county Extension office can help you decide if spraying is worth it where you live.
Other pests and diseases to expect
Fire blight gets the attention. A few others are worth knowing:
- Scab and leaf spot: Scab and leaf spot thrive in humid weather. Good airflow and cleaning up fallen leaves help keep them at bay.
- Pear psylla: Pear psylla is a sap‑feeding insect that leaves sticky honeydew and sooty mold. It is more common in the West, so keep an eye out.
- Codling moth: Codling moth larvae tunnel into fruit. Bagging fruit or timing treatments with Extension guidance can help.
- Pear sawfly: Pear sawfly larvae skeletonize leaves. They usually cause only minor damage and rarely need treatment.
Local pest pressure varies by region. Ask your Extension office for a home orchard spray guide instead of applying products on a general schedule.
Harvesting and ripening: pears work differently from most fruit
European pears are picked when they are mature but still firm. Then they are allowed to ripen away from the tree. If you let Bartletts ripen completely on the tree the inside of the fruit often becomes rough and dry in the middle. Look for a change in color (many types turn from a darker green to a lighter green or yellow-green) and make sure the fruit comes off easily when you lift and twist it. Then let them ripen inside at room temperature. Some types, like Anjou and Bosc, get better when they are stored in the cold for a week first.
Asian pears are different: they ripen on the tree and are eaten while still crunchy.
If you have a lot of fruit, removing some of the fruit when it is still small helps the remaining fruit grow bigger and stops the branches from breaking.
Common mistakes
- Buying a single tree for a variety that needs a pollination partner.
- Choosing a blight-prone variety because it’s famous, instead of one that suits the region.
- Over-fertilizing and over-pruning, both of which promote the soft growth blight exploits.
- Burying the graft union.
- Letting a tree overbear and then losing limbs.
- Leaving fruit on the tree too long, resulting in gritty fruit.
- Planting in a frost pocket and losing blossoms nearly every year.
When pears aren’t the right choice
If you live in a warm, humid area with a history of fire blight in nearby apples, pears, or ornamental pears, or if you only have room for a single tree and can’t find a self-fruitful variety, consider alternatives. Asian pears with good resistance, apples, figs, or persimmons may be less frustrating, depending on your climate. Pears are rewarding, but they punish a poor match between variety and location more than most backyard fruit trees. If you want another fruiting plant for a home landscape, our mulberry growing guide is worth a look.
If you’re planning a larger landscape project that includes fruit trees, our guide to the Hass avocado tree is a useful companion for warmer climates.
For region-specific variety lists, spray guidance, and fire blight management, one of the most useful starting points is Utah State University Extension’s guide to growing pears in the home orchard. Your own state’s Extension service will have a local equivalent.
FAQ
How long does it take for a pear tree to produce fruit?
Dwarf and semi-dwarf trees typically start bearing in roughly three to five years, while standard trees often take longer. Variety, rootstock, and growing conditions all affect timing.
Do I need two pear trees to get fruit?
Usually, yes. Most pear varieties need cross-pollination from a compatible variety that blooms at the same time. A few are partially self-fruitful, but they generally produce better with a partner.
When is the best time to prune a pear tree?
Late winter, while the tree is dormant. Avoid pruning in wet weather, and prune lightly, because heavy cuts stimulate growth that is vulnerable to fire blight.
Why are the leaves and shoots on my pear tree turning black?
Fire blight is a common cause, especially if it happened after warm, wet weather at bloom. Look for shepherd’s crook tips. If you suspect it, contact your county Extension office for confirmation and cut out infected wood well below the damage, disinfecting tools between cuts.
Why is my pear tree flowering but not producing fruit?
The usual reasons are a lack of a compatible pollinator, a frost during bloom, poor pollinator activity in cool, wet weather, or a young tree that isn’t mature enough to carry fruit.
Why are my pears gritty?
Grit comes from stone cells, which are more prominent in some varieties (Kieffer is known for it) and in European pears left to ripen too long on the tree. Picking at the right maturity and ripening indoors helps.
Can I grow a pear tree in a container?
It’s possible with a dwarf tree and a large pot, though you’ll still need a pollination partner for most varieties. Container trees need more frequent watering and winter protection in colder zones.
Do I need to spray my pear tree?
It depends on your region and disease pressure. In dry climates you may need very little, while in humid regions fungal diseases and insects can be serious. Your Extension service’s home fruit spray guide is the best source for timing and products.
Sources & references
- Utah State University Extension, How to Grow Pears in Your Home Orchard
- University of Georgia Cooperative Extension, Home Garden Pears (Circular 742)
- University of New Hampshire Cooperative Extension, Growing Pears in the Home Garden
- Walter Reeves (Georgia gardening), pear variety notes
- USDA Plant Hardiness Zone Map
[…] more fruit tree guidance, see our pear tree care guide. Before the first frost, read how to winterize your […]