

Have you ever stood in the insulation aisle at Home Depot or Lowe’s, staring at a wall of pink, yellow, and white rolls? You already know the problem. Every package promises comfort and savings. But the labels rarely explain which product fits your home, your climate zone, or your budget. That confusion costs homeowners real money every winter and summer. Poorly chosen or poorly installed insulation is one of the top reasons energy bills run higher than they should.
This guide breaks down batt insulation in plain terms. You’ll learn what it is, how the main types compare, and which R-values make sense for your region. You’ll also learn how to install it correctly so you don’t waste money or create moisture problems later. Maybe you’re finishing a basement in Ohio. Maybe you’re upgrading an attic in Minnesota, or insulating a garage in Texas. The fundamentals below apply everywhere, and we’ll flag regional differences where they matter.
What Is Batt Insulation, Exactly?
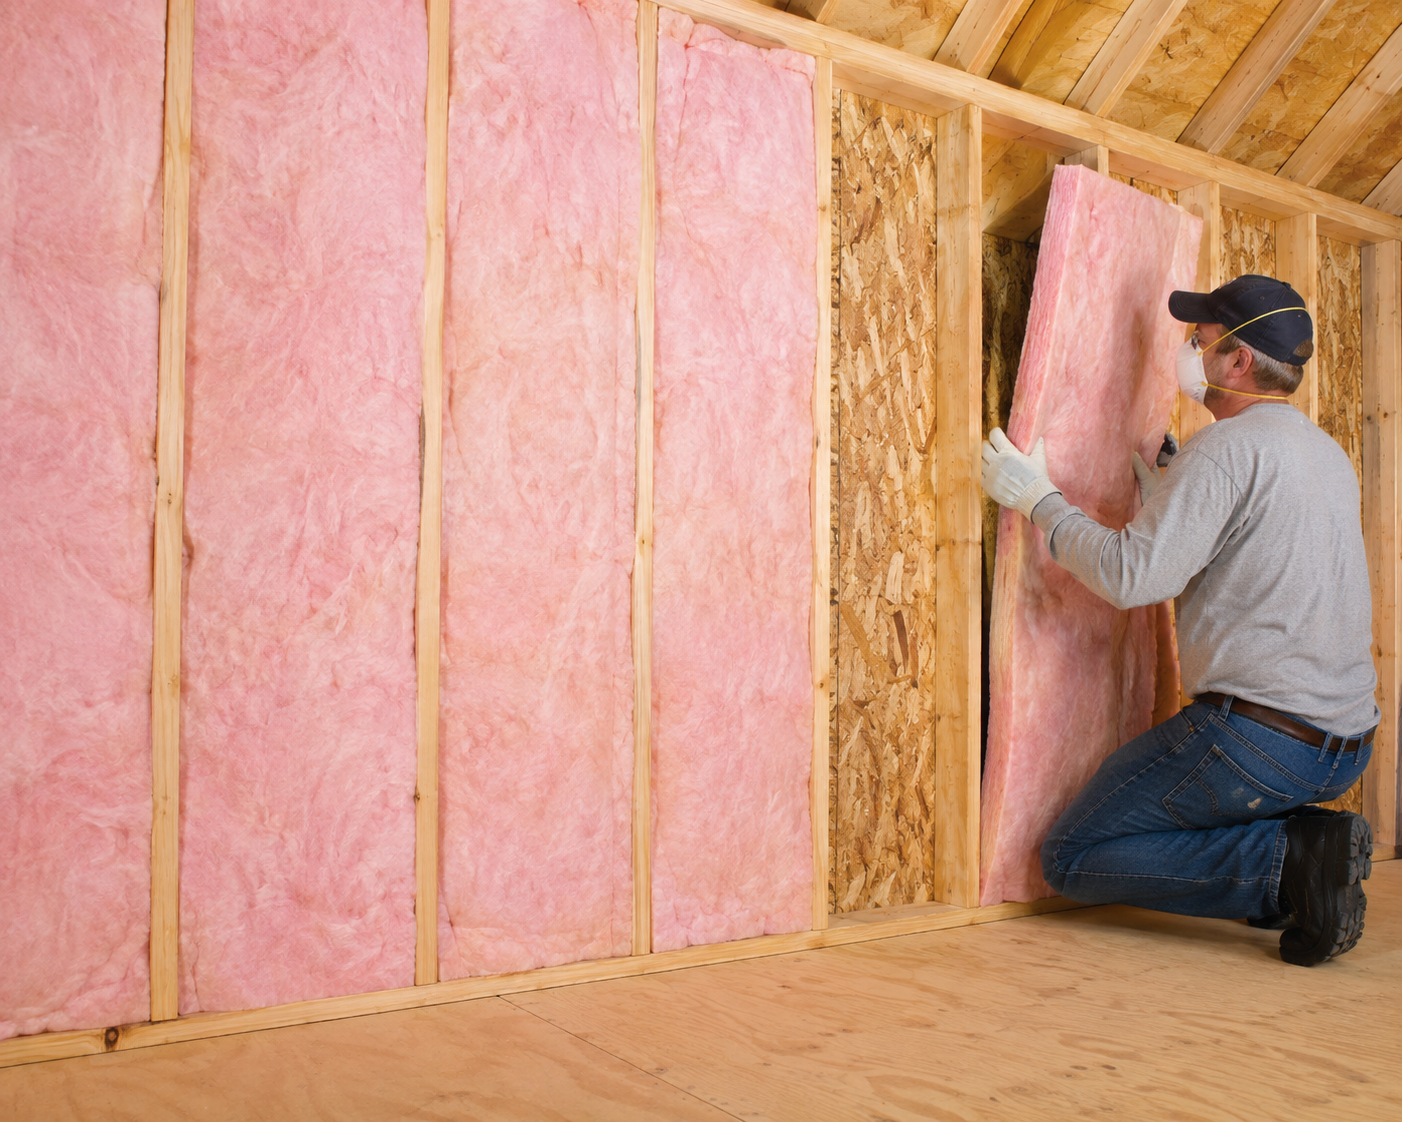
Batt insulation comes as pre-cut panels or rolls of material. Manufacturers size these panels to fit standard stud, joist, and rafter spacing, usually 16 or 24 inches on center. Loose-fill insulation gets blown into place. Batts don’t work that way. Installers handle and place them by hand, which makes batts a popular choice for both DIY projects and professional jobs.
Because batts come pre-formed, they install quickly in open wall cavities, unfinished attics, and floors above crawl spaces. That speed only pays off with careful fitting, though. Gaps and compression are the two biggest reasons batt insulation underperforms its rated value in real homes.
Common Types of Batt Insulation in 2026
The batt insulation market has shifted in recent years. More manufacturers now offer formaldehyde-free and recycled-content options. Here’s how the main categories compare today.
Fiberglass batts remain the most widely used option in the U.S. They’re affordable, and you can find them at nearly every big-box retailer. Fiberglass batts typically deliver R-3.1 to R-3.7 per inch of thickness. Most major manufacturers now produce formaldehyde-free versions as standard. You can cut them easily with a utility knife. Still, always wear gloves and a mask, since loose fibers irritate skin and lungs.
Mineral wool (rock wool) batts have grown in popularity. Part of the appeal comes from their fire resistance and sound-dampening properties. Rock wool batts hold their shape well inside cavities. They also resist moisture better than fiberglass. Their R-value per inch lands in a similar range to fiberglass. Homeowners in wildfire-prone areas of California and the Mountain West increasingly choose mineral wool for the added fire protection. It usually costs more per square foot than standard fiberglass, though.
Cotton (denim) batts often come from recycled denim scraps. They appeal to buyers who want a lower-VOC, more sustainable product. Their R-value performs about the same as fiberglass. But they cost noticeably more. That price gap keeps them a niche choice rather than a mainstream one.
High-density fiberglass batts pack more fiberglass into the same thickness. This pushes R-values higher without requiring a deeper wall cavity. These batts work well when you’re stuck with a standard 2×4 wall but want performance closer to what a 2×6 cavity offers.
Building codes and cavity depth constrain your options just as much as personal preference does. So match the batt type to the space first, then shop for brand names.
Understanding R-Values: What the Numbers Actually Mean
R-value measures a material’s resistance to heat flow. Higher numbers mean better insulating performance. An R-30 attic floor blocks heat transfer roughly twice as effectively as an R-15 floor. The relationship isn’t a simple straight-line percentage, but the takeaway is simple: more resistance means your HVAC system works less to keep your home comfortable.
Here’s the catch, though. The R-value on the package assumes ideal installation conditions. Real-world performance often falls short. Compressing a batt to fit a shallower cavity than it was designed for reduces its effective R-value. An R-19 batt squeezed into a 3.5-inch 2×4 cavity performs closer to R-13 or R-16 once compressed. Gaps around framing and electrical boxes also hurt performance. So does inconsistent coverage. Together, these issues can cut a wall’s overall performance by 20 to 50 percent, according to building science research cited across the insulation industry. That’s a strong reason to focus on careful installation, not just the highest R-value you can find on the shelf.
Recommended R-Values by U.S. Climate Zone
The International Energy Conservation Code (IECC) divides the country into eight climate zones. Each zone carries different minimum R-value recommendations for walls, attics, and floors. Your local building department has the final say, and some states adopt amended versions of the code. Still, general 2026 guidance looks like this:
- Zone 1 (South Florida, Hawaii, southern Texas): Attics need R-30 to R-38. Walls need R-13.
- Zone 2 (Gulf Coast, most of Florida, southern Arizona): Attics need R-30 to R-38. Walls need R-13 to R-15.
- Zone 3 (much of the Southeast, coastal California, parts of Texas): Attics need R-38. Walls need R-13 to R-20.
- Zone 4 (Mid-Atlantic, Pacific Northwest, parts of the Southwest): Attics need R-38 to R-49. Walls need R-15 to R-21.
- Zone 5 (Midwest, Ohio Valley, parts of New England): Attics need R-49. Walls need R-15 to R-21, depending on cavity depth.
- Zones 6-7 (Northern Plains, Upper Midwest, mountain regions): Attics need R-49 to R-60. Walls need R-20 to R-21, often with continuous exterior insulation added.
- Zone 8 (Alaska’s interior and far north): Attics need R-49 to R-60 or higher. Walls require the maximum practical assembly, often batts combined with rigid foam.
Not sure which zone you’re in? Search “IECC climate zone map” with your county name, and you’ll find it fast. Your local utility company often lists it directly on its energy-efficiency rebate page, too.
Batt Insulation vs. Other Insulation Types
Homeowners often ask if batts still make sense compared to spray foam or blown-in cellulose. Each option has a place. The decision usually comes down to budget, the shape of your space, and how much air sealing you need.
Spray foam creates an excellent air barrier. It typically reaches higher R-values per inch, especially closed-cell foam. But it costs considerably more, and it generally requires a professional installer. Blown-in cellulose or fiberglass works well for irregular attics. It also works well when you’re adding insulation over existing material without removing it, since it fills gaps that batts can’t easily reach. Batts, meanwhile, remain the most budget-friendly and DIY-accessible option for open wall cavities, new construction, and straightforward attic floors. That’s exactly why they still dominate residential insulation sales nationwide.
If your project involves finishing a basement, check out our complete basement insulation guide for cavity-specific recommendations. Basement walls often need a different vapor barrier strategy than above-grade walls do.
Step-by-Step Batt Insulation Installation Tips
Good results depend far more on technique than on brand. Follow these steps to avoid the mistakes that quietly reduce real-world performance.
- Measure your cavities before buying. Standard 16-inch on-center framing usually takes batts labeled for that width. Older homes sometimes have irregular spacing, though. Measure a few cavities instead of assuming.
- Choose the right thickness for your cavity depth. A 2×4 wall, with its 3.5-inch cavity, generally takes an R-13 or R-15 batt. A 2×6 wall, with its 5.5-inch cavity, fits R-19 to R-21. Never compress a thicker batt to force it into a shallower space. Compression directly cuts its performance.
- Cut batts to fit around obstructions rather than stuffing them. Work around electrical boxes, plumbing lines, and wiring by splitting the batt and tucking it behind or beside the obstruction. Don’t compress it on top.
- Face the vapor barrier correctly. In most colder climates, point the paper or foil facing toward the warm-in-winter side of the wall. That’s usually the interior. In hot, humid climates, some codes call for unfaced batts with a separate vapor strategy. Check your local code before assuming the standard orientation applies.
- Seal air leaks before you insulate. Caulk and foam-seal around window frames, top plates, and penetrations first. Batt insulation slows heat transfer, but it doesn’t stop air movement the way spray foam does. Skipping this step is one of the most common reasons a newly insulated wall still feels drafty.
- Avoid gaps at the edges. Even small gaps around a batt’s perimeter can significantly reduce that cavity’s effective R-value. Take a few extra minutes to trim batts precisely. Don’t leave corners loose.
- Don’t cover recessed lighting unless it’s IC-rated. Non-IC-rated fixtures generate heat. Insulation packed directly against them can create a fire hazard. Always check the fixture rating first.
- Wear proper protective gear. Long sleeves, gloves, safety glasses, and an N95 mask are worth the minor hassle. This matters most with fiberglass batts, which can irritate skin and lungs during handling.
Regional Considerations for U.S. Homeowners
Climate isn’t the only factor that should shape your insulation decision. Humidity levels, local energy costs, and state-specific rebate programs all play a role, too.
In the humid Southeast, from Louisiana through the Carolinas, moisture management matters as much as R-value. An improperly placed vapor barrier can trap moisture behind it. That trapped moisture can lead to mold growth inside wall cavities. So many contractors in these regions favor unfaced batts paired with a separate, carefully placed vapor retarder. Some skip a vapor barrier altogether, depending on the wall assembly.
In colder Northern states, from Minnesota to Maine, the priority shifts. Maximizing R-value and minimizing thermal bridging through wall studs matters most. Many contractors now pair batts with a layer of continuous rigid foam on the exterior sheathing. Studs conduct heat, after all, and they can undercut even a well-installed batt system.
In the Southwest’s dry, high-heat climate, attic insulation delivers the biggest return. Radiant heat gain through the roof drives most cooling costs there. Homeowners in Arizona, Nevada, and inland California often see the fastest payback from bumping attic insulation up to R-38 or R-49, even in a milder winter climate zone.
Many states and utility companies also offer rebates for insulation upgrades. Check the U.S. Department of Energy’s Weatherization Assistance Program eligibility before you buy. Also check your state energy office’s current rebate list. Doing so can meaningfully offset material costs. According to the U.S. Department of Energy, upgrading attic insulation from R-19 to R-49 typically costs between $1,500 and $2,500, and it can save $200 to $400 annually in heating and cooling costs. That means the investment often pays for itself within five to seven years.
Cost Expectations in 2026
Material costs for batt insulation have stayed fairly stable. Labor and shipping costs, though, keep nudging overall project pricing upward in most metro areas. Here’s a general planning range for 2026:
- Standard fiberglass batts typically run $0.50 to $1.30 per square foot for materials alone.
- Mineral wool batts run somewhat higher, often $0.90 to $1.80 per square foot.
- Professional installation labor adds roughly $1 to $2 per square foot on top of materials. The exact amount depends on your region and the complexity of the space.
DIY installation saves on labor, obviously. For a straightforward, accessible attic floor or open wall cavities in new construction, many homeowners handle it themselves successfully. Finished walls that need demolition, tricky cavities, or spray foam alternatives usually make more sense to leave to a licensed contractor.
Common Mistakes That Undercut Performance
Even well-intentioned DIY projects run into the same handful of problems again and again. Compressing batts to fit shallow spaces is one. Leaving gaps around framing members is another. So is skipping air sealing before you insulate, or choosing the wrong vapor barrier orientation for your climate. These mistakes are largely avoidable with a bit of planning. Take the time to measure carefully and follow manufacturer instructions. That effort pays off far more than splurging on a premium batt brand while rushing the installation itself.
Final Thoughts
Batt insulation remains one of the most practical, budget-friendly ways to improve comfort and cut energy costs across nearly every U.S. climate zone. That’s true as long as you match it correctly to your region and install it with attention to detail. Start by identifying your climate zone. Choose a batt thickness that fits your cavity without compression. Seal air leaks first, and don’t skip the vapor barrier orientation step. These small details separate a project that actually lowers your utility bills from one that just looks finished.
Frequently Asked Questions
What R-value do I need for my attic? Most U.S. climate zones need somewhere between R-30 and R-60 for attic floors. Colder Northern states need values on the higher end. Check your specific IECC climate zone to confirm the right target for your home.
Can I install batt insulation over existing insulation? Yes, in most cases. You can add unfaced batts on top of existing insulation to boost R-value. Just avoid trapping moisture between layers. If your existing insulation has a vapor barrier facing, don’t sandwich that facing between two insulation layers. It can trap moisture inside the cavity.
Is fiberglass or mineral wool batt insulation better? Both perform similarly in R-value per inch. Mineral wool offers better fire resistance and sound dampening, though. Fiberglass generally costs less. The right choice usually depends on your budget and whether fire resistance matters in your area.
How long does batt insulation last? Properly installed batt insulation can last 80 to 100 years without much degradation. It needs to stay dry and stay uncompressed, though. Moisture exposure, pest damage, and physical compression are the main reasons batt insulation needs replacing sooner.
Do I need a vapor barrier with batt insulation? It depends on your climate. Colder Northern climates generally benefit from a vapor barrier facing the warm interior side of the wall. Humid Southern climates sometimes call for unfaced batts with a different moisture management approach instead. Local building codes typically spell out the requirement for your area.
Can batt insulation get wet, and what happens if it does? Fiberglass and mineral wool batts can dry out. They often keep much of their performance if they dry quickly. But prolonged moisture promotes mold growth, and it can compress the material permanently. If batts stay wet for more than a day or two, replace them. That’s usually the safer choice.
How much does it cost to insulate a 1,500 square foot attic with batts? Using average 2026 material and labor pricing, a full attic insulation project of that size typically costs $2,500 to $5,500. The final number depends on your R-value target, batt type, and whether you hire a pro or do it yourself.
Is batt insulation still a good option compared to spray foam in 2026? Yes, for most standard wall cavities and attic floors. Batt insulation stays cost-effective and performs well when you install it correctly. Spray foam offers better air sealing and a higher R-value per inch, but it costs considerably more. Many homeowners choose batts for standard cavities and save spray foam for rim joists, irregular spaces, or areas where air sealing matters most.
[…] Poorly insulated walls and rim joists are a common contributor to basement condensation — our batt insulation guide covers R-values and installation tips that help keep surfaces above the dew […]
[…] but protects your investment long term. Similar principles apply to wall insulation — see our batt insulation guide if you’re addressing both at once during a […]
[…] may outperform solid wood over time. In drier climates, wood options tend to hold up just fine. Our batt insulation guide covers similar moisture considerations for the walls around these […]
[…] states should pay close attention to pipe insulation around exterior-facing plumbing walls — our batt insulation guide covers R-values for exactly this situation. Freeze damage during a hard winter can undo an […]
[…] strong pick for homeowners who want a meaningful upgrade without jumping to spray foam pricing. Our batt insulation guide covers fiberglass batt options in more depth if that’s the direction you’re […]
[…] set your posts below the local frost line, which can run 36–48 inches deep in colder zones. Our batt insulation guide covers a related cold-climate consideration if you’re tackling multiple exterior projects […]