

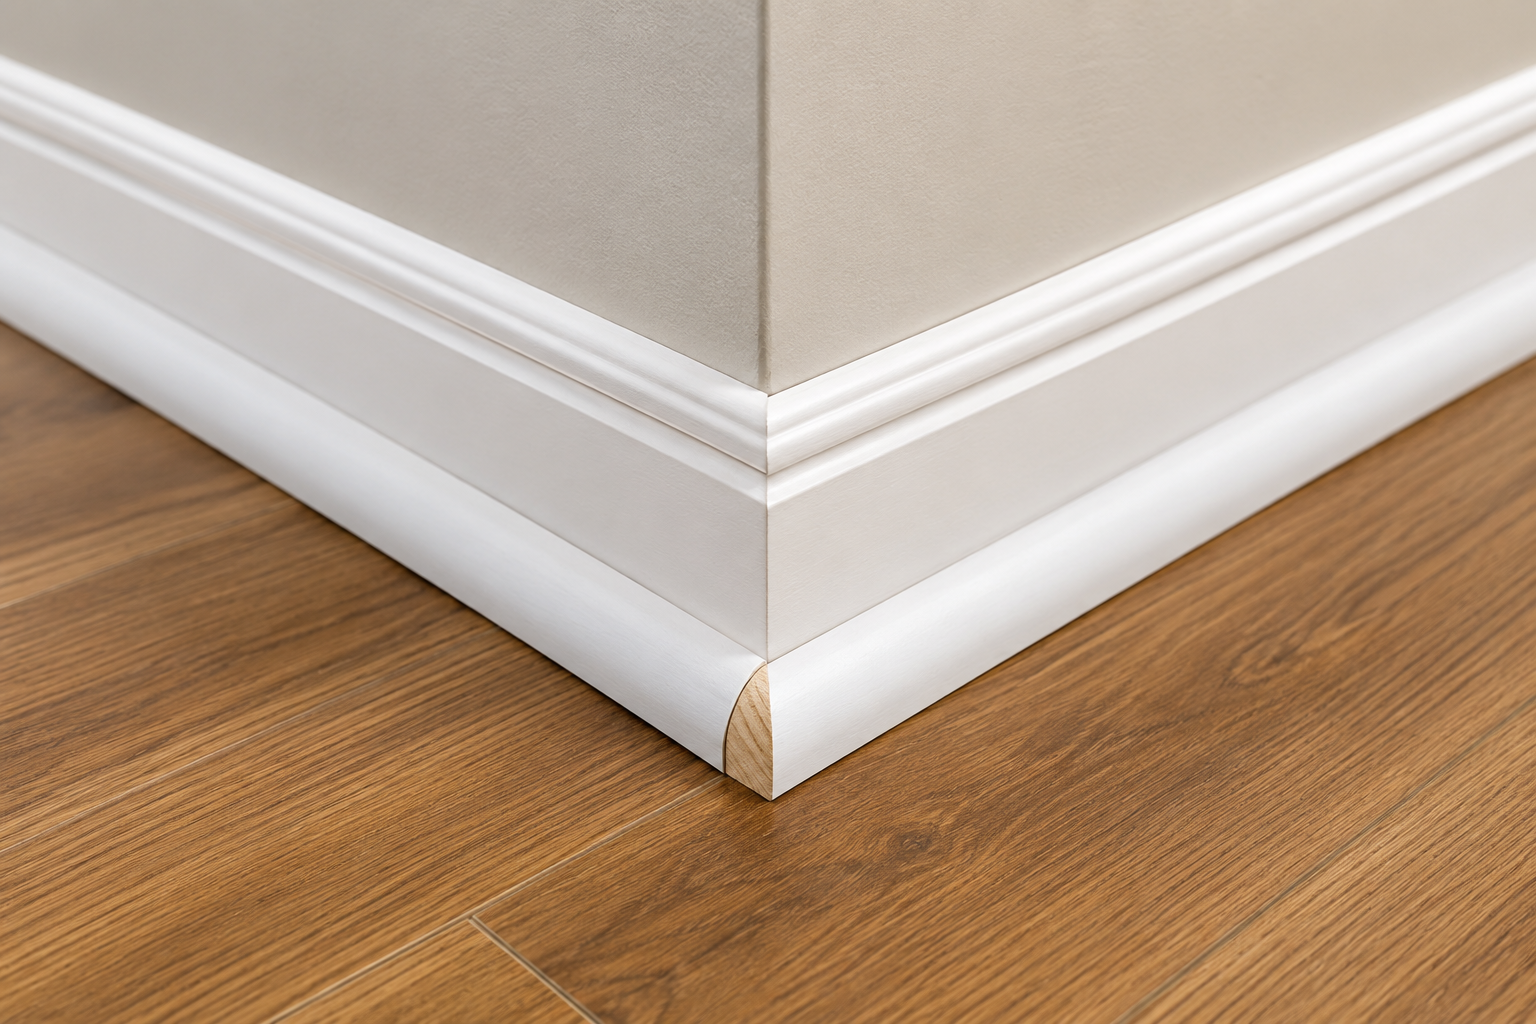
Have you ever noticed a small gap between your baseboard and your flooring? Quarter round molding was invented to solve exactly that problem. This little strip of trim doesn’t get much attention. But it quietly does a lot of work in American homes.
It hides uneven cuts. It covers expansion gaps. And it gives a room that finished, “move-in ready” look that buyers and homeowners both notice, even if they can’t quite say why.
I’ve worked alongside flooring crews, and I’ve installed trim in my own home more than once. Quarter round is one of those details that separates a professional-looking room from one that still feels unfinished. This guide covers everything you need in 2026: what quarter round actually is, the types and sizes available, what it costs across the country, and how to install it yourself.
What Is Quarter Round Molding, Exactly?
Quarter round molding is a thin strip of trim shaped like a quarter of a circle. It usually sits at the bottom of your baseboard, right where the baseboard meets the floor. Flooring and baseboards rarely line up perfectly. That’s especially true in older homes or after a new floor installation. Quarter round bridges that gap with a soft, rounded edge instead of a harsh, visible line.
People often confuse it with shoe molding, and the two do overlap in purpose. Shoe molding has a slightly more tapered, flatter profile. Quarter round has that classic, uniform curve instead. Both trims cover gaps, but quarter round tends to win out for standard residential projects. It’s simpler to cut, easier to find at big box stores, and more forgiving for DIYers.
Quarter round also protects your baseboard from vacuum cleaners, mop heads, and shoes bumping against the wall. It’s cheaper to replace than an entire baseboard. So it acts as a sacrificial layer that saves you money down the road.
Why Quarter Round Still Matters in 2026
You might assume that precision-milled baseboards and engineered flooring would make quarter round unnecessary by now. That hasn’t happened. If anything, the rise of floating floor systems, like luxury vinyl plank and laminate, has made quarter round more relevant than ever.
Floating floors need expansion gaps around their perimeter. These gaps let the floor shift slightly as temperature and humidity change. Something has to cover that gap, and quarter round is often the cleanest, most affordable fix. LVP flooring remains one of the most popular choices for U.S. homeowners heading into 2026. So demand for quarter round molding has stayed steady rather than fading away.
Types of Quarter Round Molding
Choosing the right type comes down to your budget, your climate, and how much upkeep you want to handle. Here’s a breakdown of the main materials available today.
Solid Wood Quarter Round
Solid wood, usually pine, oak, or poplar, remains the traditional choice. You can stain it to match hardwood floors, or paint it to match your trim. Wood offers a warm, authentic look. However, it costs more than other options, and it can warp or crack in humid environments. That matters if you live somewhere like Florida, Louisiana, or coastal Texas.
MDF (Medium-Density Fiberboard) Quarter Round
MDF is budget-friendly, and it comes pre-primed and ready for paint. It cuts cleanly, and it doesn’t split easily. The tradeoff is moisture resistance. MDF doesn’t hold up well in bathrooms, laundry rooms, or damp basements.
PVC and Vinyl Quarter Round
PVC quarter round has grown more popular for good reason. It’s completely waterproof, it won’t rot, and it resists insects. It holds up well in humid or wet spaces. That makes it a smart pick for kitchens, bathrooms, and homes across the Gulf Coast and Southeast. The main downside is that you can only paint it, not stain it. Some homeowners also feel it looks slightly less authentic up close.
Flexible Quarter Round
Flexible quarter round bends to fit curved walls, arched doorways, and rounded architectural features. It costs more per foot. But it solves a problem that rigid molding simply can’t handle.
Polystyrene Quarter Round
Polystyrene is lightweight and shock-resistant, and it’s often sold pre-primed in white. Builders like it for new construction because it installs quickly and holds paint well. Some installers do find it a bit more brittle than wood near corners, though.
Common Sizes of Quarter Round Molding
Quarter round comes in different thicknesses and lengths. The right size depends on the gap you need to cover.
Standard sizes typically include:
- 1/2 inch by 1/2 inch, for smaller gaps and tighter transitions
- 3/4 inch by 3/4 inch, the most common size in residential homes
- 1 inch by 1 inch, for larger gaps or thicker flooring transitions
Most quarter round comes in 8-foot lengths. You can also find 12-foot and 16-foot boards for larger rooms where fewer seams matter. Did you install thicker flooring recently? If your baseboard now sits noticeably higher than the floor, choose a larger profile. It will fully cover the gap without looking undersized.
Quarter Round Molding Costs in 2026
Pricing has stayed fairly stable compared to the sharp material cost spikes of recent years. Labor rates, though, keep climbing in many metro markets. As of mid-2026, homeowners across the U.S. can expect the following general price ranges.
Material costs alone typically run between $0.50 and $4 per linear foot. That depends on whether you choose MDF, PVC, or solid wood. A standard 3/4-inch pine quarter round board often costs around $1 per linear foot at major retailers like The Home Depot. Premium hardwood or flexible options push toward the higher end of that range.
Factor in professional installation, and total costs usually land between $2 and $7 per linear foot. A typical 12-by-12 room needs around 45 to 50 linear feet of trim once you count doorways and corners. That works out to roughly $150 to $350 for materials and labor combined.
Labor rates vary by region, too. Homeowners in major metro areas, including New York, San Francisco, and Chicago, tend to pay more. Skilled trim carpenters charge higher rates in expensive cities. Homeowners in the Midwest and parts of the South often pay less, sometimes 20 to 30 percent below coastal metros.
Are you also painting or staining the molding? Budget an extra $1 to $4 per linear foot for finishing work. Removing old, damaged quarter round before installing new trim adds another cost. Expect to pay $50 to $150 per room for removal and disposal.
Want an accurate estimate for your zip code? Check a detailed cost calculator from a trusted resource like Angi’s trim installation cost guide. It breaks down pricing by region and project scope.
Regional Considerations Across the U.S.
Climate genuinely affects which material makes sense for your home. Humid regions like Florida, the Gulf Coast, and parts of the Southeast favor PVC or vinyl quarter round. Solid wood can swell or warp there as moisture levels shift throughout the year. Drier climates, such as Arizona, Nevada, and parts of Colorado, suit solid wood just fine. Humidity-related expansion isn’t much of a risk there.
Colder northern states, including Minnesota, Michigan, and much of New England, deal with dramatic seasonal temperature swings. These swings make flooring expand and contract more. Flexible or slightly oversized quarter round can absorb that movement without cracking or popping loose. Are you renovating an older home in a historic district? Cities like Boston, Charleston, and New Orleans often require matching existing molding profiles. Architectural consistency matters there, so it’s often worth hiring a trim carpenter to custom-match your existing style.
How to Install Quarter Round Molding: Step-by-Step
Installing quarter round is one of the more approachable trim projects for a DIYer. You don’t need years of experience with a miter saw. Here’s the general process.
Step 1: Measure Your Space
Measure the total perimeter of the room. Then add 10 to 15 percent extra to cover cuts, mistakes, and corner waste. It’s always better to have a little extra material than to run short mid-project.
Step 2: Choose Your Material and Size
Think about your climate and the size of the gap between your baseboard and floor. Then pick the material and thickness that fits best. When in doubt, go with 3/4-inch pre-primed MDF or PVC. It works well for most standard residential rooms.
Step 3: Cut Your Corners
A miter saw earns its keep here. Inside corners need a 45-degree angle cut on each piece so they meet cleanly. Outside corners need the opposite angle. Experienced trim carpenters sometimes use coping saws for tighter, more precise inside corner joints, especially when they want a seamless finish.
Step 4: Nail It Into Place
Use a pneumatic finish nailer with 18-gauge brad nails, roughly 1 to 1.5 inches long. Nail into the baseboard, not the floor. This lets the flooring expand and contract naturally without the molding holding it back. That matters most with floating floor systems.
Step 5: Fill, Caulk, and Paint
Fill the nail holes with wood filler. Run a thin bead of paintable caulk along the top seam where the molding meets the baseboard. Finish with paint or stain to match your trim. This final step separates a passable DIY job from one that looks professionally done.
Are you installing quarter round alongside new flooring? Check our complete guide to baseboard installation first. Baseboard height and positioning directly affect what size quarter round you’ll need.
Common Mistakes to Avoid
Even a simple trim project can go sideways if you rush it. One frequent mistake is nailing quarter round into the floor instead of the baseboard. That can cause squeaking, cracking, or gaps as the floor naturally shifts over time. Skipping the caulk line is another common issue. It leaves a visible seam that draws the eye in the wrong way.
Some homeowners choose a size that’s too small for the gap they’re covering. That defeats the whole purpose of the trim. And painting before filling nail holes usually leaves a patchy, uneven finish. You’ll likely need a second coat anyway, so do things in the right order the first time.
DIY vs. Hiring a Professional
Quarter round is genuinely one of the more DIY-friendly trim projects. You just need a miter saw, a finish nailer, and some patience. Most homeowners can finish an average-sized room in an afternoon. Does your home have a lot of odd angles, curved walls, or historic molding profiles that need matching? Hiring a professional makes more sense in that case, since those situations call for specialized cutting skills.
Professional installation also makes sense for large-scale projects. Think about trimming an entire home after a full flooring replacement. Consistency across many rooms matters, and mistakes cost more to fix. In that case, the labor cost is often worth it for the time you’ll save and the guaranteed clean finish.
Final Thoughts
Quarter round molding might be one of the smallest details in a home renovation. But it has an outsized impact on how finished a room feels. Maybe you’re covering gaps from a new LVP floor installation. Maybe you’re protecting your baseboards from daily wear, or simply refreshing an older home’s trim. Either way, choosing the right material and size for your climate and budget will pay off for years to come. Material costs remain reasonable in 2026, and plenty of DIY-friendly options exist. Most homeowners can tackle this project in a weekend without calling in a contractor.
Frequently Asked Questions
What is the difference between quarter round and shoe molding?
Quarter round has a uniform, rounded quarter-circle profile. Shoe molding has a slightly flatter, more tapered shape instead. Both cover gaps between baseboards and floors. But quarter round is generally easier to cut and more widely available, which is why it’s the more common choice for standard residential projects.
Do I need quarter round with vinyl plank flooring?
Yes, in most cases. Floating vinyl plank floors need an expansion gap around the room’s perimeter. Quarter round is one of the simplest, most affordable ways to cover that gap. It still lets the floor shift naturally as temperatures change.
Can I install quarter round myself, or do I need a professional?
Most homeowners can install quarter round themselves. You just need a miter saw, a finish nailer, and a free weekend. It’s one of the more beginner-friendly trim projects around. Homes with unusual angles, curved walls, or historic molding profiles may benefit from professional installation instead, for a cleaner result.
How much quarter round molding do I need for a standard room?
A typical 12-by-12 room usually needs between 45 and 50 linear feet. That accounts for doorways, closets, and corner cuts. Add an extra 10 to 15 percent to your total measurement to cover mistakes and waste.
What’s the best quarter round material for humid climates?
PVC or vinyl quarter round tends to perform best in humid regions. It’s fully waterproof and resists warping. Solid wood, by contrast, can swell or crack as moisture levels shift throughout the year.
Should quarter round be nailed into the floor or the baseboard?
Always nail quarter round into the baseboard, not the floor. This lets the flooring underneath expand and contract naturally. That’s especially important with floating floors like laminate or luxury vinyl plank, since nailing into the floor can loosen or crack the trim over time.
How much does it cost to install quarter round molding in 2026?
Material costs typically range from $0.50 to $4 per linear foot. Professional installation brings the total to roughly $2 to $7 per linear foot, depending on your region and material choice. A standard room usually costs between $150 and $350 total for materials and labor combined.
Can quarter round molding be painted or stained after installation?
Yes, though it depends on the material. You can stain or paint solid wood quarter round. MDF and PVC options are typically paint-only, since they don’t absorb stain evenly. Fill the nail holes and caulk the seams before you apply your final coat for the cleanest finish.